Guitar 803 – Greenbacks
November 3, 2008
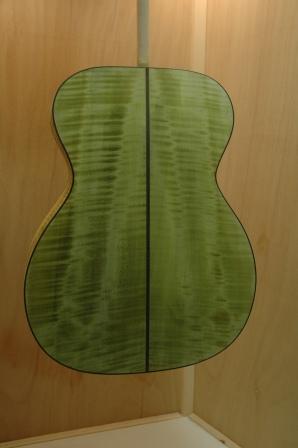
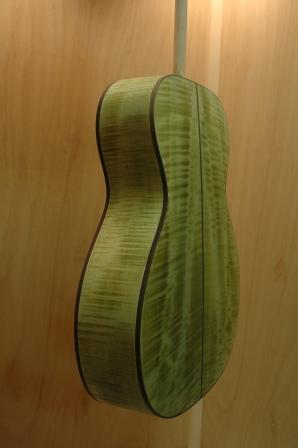
Larry dropped by and we made greenbacks! Oh yes, it’s green.
November 3, 2008
Larry dropped by and we made greenbacks! Oh yes, it’s green.
November 2, 2008
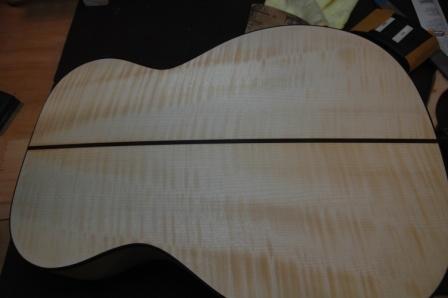
I’m scrambling to be ready for Larry when he comes over tomorrow as I promised I would be ready to stain. I really need to get the surface baby bottom smooth, and make sure I get any surface glue sanded away to ensure an even stain absorbtion. I’m working with 100 grit paper to get all the rough spots levelled down and all the glue from the binding shaved off the maple surface. In between sandings, I’m wetting the wood to expose where there are still glue patches. The wetting also pulls grain up out of the interior of the wood to the surface, allowing further sanding and assuring of a completely smooth surface.
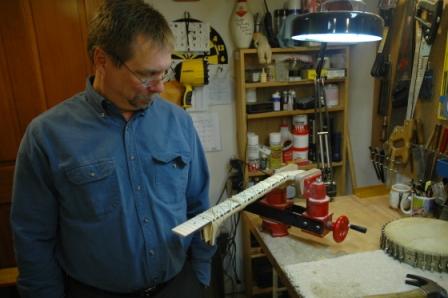
I found an old post where I documented the stain we will be using. I say 75% green, 25% tobacco brown in a 65% solution (whatever THAT means!). I think it’s this….if you use 10 drops in 2 oz. of water, then 7.5 drops green and 2.5 drops tobacco brown at 100% for 2 oz. water. 65% fewer drops = .65 x 7.5 green = 5.5 drops. And .65 x 2.5 tobacco = 1.6 drops. Make 10 oz. of solution with 28 drops green and 8 drops of tobacco brown.
I finished fretting the neck as well as post stain will be a sanding sealer (50% solution of KTM9) over the entire guitar body and neck (including frets). Then I start the spraying of 100% KTM9 in 3 coats an hour apart, dry overnight, then repeat the 3 coats up to 12 coats, then let cure for one week before installing neck and bridge. Oooh, it’s getting close!
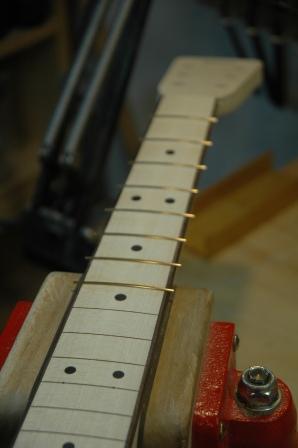
Larry picked gold frets to go with his gold tuners. They look pretty good!
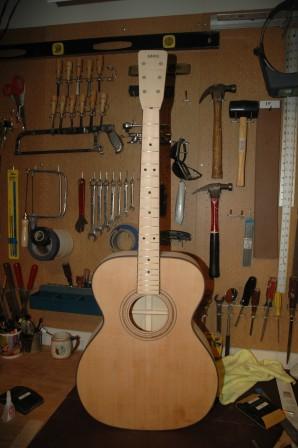
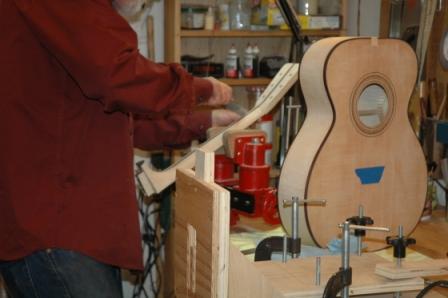
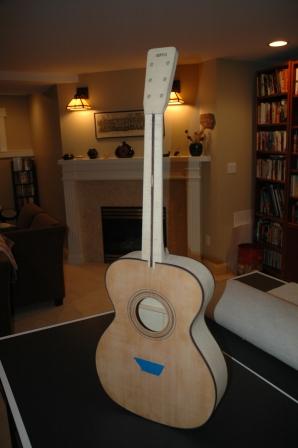
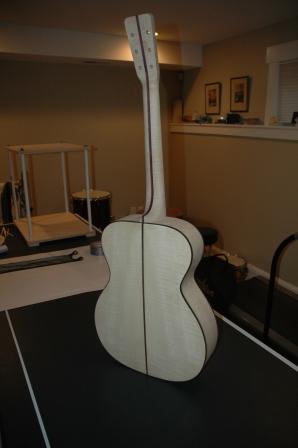
Here’s the guitar with the fretted neck dry fit. I realized I have the inner ring of the soundhole rosette fully exposed, so had to insert a little BWB sliver in the top gap. It looks OK! Only I will notice that it’s not one continuous piece.
October 28, 2008
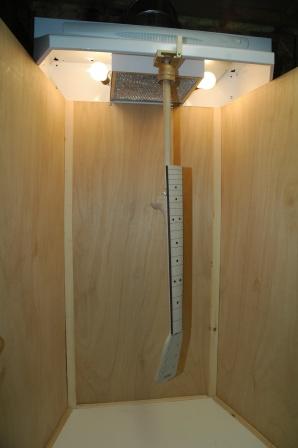
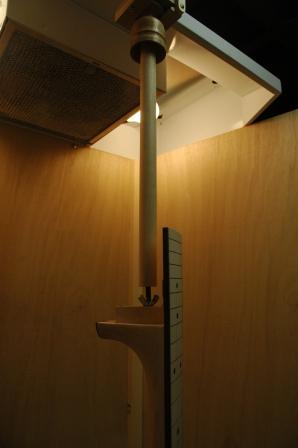
Last night Larry came by ostensibly to play music, but I ended up recruiting him to help finish the spray booth installation. I crafted a booth by building a platform (table) with 1/8″ plywood trifold with a range hood mounted on the top. I measured for the location of the vent through the wall to the outside, drilled and chiselled it out inside the house and outside the house and had Larry feed the vent tube from the outside while I lined it up with the hood duct then duct taped it in place.
We spent the rest of the evening sanding and filing the neck (me) and sanding down the body (Larry). Today, I finished crafting a device for hanging the guitar body and neck. I designed so a dowel attached to the guitar or neck could hang and rotate. Turned out perfect. I’m so clever, and humble.

I returned to working on the side bending machine. I’m using plans from Luthier’s Cool Tools and referring to pictures from my guitar building workshop with Charles Fox (the purported inventor/designer of the side bending machine).

October 20, 2008
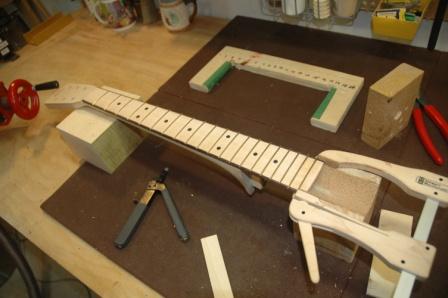
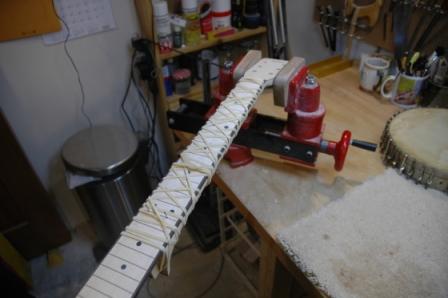
Used my groovy laser leveller to sight line down the body of the guitar to the end of the fretboard all the way to the nut end of the fretboard, drilled 3 pilot holes in the fret slots and inserted brads to locate the fretboard on the neck. Unbolted the neck, inserted the truss rod, put in the vise, then slathered just enough glue on the neck AND underside of the fretboard, taking care not to apply glue to the truss rod itself, lined up the drillled brad holes and inserted brads then………….wrapped it all up in my 35,000 inch rubber band.
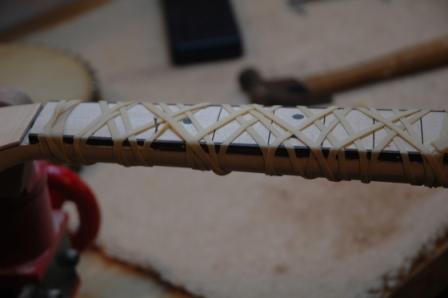
There’s a brad in the 2nd fret and two in the twelfth fret slot. These holes will be hidden once the frets are pressed in. I found a discussion board addressing the topic of when to apply lacquer to the maple fretboard: before fretting or after. Concensus is after.
Larry wonderz: “That’s a neck? It looks more like a ladies shoe, but these aren’t my regular glasses.”
September 30, 2008
As the neck needed further “adjusting”, I remounted the neck in the jig, knowing that I needed to increase the neck angle ever so slightly. I just barely adjusted the angle from the original setting, and rerouted out a new angle, and, viola! it was dead on.
Took a measurement on the neckand the fretboard, marked up, and continued rasping toward the perfect shape.
Mounted the end cap with a scrap of rosewood, then tested fit of everything. Just a bit more neck shaving to do to get it to the same dimension as the fretboard. I think I have the right shape, but will have Larry hold and suggest any adjustments. Hey, there’s a benefit to a custom, you can get the neck shape just as you like it!

September 21, 2008
Yes, it’s been 3 weeks since I’ve posted anything to the blog. I haven’t made much progress up until today. I spent quite some time working on the neck, shaping with a spoke shave and rasp. It’s getting very close to the true shape. Next step was to build a jig to allow the shaping of the tenon on the neck at the right angle.
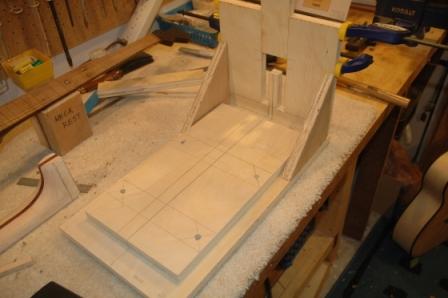
I used the jig on the O’Brien DVD as a model. It took two weeks to complete, but mostly due to inactivity rather than difficulty.
The slot in the rear is for the router to shape the tenon.
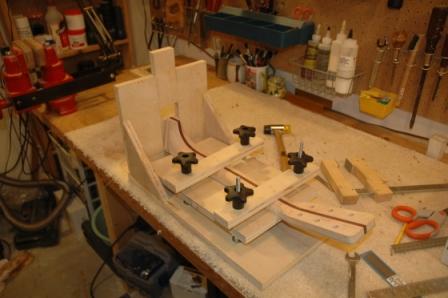
The platform can be adjusted to ensure level, and angle based upon the angle measured between the guitar top and the top of the rim. It took me quit some time to devise a way of discovering the angle, then transferring it to the jig. Suffice it to say it includes using a level, a sliding bevel and pencils.
I did run into several problems, including an improperly seated router bit which damaged my collet. As I could not find a replacement collet quickly, I bought a new router (which I needed anyway). It’s a man thing.
The end result is reasonable, and I was able to dry fit the neck to the body. What remains is some selective shimming, marking the end of the neck to drill the holes for the neck bolt receivers.
August 21, 2008
Now it’s time to resume multitasking and go back to working on Larry’s OM Maple, and the Koa Parlor. My first guitar took 3 months to complete, but that was done without distractions of multiple guitars in progress. It’s been 5 months since I finished guitar number 1, but I can’t say that’s how long it takes to build one guitar. I’m 75% done with the OM Maple, and about 25% done with the Koa Parlor, and I’m sure I’ll have them both finished before the end of the year, which is still about a guitar every 3 month pace. Don’t forget I have a full time job, a family, a dog, and an active golf habit. If I could dedicate my entire day to working on guitars, it would be weeks instead of months to complete.
So off to restart my work on the OM Maple. I’m ready to set the neck angle and route out the tenon on the neck. The last guitar was constructed with an incorrect neck angle and I had to compensate by installing a very tall saddle. I know better now, and the neck angle on this guitar will be PERFECT.
July 27, 2008
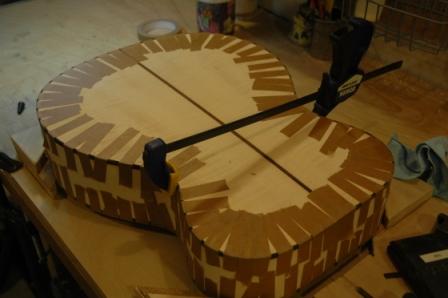
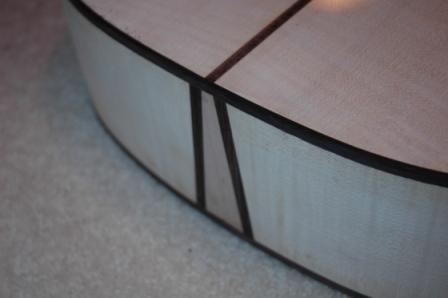
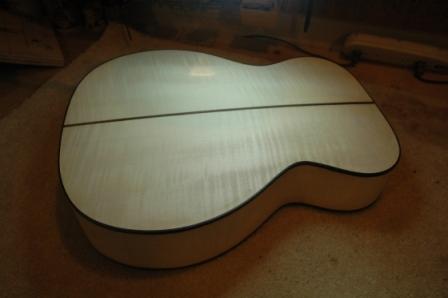
Spent a lot of time today scraping down the binding and purfling. I was finally able to burnish my scraper properly and it made the effort of bringing the binding down flush with the body all that less difficult. Scrape scrape scrape, and the result is really nice. I’m left with very few gaps which will need filling.
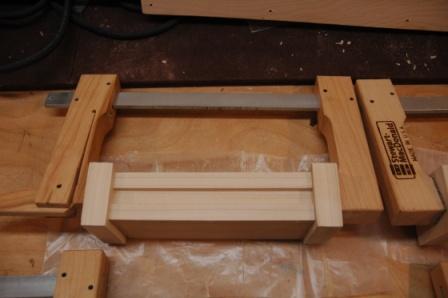
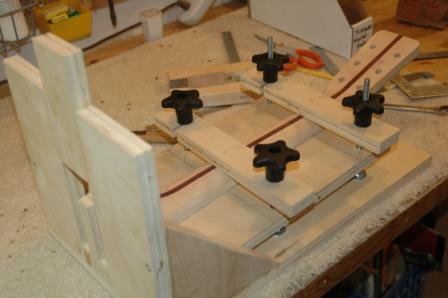
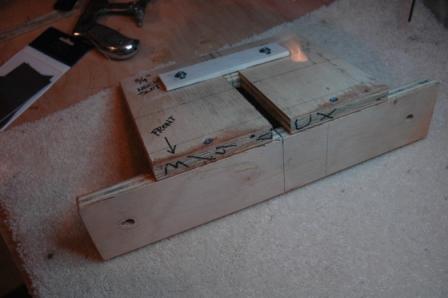
Next step was to rethink the jig for routing the mortise into the body. I came to the conclusion that I could incorporate it into the body vise which I built last week.
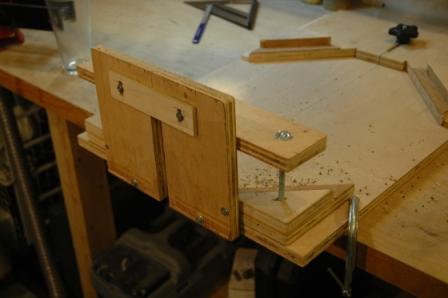
This really helped with alignment, as I can secure the body in the vise, then align the center lines on top and bottom to ensure a square mortise channel. I have to sit on the floor and run the router up and down the guide channel. First thing I did was let the router get away from me and I hosed up the guide channel on the right side, and the end result was a beautiful left hand wall, and funky wavy wall on the right side. I will be able to recover, but I need to rebuild the jig as it is battle worn.
Lesson learned: Find a way to route channels where the router is sitting on the thing to be cut, or be more careful.
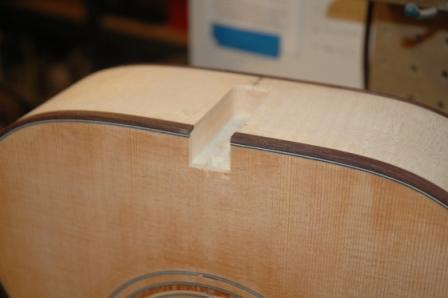
Next step is to build a jig for the tenon (neck), determine the correct neck angle, carefully cut the neck to leave the tenon, and check fit. I can also insert the neck bolt receivers into the neck and dry fit the neck onto the body.
July 25, 2008
I scrape, I file, I do the voodoo that I do so well, but I cannot burnish. I finished gluing the binding and the purfling for the OM Maple and I next must scrape. Months ago, Rob Girdis kindly showed me the method for “sharpening and burnishing” my scraper.
Let me say now, that my scraper is the best thing ever. I love my scraper. i love to scrape. But some time has gone by, and my scraper needs to be sharpened and burnished. I cannot burnish. My burnisher is a simple steel rod on a wooden handle. I put my scraper in the vise, and held the burnisher against the scraper and pressed and pulled and pushed and forced and……nothing happened. It’s still a rectangular piece of steel without the requisite curled, sharp edge. Crikey.
The only good news from this sad story is that I scraped and filed the hell out of this guitar box, and I am slowly moving toward a beautiful piece of finished product. It is becoming a fine maple box with binding and purfling without gaps, and I must say I am very happy. I consider the butt block area a confluence of rosewood and maple which makes the best freeway overpass collector distributor blush in comparison.
And, my dull sraper allows me to draw and pull along the guitar body without fear of gouging and I can attack and attack with positive results.
I’m also working on a jig for the neck mortise and tenon cutout. Square is your friend.
Label everythig. Your memory will fail. God is love.
July 20, 2008
Went the whole 9 yards and got into the binding and purfling. Spent lots of time assuring the channels would be right, and also dealt with the not so tight bends in the binding at the waist. Can’t wait to strip off the binding tape to see how good (or bad) the binding job is.