Guitar 804 – Move forward
December 31, 2008
Look! It’s tomorrow! But you can find my progress right here on the immediate response web thing.
OK, here’s a little something for the 804 followers.
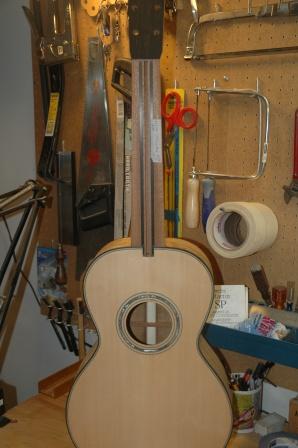
Oh look, it has a neck!
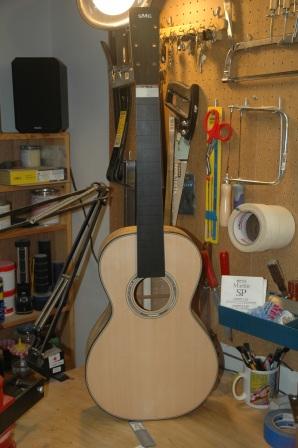
Oh look! It has a fretboard.
December 31, 2008
Look! It’s tomorrow! But you can find my progress right here on the immediate response web thing.
OK, here’s a little something for the 804 followers.
Oh look, it has a neck!
Oh look! It has a fretboard.
December 14, 2008
I ranted earlier about sharpening and burnishing my cabinet scraper. I remember using a properly burnished scraper and how quickly it worked fairing the binding on the body down to the sides. I couldn’t get a good burnish reestablished and I was contemplating abandoning guitar making and resuming drinking.
After reviewing several interweb instructions, I resumed and got a good burnish on the scraper. Let me tell you right now, a well burnished scraper is worth its weight in brazillian rosewood. It curls off the binding and purfling smoothly and quickly, and I even took time to burnish again before I was finished, which is not behavior typical of Mr. Me.
One site recommended cleansing the scraper in dry ice bubbling in acetone:

but I soon realized it was bogus.
Now the body of the Koa Parlor is ready for fine sanding and finishing. I’m entertaining the possibility of abandoning KTM-9 and trying nitrocellulose. My wife has agreed to let me try, but she’ll let me know the second she get’s a whiff and makes me stop.

November 17, 2008
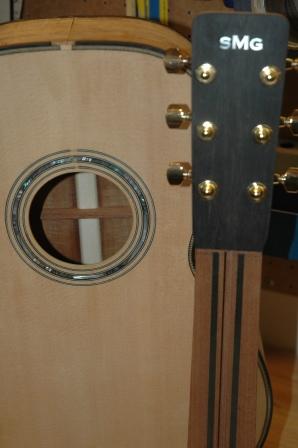
Took the headstock down to about 15mm and dry fit the tuners to see how it looks.
November 15, 2008
Spent some time doing neck prep. The plans for the Parlor have a bit wider neck than the OM, and subesequently, the bridge is “non standard”, and will require me to build my first bridge from scratch rather than using a pre-fab. I worked on the neck in conjunction with working on the neck for 805. I crafted a jig for the band saw which cuts the headstock piece off the neck blank at a 12 degree angle for reversing and gluing to create the long grain headstock attachment. Just like 804, this jig gave me a not so square cut. I believed at first it was the band saw drift, but it may be the jig is out of square. I need to resolve. Regardless, I sanded in attempt to square, but it’s not perfect.
I made a template of the fretboard using posterboard and laid it on the neck, traced, then cut out the excess using the band saw. Sanded it back, then attached the headstock laminate (glue/clamp), drilled out the tuning machine holes and trimmed back the headstock to the final shaping.
October 26, 2008
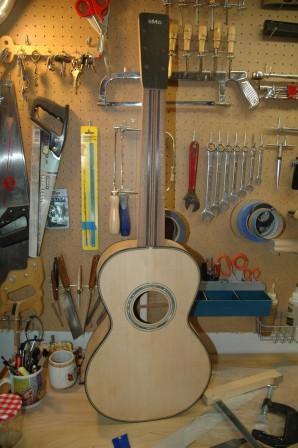
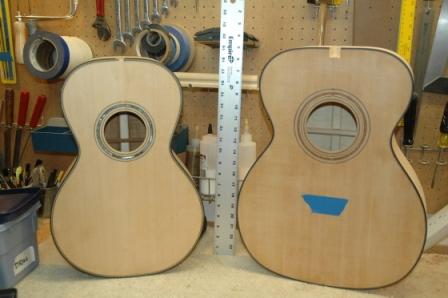
5 days until Halloween, and 9 days until we regain our freedom. Been working once again on tools. Got plans to build a side bending machine, and have been spending time doing that. As well have been exploring what I should do for Guitar 805, whether it should be an OM or Parlor. I’m leaning toward Parlor, but here’s a side by side comparison of the two to see the size difference.
October 19, 2008
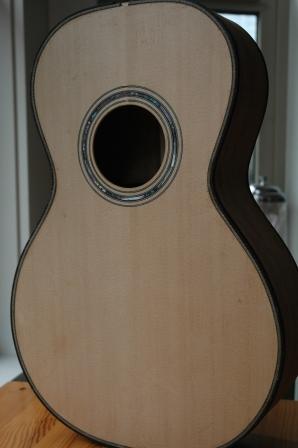
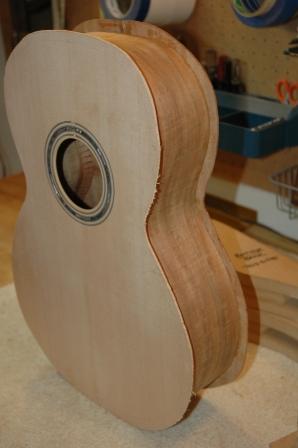
Pulled the tape (and unfortunately, a bit of spruce grain, but that will sand out) and have a top bound guitar body ready for scraping.
October 18, 2008
Just 18 more days until Barack Obama is elected. Wish it was tomorrow.
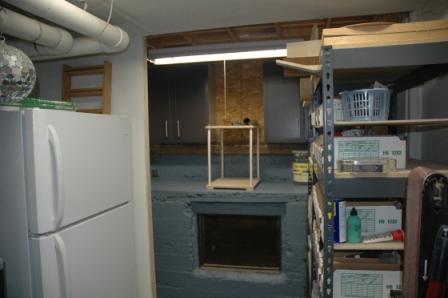
I pretty much completed my workshop remodel on Friday. There’s still a lot of cleanup and organization to do, and maybe Carol will help me with that tomorrow.
When I have multiple projects going on at the same time (like the Koa Parlor, the OM Maple, and the banjo rejuvenation) I work on the one that is the most fun. And, I really like putting on the binding and purfling. So even though Tom is wondering when his banjo will be done, and Larry is patiently waiting for his maple OM (which I will call the Hulk), I gravitate to the Koa Parlor as it is in the phase I enjoy the most.
Spent a lot of time ensuring I had the right depth and height for routing the channels, and tackled the back first.

Preparing for the gluing is key. Get all those binding tape strips ready, square off the ends of the binding, slather on the glue, and get going. I’m always a bit sore in the forearms after applying the binding tape as the tight fit between binding and body is essential, so I really bear down on the tape as I’m putting in place.
It doesn’t need to be taped long, maybe a couple of hours, but I left for at least 4 hours before removing tape.
The top is a bit more complicated as it is binding and purfling. The purfling is the decorative strip between the binding and the top. It requires two channels carefully routed.
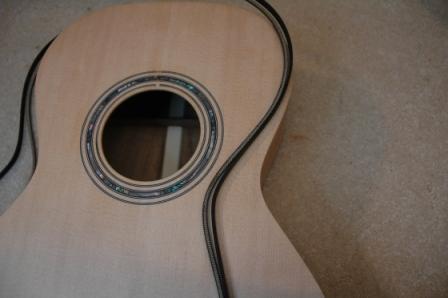
This side is quite a bit messier than the back, making sure to get all the glue in all the faces that need it: in the channels, between the binding and the purfling. I prefer too much glue to ensure that glue gets everywhere it’s supposed to. I don’t want any gaps, and missing glue spots can allow gaps to open up. Again, taping is more difficult than the back, and keeping up with the drying glue and getting everything pressed firmly together and against the top while pulling down the tape is a bit tricky.

Tomorrow, I can remove the tape and start scraping. But….maybe I’ll work on the banjo and the maple OM to keep my boys happy.
October 3, 2008
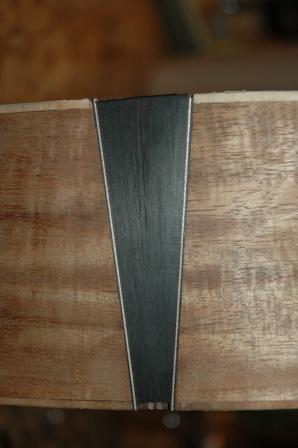
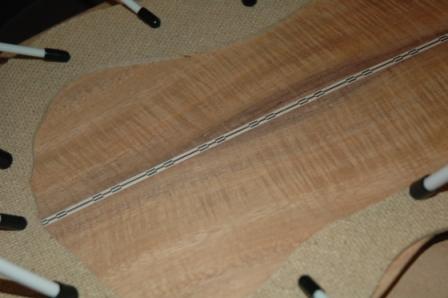
Ordered some ebony (actually a headplate) to use for the end graft. It arrived this morning. Used the T bevel to etch out the shape on the butt, sawed and chiselled out down to the end block. Shaped the ebony end graft piece then thickness sanded down in the Luthier’s Friend. Used some BWB for accent, glued, then hammered in.
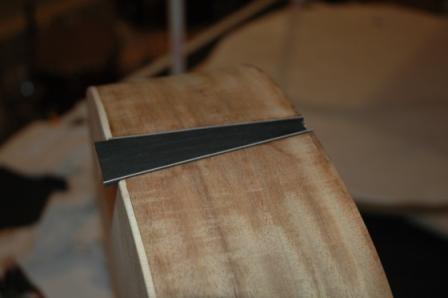
After a couple of hours of dry time, trimmed off the excess, then scraped down smooth.

September 30, 2008
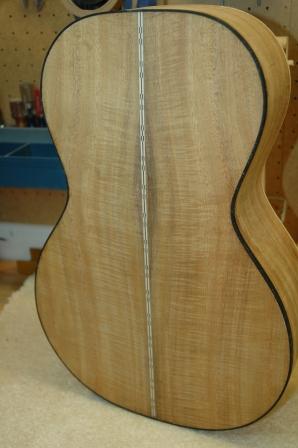
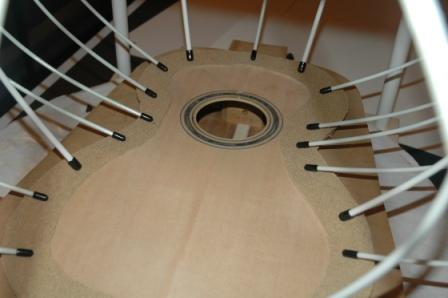
I let the body dry overnight in the go-bar platform. Did a good job with just enough glue and got no squeeze out from the kerf/top and kerf/back joint. Did have a little at the neck block, but up underside, invisible to all without mirrors. I signed the spruce top on the inside before gluing up (a hedge against counterfeiters, hah!).
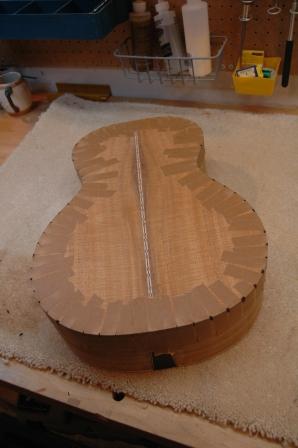
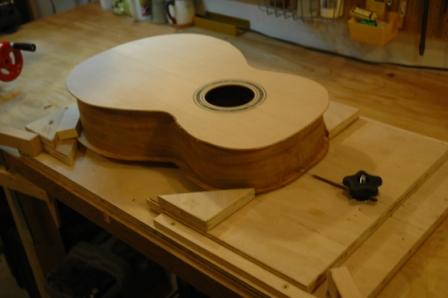
Here’s the body before triming the overhang.
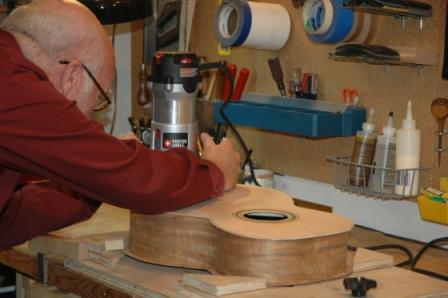
I used my body mounting jig clamped to the workbench to hold the body still while I use the megarouter to remove the scarf (if that’s what you want to call the overhang) with a flush cut router bit.
I can’t use this monster router to cut the channels for the purfling/binding as it’s too heavy. I need to use my palm router, which is out of commisssion until I get a replacement collet.
Next step: sand it sand it sand it, then wait.
September 29, 2008
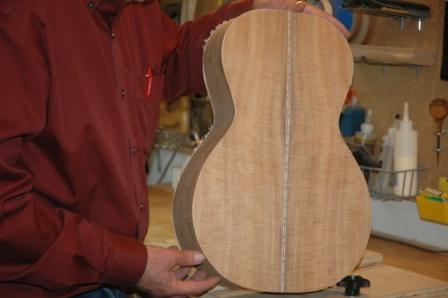
Finished trimming down braces on back, removed excess backstrip, and glued back to rim in go-bar platform.

I use a masonite “ring” cut to the outer shape of the back, with the middle removed to accomodate the radius and provide a caul to protect the back from the go-bar rods.
Added a cross of fabric over the top of the top x-brace to fill gaps and add strength. Used the approach of feathering the brace ends that meet the kerf down to nothing so I didn’t have to notch the kerf. Glued it up and attached the top in the go-bar platform.
I special ordered a replacement collet and nut for my palm router (I broke the original). It probably won’t come for a few weeks, so the next step of routing the channels for the purfling and binding will have to wait. Tomorrow, I’ll continue the process of shaping the neck for the OM Maple.
