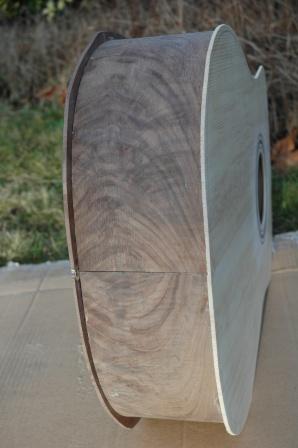
Archive for the 'Guitar 805 – 12 String Dreadnought' Category

Guitar 805 – Bound

January 26, 2009

Ah I have completed my favorite part of guitar building:  the installation of the binding and purfling and binding the fretboard.

090126topdetail2.jpg

I now have a lot of “fairing and squaring” to do. I used ivroid for the first time (it cost me $20 extra buck just to have it shipped).  I used #16 weld on cement and a hair dryer to soften for bending around the lower portion of the fretboard.

090126fretboard.jpg

090126fretbound.jpg

It’s very much like a guitar, and not hard to imagine what it will look like fully finished.

090126onstand.jpg

This was taken before I bound the fretboard, so it extends down farther than actual.

090126dryfit.jpg

Time to tackle the shaping of the neck, oh, and I’m going to make a tracing/rubbing of my 12 string Taylor bridge.  I like the shape, and I think it will look nicer than the std. Martin style bridge.

Guitar 805 – Binding installed

January 25, 2009

This guitar has the most complex binding/purfling combination to date.  I added a Black/White strip to the curly maple binding that goes all around the sides and back.  I preinstalled the B/W on the bottom of the binding then put in the bending machine.  I later added another B/W strip to the bottom of the binding used for the back before installing.

090125pinstrips.jpg

Spent the appropriate amount of time test cutting MDF before driving the router into the guitar body.  The top needed two passes, one for the binding, one for the purfling.

090125rout.jpg

Installed the top binding/purfling first, the concluded with the back binding, which had the attached B/W strips.  The back has a severe radius, and the router needs to be used on a swivelled base to keep the channel somewhat upright.  The channel is slightly deeper at the back surface, but that worked fine as the B/W strip essentially leveled the binding with the sides.

090125bindtop.jpg

After setting for a few hours, I removed the binding tape with a hair dryer.

090125hairdry.jpg

The binding and purfling installed without any signifcant gaps.

090125endgraft.jpg

One problem of note, a section of binding on the back did crack.

090125crackdetail.jpg

All things considered, I was pleased with the results.  Professional golfers are successful due to their ability to get out of trouble.  No matter how good you are, you occaisionally get into trouble.  Knowing how to get out of trouble and being succesful at it is the secret.  I’m getting better every day of getting out of trouble.  I think I’ve got that crack repaired.

090125crackrepair.jpg

Guitar 805 – 2am and the body is assembled

January 24, 2009

Momentum kept me going, and I got the body assembled.  First, I put my handprints in cement…..

090123signature.jpg

Carved out slots in the kerf to accept the braces that extend into them.  I had left some brace work on the back until just before assembly.  I managed to get everything assemble with a proper fit.

090123backdetail.jpg

I do admit that the back strip is slightly off center at the butt end.  I will compensate with the end graft piece, so that visually it aligns.

I must let Mr. Wood and Ms. Commissionee know that the walnut is now a guitar.

090124butt.jpg

090124back.jpg

090124top.jpg

Next step:  binding and purfling and end grafting.

Guitar 805 – Momentum into the weekend

January 23, 2009

I’m about to embark on my favorite part of guitar building.  Assembling the body.  This is the part where all the little things you’ve been doing start to come together and look like a guitar.

I pulled the bent sides out of the bending machine and placed them in the mold, after determining how much to cut off each end.  Once in the mold they were ready to accept the neck block and butt block.

090122neckbuttblock.jpg

The blocks were prepared in advance to be of the right height.  Once the blocks are in, the sides can be planed down and ready for kerfing.

090122buttblock.jpg

Kerfing is fun.  You get to play with clothespins.  Before kerfing and after planing, the sides are in the mold and shaped using a 15′ radius bowl for the back, and a 30′ bowl for the top.  The top doesn’t get planed, as the blocks are set in flush against the top edge.  A few quick twists in the 30′ bowl, and the top is properly shaped.  The back, although, takes a steep dive from butt block toward neck block, and lots of material needs to be planed down.  This is tricky, as there’s a high risk of cracking the thin sides, which I did, twice.  One crack surfaced while planing along the upper bout where the curve is tight.  The crack, about 1″ long moved diagonally down the back, leaving a finger of side sticking out.  Fortunately this happened early, and I was able to superglue it back in place, then plane through it down to the desired height.

After planing and radius bowl sanding, I applied the kerf.  I’m using a reverse kerf on this guitar, which has a better look when gazing into the soundhole.

090123kerf.jpg

Oooh boy, next I sand the installed kerf and run them through the radius bowls.  I’m going to use a very nice piece of curly maple left over from the neck stock of the OM I just completed for the end graft.  I’m going to get fancy with the binding and purfling, and after I install the top and back, I’m very much looking forward to the binding work.

I should have the binding completed by this weekend.

Guitar 805 – Disaster Averted!

January 21, 2009

Here’s the charred walnut side which put me into a funk.

090121walnutburnt.jpg

I was convinced that I was unable to discern the subtle difference between bending a side flawlessly and turning it into expensive firewood.  I thought it all through carefully and tackled a successful creation of two walnut sides bent properly and ready for putting in the mold.

I thickness sanded the remaining two (good) sides with a hand held belt sander from 4+mm down to 3mm.  Even with some difficulty keeping the belt on the sander, I was able to get those suckers down to the thickness I believed would be easily bent.  Also, I believed the order of the bender sandwich components would make a difference.

Disaster averted!  I have two perfectly bent walnut sides.

The sandwich order:  Mold/stainless/silicone blanket/parchment/walnut/stainless.

090121sandwich.jpg

Also, preheating the wood before bending was acheived by clamping down the ends of the sandwich to keep the wood next to the blanket.

090121benderproper.jpg

And finally, the right temperature:  not too hot (charcoal), not too cool (wood cracks).  I set the temp gauge to MED and let the wood sit in the clamped sandwich for about 2 – 3 minutes.  A meat thermometer stuck into the sandwich at the lower bout area showed the temp to be 290 degrees.  I don’t have any idea if the temp is accurate, but I now have a benchmark.  In that the bending was successful (no burns, no cracks), I have the sandwich configuration figured, a temperature benchmark, and I’m sure future bends will be mostly successful.

090121thermo.jpg

Guitar 805 – Deadline challenged

January 21, 2009

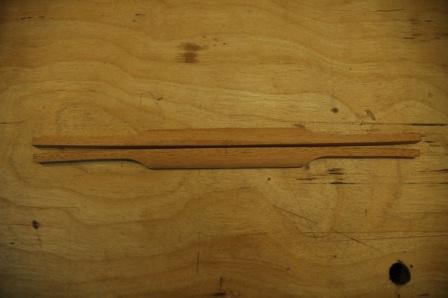
Yesterday, the replacement walnut sides arrived.  As you may recall if you are a regular follower of this blog, I purchased a bench top planer to use to bring down the thickness of the sides to at least 3mm.  The planer worked very well on spruce, but when I planed down the walnut sides I met with disasterous results.  The planer would have worked well on the walnut, even though it is a harder wood than spruce, had the side grain been consistent and in one direction.  The planer is a rotating drum of blades that cuts into the approaching wood in the opposite direction of the wood moving through the planer.  If the wood grain that meets the planed surface skews away from the entering planer blade, no problem.  If the grain points toward the planing drum, the blades will grab the grain (instead of shaving it) and pop off or break through the wood plate.

Here’s and example of a wood plate with grain all going in the same direction as seen from the side:

/  /  /  /  /  /  /  /  /  /  /  /  /  /  /  /  /  /  /  /  /  /  /  /  /  /  /  /  /  /

If the wood is fed into the planer as shown, it will grab the top of the grain and pop off pieces.  If this piece were turned upside down or fed from the left, the grain as it meets the top of the wood would be leaning away from the cutting blades, and you get a nice smooth cut.

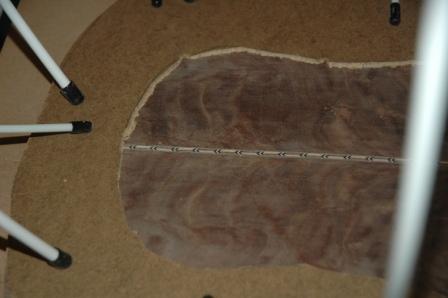
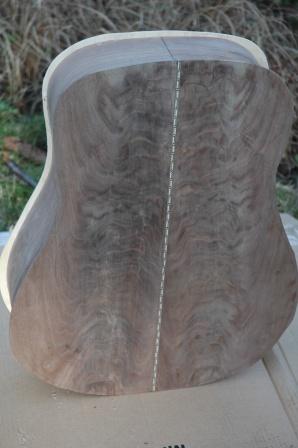
The problem with the walnut is that the pieces all have shifting grain direction, making the planer option disasterous down around a 3mm thickness.  Here’s what the walnut looks like, viewing from the side:

/ / / / / / / / / / / / / / | | | | | | | | \ \ \ \ \ \ \ \ \ \ \ \ \

As I mentioned, it works just fine down to about 3 or 3.25 mm.  After that, the above piece fed into the planer will get from the front through the middle then pop off the rest of the board on the left when it hits the first strong forward directional grain.

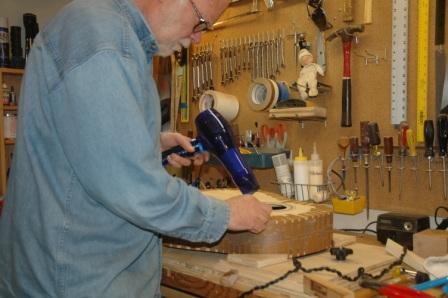
The replacement pieces seemed to have enough similar directional grain, so I hit the old planer again, feeding both pieces in, one after the other, and only taking off around .25mm at a time.  The results were excellent!  Except when I went from 3.25 mm to 3 mm.  I whacked off a piece from the leading edge.  I had just previously measured the 3.25 mm, examined the wood carefully, and smiled, said, “one more time”.  Crap.

The whacked off piece left just enough side remaining to qualify as a side.  I put it in the bender, cranked up the heat, and turned a nice piece of walnut into charcoal.  Two critical mistakes in the course of 1/2 hour.

Mistake recap:

1.  Using a planer to thickness figured hardwood.

2.  Trying to bend 3.25mm thick wood (which is highly figured)

3.  Placing the heating blanket on TOP of the wood and turning it up to 11.

Now I am in serious shit.  I have two unmatched but good pieces of figured walnut, one from each batch which are close enough in color and figure to be entirely appropriate for the guitar sides.  One is 3.25mm thick, the other, 4.15mm thick (both too thick to bend).  I will NOT put either of these pieces in the planer again.  I need to get them down to about 2.5mm and bend them properly with the heating blanket UNDER the wood, and the temp level to 5, instead of 11.  I have enough experience to (hopefully) execute the next bends properly IF I can get the plates thicknessed down to 2.5mm.

I can hand sand them, orbital sand them, or belt sand them.  I could buy a $700 drum sander, or I could get O.B.Williams to thickness sand them for me, for around $75.  I could (and did) call LMI and order a pair of walnut sides as emergency replacements in case my next steps fail as well.

So, I continue to learn a lot about my decision processing when I encounter problems such as these.  There’s my initial gut reaction which usually results in me trying to buy my way out of the problem with extra tools, supplies, or services.  When I can resist the initial gut reaction, I spend a lot of time thinking through all the possible next steps.  I got through my gut reaction around 10am today, and other than inquiring with LMI about walnut side availability, I did NOT buy any solutions (especially the $700 drum sander solution).  So here’s what I’ll do tonight, and I will aspire to being successful, and will not curse if not successful, knowing I have a backup plan with LMI.

1.  Commit to thickness sanding the remaining good sides using my hand held belt sander.  No matter how long it takes, I will work those puppies until they are no thicker than 2.5mm.

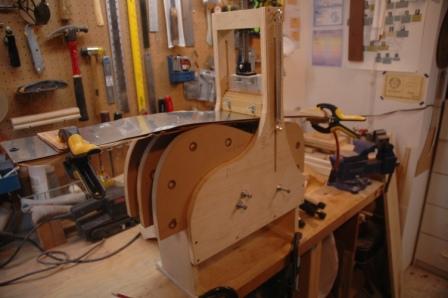
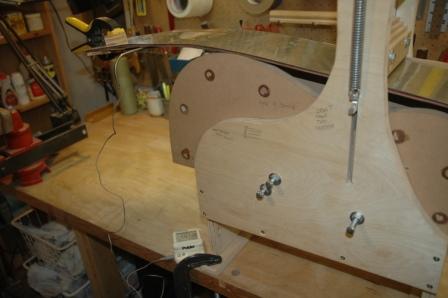
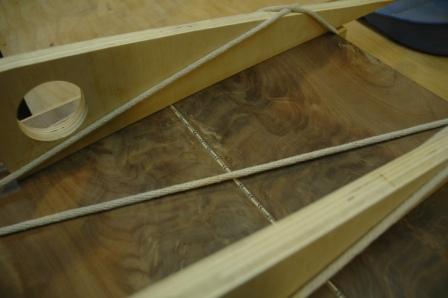
2.  Properly build the bender sandwich which keeps the tomato (silicone heating blanket) UNDER the wood.  From the bender mold out, the order will be:  stainless steel sheet, tomato, parchment, walnut, parchment, stainless steel sheet.  (I even drew a diagram on the side of my bender so I would remember, along with the caption:  “don’t cook the outside”.) .  Do NOT spritz the wood.  Subsequent reading suggested it was a no-no with figured wood.

3.  Don’t turn the heat dial above MED.  Don’t cook for more than 15 minutes.

4.  Draw the spring blocks slowly but don’t hover over any one spot.

If I fail, I will scream, and I will probably have bad dreams again tonight as I did last night.  Last night all my family, all my friends were disappointed in me and my mechanical ineptitude (in my dream).

Guitar 805 – Bracing complete

January 19, 2009

All bracing is applied, and the top bracing has been shaped and final sanded.

090119topbracing.jpg

The back bracing is on, but I will trim and final sand only just before attaching the back to the sides.

090119hang.jpg

The sides are supposed to arrive tomorrow.

Guitar 805 – Frets.net forum provides answer

January 17, 2009

As mentioned, my dilemma and setbacks with the warped walnut back prompted a posting on frets.net seeking advice on how to work through or remove the warp.  A responder suggested I place the back pieces on a concrete floor with a plywood cover, then weighed down with about 50 lbs. and let sit for a week.  I did such, and it pretty much worked as advertised.  Although the warp did not entirely disappear, it reduced considerably, and I was able to resume with joining, backstrip reinforcement, and bracing without the disaster previously encountered.

090117flattenamp.jpg

This is a good example of what to do with that old Peavy amp that you’re not using anymore.  It’s heavy, and balances nicely on a 5 gal paint can on the plywood cover of the back plate (sticking out in the foreground).

090117flattenback.jpg

I scraped off the leftover backstrip reinforcement scarf, and rejointed the back plates with my custom shooting block.

090117shootingboard.jpg

Decided this time to put the back plates face down in the joining jig to assure the backstrip and plates aligned flush down against the jig bars.

090117rejoinback.jpg

I’ve got to reexamine my threading pattern for this jig.  I think I need to add another “loop” at each bar to avoid driving the cross to the far end.

After curing sufficiently, I removed from jig and was pleased with the results.  Sanded smooth along the backstrip and installed the reinforcement strip.

090117reinforcement.jpg

The following shows the 15′ radius applied to the back braces, which are ready to install once the backstrip reinforcement has time to dry.

090117backbraceangle.jpg

Guitar 805 – Top bracing

January 15, 2009

Received an order of BWB and was able to finish the rosette’s center ring with paua abalone.

090115rosette.jpg

This shows a bit of the superglue coating/flooding of the paua.

I got a bit ahead of myself and hadn’t put tools away in a while, so spent some time cleaning up.

090115rosettemess.jpg

Cut out the soundhole and laid down the x-brace, and bottom bout braces which I radiussed to 30′.  I also glued in the bridge plate.

090115topbracing.jpg

The parlor is fretted and sitting awaiting convergence with the 12 string so I can lacquer finish both at the same time.  Whenever I have idle time with the 12 string, I’ll do some fine sanding on the body and neck, and work on getting the neck bolt holes and truss rod channel in the top bracing opened up a bit more.

090115parlor.jpg

Guitar 805 – Bending binding and purfling

January 11, 2009

Looking for things to do on the 12 string until the sides arrive, I test bend the crapped out walnut to see how it would do in the bender.  At 4.5mm, the sides cracked when I used the bender.  I half suspected this.  Also recognized that grain direction is important especially near the tight bend on the upper bout.  Will account for that when I postion the sides in the bender.  Also, if I get them down to 3mm, I should have not problems.

Also, trimmed the top to a skosh larger than final size.

090111toptrimmed.jpg

After testing out the bender, decided I could go ahead and bend the curly maple and purfling.

090111bindingsandwich.jpg

This is the sandwich of binding and purfling in the bender prior to clamping down.

090111bindingjigged.jpg

After cooling, I removed from the bender (nicely bent) and placed in the mold to hold the shape in anticipation of installation.

« Prev - Next »