Archive for the 'Repairs, Jigs, Tools and Other' Category

A Repaired Uke and Some Mahogany

April 10, 2011

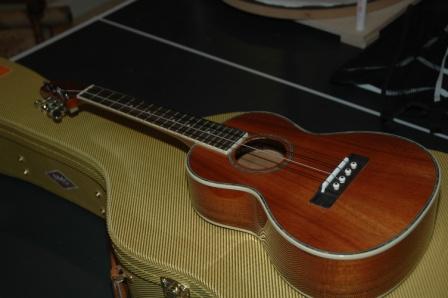
I’ve completed the bridge install for the “Fender” Uke.  The experiment with using beads as string ends worked well.  The strings are now fully stretched and stay in tune, and the intonation is quite fine, indicating I mounted the bridge properly.

110410fenderfinished

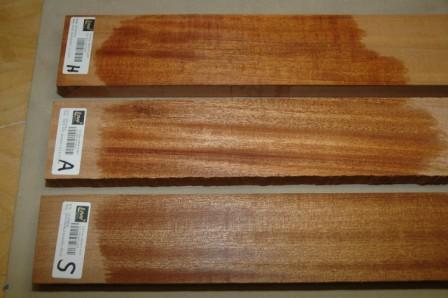
I ordered three different mahogany neck blanks to see them side by side and hopefully arrive at a favorite.

110410mahoganyneckblanks

From top to bottom:  Honduran, African and Sapele.

Fender Uke Gets a Bridge

March 27, 2011

The Fender Uke, which has been getting some headstock lacquer, came without a bridge.  I have a couple of preshaped uke bridges which I’ve drilled out to take bridge pins (very “not uke”).

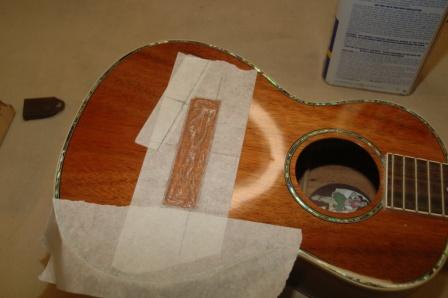
I stripped away the lacquer with Stryp-Eze after positioning the bridge with masking tape.

110327fenderstripeze

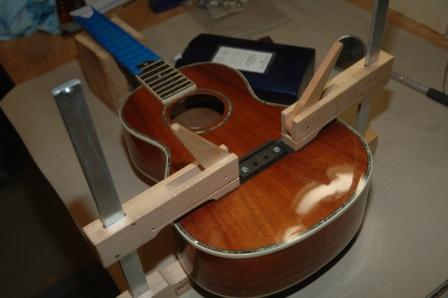
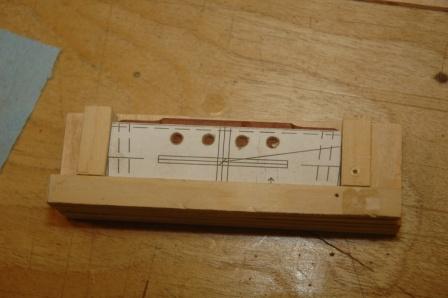
Scraping and chiseling left a glue-able surface.  Since this bridge will use bridge pins, I drilled two screw holes through each outside pin hole, glued up and screwed down.  These screws are for clamping only, and will be removed after the glue dries.

110327fenderbridge

Parlor Neck Reset

March 26, 2011

My guilt has taken command of me.  I’ve had Tom’s parlor guitar sitting waiting for me to do a neck reset since, oh I don’t know, 2008.
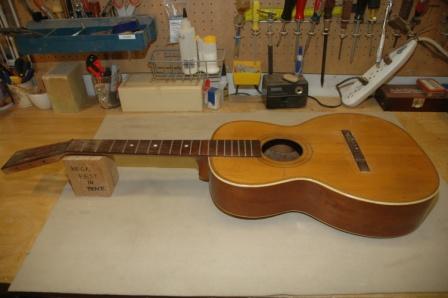
110326tomparlor

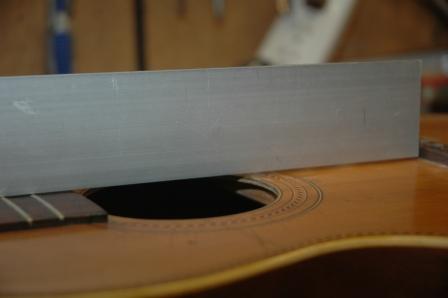
The neck is beginning to come away from the body down at the point where the heel meets the back, essentially pulling up, depressing the top and creating massive string height.
110326tomtop

This photo shows a straightedge on the fretboard meeting the bridge at its’ base.  The straight edge should hover just above the bridge surface.
110326tomtop2

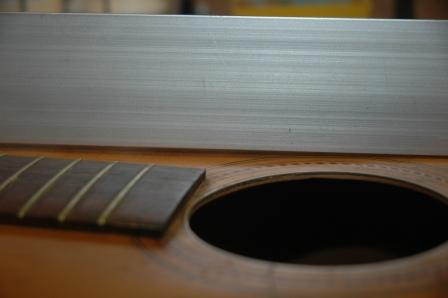
When the straightedge is placed on the lower bout area of the top, you can see the depression of the top surface around the soundhole.

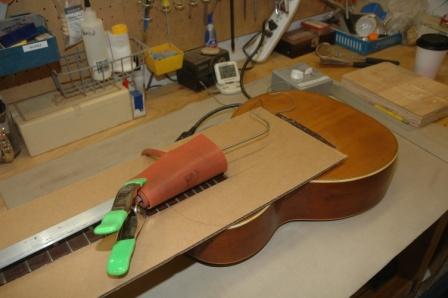
Neck removal starts with releasing the fretboard glued to the top between the heel and the soundhole.  I tried several configurations of a heating blanket on the fretboard to warm it to allow the glue to be softened.
110326tomwrap

Multiple attempts to loosen the glue went naught.  Insertion of a spatula under the fretboard went nowhere.  I’m concerned the glue is of the ilk that won’t respond to heat to release.  I’m tempted to procure another tool, which is specific for heating the fretboard end for loosening.

Once the glue is released, I will be able to steam out the dovetail joint and remove the neck.  Only then will I be able to determine what needs to be done to remove the depression in the top, and what the new neck angle will be.
What is it?

March 19, 2011

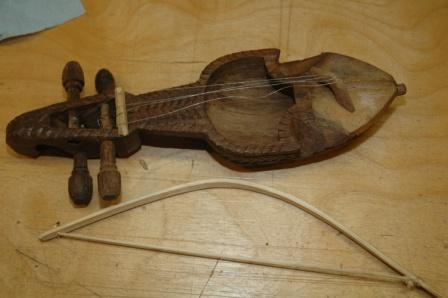
Rachel returned from China/India Tuesday and she brought me a present.

110319chinainstrument_0

She’s not sure what it’s called, so what’s it called?  I need to restring, and I’m not sure what the bridge orientation should be.

Today I added more lacquer coats to the koa dreadnought (6 of 12) and the uke (9 of 12).  The uke is a disaster.  It became dislodged from the spray booth bracket and fell to the cement causing a reasonable amount of damage, including pebbles throughout the wet lacquer coat, a chip out of the headstock, and a segment of binding with road rash.  Oh well, file it down, keep going.  Thank god this is just a “test uke”.  I’m sure it will sound lovely, but it will look like shit.

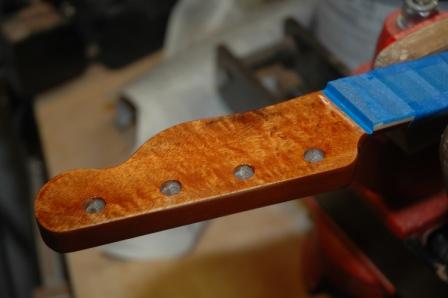
I’m also refinishing a headstock on an eBay purchased Fender koa uke.

110319fenderhead

I have some aerosol nitrocellulose that I am using to refinish this headstock.  It’s got 4 coats now, and I’ll probably go as far as 10.

I devised a little jig for drilling holes in my uke bridges.  I’m going to use bridge pins with strings secured inside the body with bone beads.  I’ll get a picture up later of the string beads.

110319bridgejig

Uke Side Bender

February 13, 2011

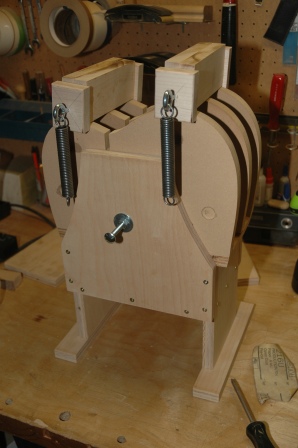
Finished the side bender for uke sides.  Awaiting the delivery of the cutaway ram, which will be used to clamp down the waist.

110213ukesidebender

Dear Customer

January 17, 2011

I am compelled to offer an apology to my customers.  I am developing the prevailing luthier ethic of taking a long time from inception to construction of my guitars.  It doesn’t help that I am a full time intern teaching high school math, or that I am enrolled in a program at CityU which has classes, homework, and assignments.  I like to read and watch old episodes of Lost, and the dog needs walking on a daily basis.

It also doesn’t help that I have 5 guitars/ukes in the pipeline, not to mention the several repairs/restorations which have been ignored in favor of building for way too long.  I have a koa dreadnought waiting for the spray booth (I want it to get warmer in the garage, as well as less leaky from the rain).  I have an apprentice who comes twice a week, and together we are completing a walnut OM.  My first uke, a spruce/bubinga tenor, is still in progress, and wants to be ready for the spray booth coincident with the koa dreadnought.  There’s the palo escrito hybrid cutaway that gets my attention every few days, and finally a koa tenor uke for my sister, which has some early attention.

I ramble here to make amends and assure all of you waiting for your special guitar/uke, that I’ll do my best to deliver as soon as it is possible.  The delivery date isn’t as important as the righteousness  of my attention.

Luthier Community Advice

January 9, 2011

I posted the following question on a Luthier Community Forum.

I use an 18″ Grizzly Drum Sander to thickness backs and sides.  I use 100 grit paper, keep it clean, advance mere micro millimeters for each pass yet still can’t avoid burning.  Any suggestions?  The feed rate has been tested from slowest to fastest, yet it doesn’t seem to make a difference.  The harder the wood, the more prone it is to burning.  Must
I accept burning as part of the process (I can scrape it off in the end)?

  • My first thought is that the belts are moving too fast.  Can you adjust the speed of the belts??  I assume that the feed pressure is appropriate given that  you are able to adjust the thickness w/o difficulty.  100 grit is fairly common in this application.
  • Are you sanding with the grain? Sanding with the grain on high resin woods can cause burning. Try sanding at an angle against the grain. The greater the angle the better.
  • I have a Performax 16-32 and found out early on that you need to use a heavy grit (80 or lower) to take the initial pass.  After you have removed a bit, go to 100 or higher.  This works very well for me. Also, with high resin woods, the paper will not gum up as quickly.  If you try to remove the wood with a higher grit, it will  burn and gum up.  Use a heavy grit to remove the bulk of it, and go to a higher grit to smooth it out.
  • A dust collector of adequate CFMs is a must.  That would be the first thing I’d look at.  You have to get the dust out of there efficiently as the sanding is happening in order to prevent clogging of the abrasive.  If you have a good dust collector on there, then the problem could be the design of the sander – how well it’s designed to maximize dust removal.  I have a Woodmaster, which excels in this regard.
  • I use the little Performax (10-20) so I have to pass on each side to thickness a plate.  I have never had a problem with burning, but I keep my sanding belt really clean (I have a sanding “eraser” next to it and use it about every 4th pass) and use a Grizzly product that comes in 10′ or 30′ rolls for about 4 bucks.  It fabric backed and doesn’t loat much anyways.  I get 3 out of the small one, if I’m really careful cutting.  Also, when wrapping the drum I don’t go right up tight to eachother, but leave a little gap of about 3mm.  I find that any dust not pulled into the hose lodges in there rather than the grit.  I’ve done Sitka and Englemann spruce, and the hardwoods from mahogany to ebony, no issues.  Hope this helps.

Snow Days Means More Guitars!

November 23, 2010

Today is a snow day, which means I don’t have to work!  Work being teaching math at a high school.  The power is still on, so my power tools and lights work down in the shop, and I’ve got lots I can work on.  I’m juggling several projects right now, a koa dreadnought, a bubinga uke, and a new entry, a palo escrito hybrid with my first cutaway.  I’m also supporting an intern who is working on a walnut OM.  In addition, I’ve got lots of workshop organization and cleanup to do.

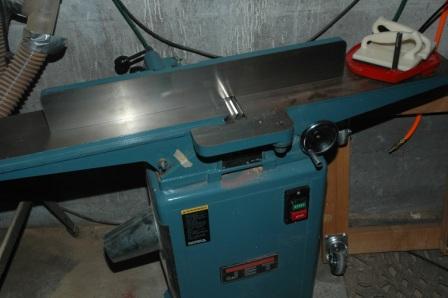
I introduced a new power tool into my garage; a planer.

101121planer

I moved the compressor to a temporary location to make room for the planer, merely delaying the inevitable; where do I put the compressor?

Anyway, minor issues, lots of work available to choose from, and I’m damn excited.

New Toy – Planer

November 21, 2010

New toy purchased this weekend.  I found, at a very reasonable price, a used planer for my shop.

101121planer

New Tonewood – Myrtle

October 7, 2010

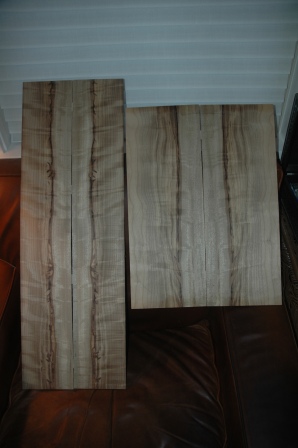
Oooh, more wood to play with.  Just got this myrtle today.

101007myrtle

« Prev - Next »