Guitar 805 – Momentum into the weekend
January 23, 2009
I’m about to embark on my favorite part of guitar building. Assembling the body. This is the part where all the little things you’ve been doing start to come together and look like a guitar.
I pulled the bent sides out of the bending machine and placed them in the mold, after determining how much to cut off each end. Once in the mold they were ready to accept the neck block and butt block.
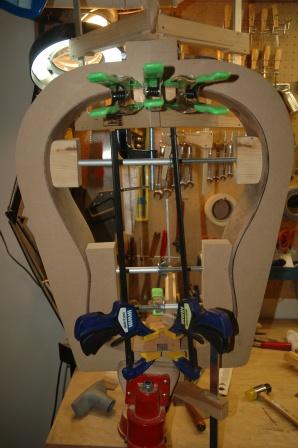
The blocks were prepared in advance to be of the right height. Once the blocks are in, the sides can be planed down and ready for kerfing.
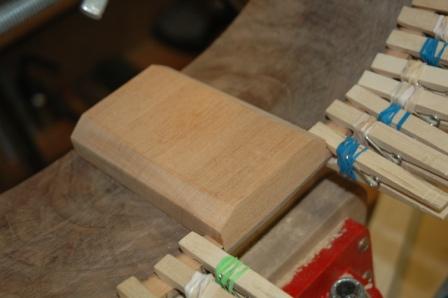
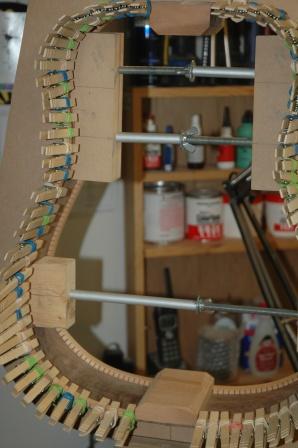
Kerfing is fun. You get to play with clothespins. Before kerfing and after planing, the sides are in the mold and shaped using a 15′ radius bowl for the back, and a 30′ bowl for the top. The top doesn’t get planed, as the blocks are set in flush against the top edge. A few quick twists in the 30′ bowl, and the top is properly shaped. The back, although, takes a steep dive from butt block toward neck block, and lots of material needs to be planed down. This is tricky, as there’s a high risk of cracking the thin sides, which I did, twice. One crack surfaced while planing along the upper bout where the curve is tight. The crack, about 1″ long moved diagonally down the back, leaving a finger of side sticking out. Fortunately this happened early, and I was able to superglue it back in place, then plane through it down to the desired height.
After planing and radius bowl sanding, I applied the kerf. I’m using a reverse kerf on this guitar, which has a better look when gazing into the soundhole.
Oooh boy, next I sand the installed kerf and run them through the radius bowls. I’m going to use a very nice piece of curly maple left over from the neck stock of the OM I just completed for the end graft. I’m going to get fancy with the binding and purfling, and after I install the top and back, I’m very much looking forward to the binding work.
I should have the binding completed by this weekend.