Guitar 0208 – April 27, 2008 – on to the neck
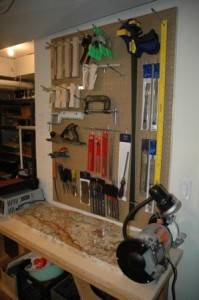
Over the past week I took a little diversion. I have a homemade workbench in my shop (really the furnace room, which may, temperature/humidity wise, be a bad choice for a workshop). The setup of the room is quite nice for the one person guitar maker. I have been acquiring hand and power tools over the past 3 months and have run out of space for storage and work surfaces.
There was unused wall space behind me, as I face the workbench. My orignal bench was built from plans I found on the interweb, and it is essentially two by fours with a solid core door mounted on top. It is sturdy and has proven to be an excellent work area. I modified the plans to be a shallower, L shaped workbench to nestle into the wall and around a corner. It took me a week to build, and most of the time was trips to the hardware store for supplies. Dunn Lumber always has a supply of odd stock at a good price which helped keep the cost down. I scrounged two by fours from our sukkot which we haven’t erected for years. The top, instead of a solid core door, is a laminate of two 3/4″ ACX plywood.
It is now the proud holder of my bench grinder, the massive slap of marble I scrounged two weeks ago, a new sanding station, my sharpening stone jig, and the go-bar platform. The final bonus is another pegboard reserved exclusively for guitar making tools (even though many remain on the old pegboard).
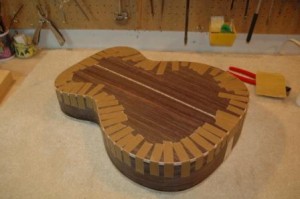
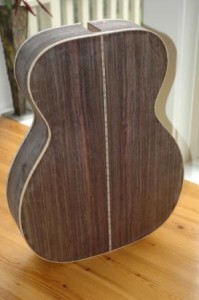
It’s time to move on to the neck. You may infer that means I’m done with the body. Essentially, yes. I’ve completed the installation of the top binding and purfling, and the back binding. I’ve scraped the sides, back and top and am almost done with that process. It’s a long tedious step which I choose to do in lull moments as I work on the neck.
The binding tape, shown here, is one of many methods for clamping down the glued binding. If you are diligent, this works perfectly well, but one has to pay real close attention to the end cap joints and the waist area. It’s real easy to leave gaps. Some use the “wrap the guitar” method with long pieces of fabric tape (twill tape), and still others use clamps, estpecially at the waist. I use a hairdryer to heat the tape as I remove it to minimize the grain tear up. Still, the grain tears up. The shellac on the top was good idea, as I had minimal grain tear up on the spruce.
Before I move on to the neck, it’s time for what I call, “Hey you bonehead, you’ve made an error”. I will abbreviate this to be known as Boneheads. Boneheads will be warnings for the next guitar. I’ve embedded many unclassified boneheads in the previous posts, but here’s the first itemization of boneheads.
1. Top left (looking from the top) shoulder dips. This must have occurred from over radius sanding that section of the top, or it could have been contributed by bonehead 2 below. Next time….measure depth of box many times as I go during the radius sanding process, AND pay attention to number 2.
2. It’s not much, but the upper right bout side (again, looking from the top) is not square. This doesn’t make sense that this contributed to the shoulder droop mentioned before, but who knows about cause and effect when it comes to radiused guitar bodies. This has to be from a not square mold. I’ll need to go back and ensure that my mold is square all around, especially if I use it for a future OM.
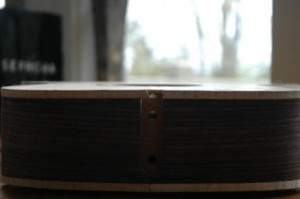
3. Back binding channel too deep. This means the body is taller than the binding, meaning I have to shave, sand, file, the edge of the body to bring down flush with the binding. The binding a skosh proud of the body is the ideal approach, as binding reduction is much easier. It’s not much here, but enough to create extra work for me. And…I’m not about extra work.
4. Spruce top has a few gouges. My favorite type of bonehead, as it reminds me to keep my work surface clean. These certainly came from me dragging the face down body across some vile little piece of devil crag which added a new dimension of grain to the spruce. Good news, it’s in the direction of the grain, so it will be easily filled or sanded away, and whatever remains will look like grain.
More after I make some progress on the neck.
Brian Riley on 28 Apr 2008 at 5:55 am #
Hi Steve,
Lawrence Z sent your website address to me. As part of his cycling/fundraising team, we were chatting along the ride and I mentionned to him that I had a guitar that I made that I wanted him to play.
You’ve done a wonderful job here with the site, the pictures are clear and the text is clean.
My lutherie began 3 summers ago and I’ve had struggles of my own. I’m finding that imperfections are rooted in understanding how perfect the earlier steps must be in order for the final outcome to be anywhere near good. Not a huge insight for sure, just another reminder.
When will you be starting your next venture?
You website is a good idea, I’ve got my pictures on the web but not nearly as accessible.
Regards,
BR