Guitar 0108 – Log Entry – December 2007
December 25, 2007
Received kit (#5297): OOO Mahogany Dovetail neck joint. $395.00. Review of printed instructions and instructional DVD made it evident that acquiring tools was going to cost more than the kit.
December 26, 2007 – January 19, 2008
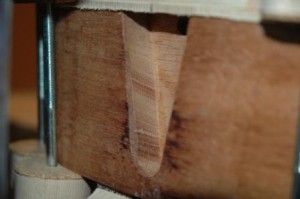
Reviewed printed and DVD instructions several times before embarking. First steps included determining which side of the prebent mahogany sides was the top vs. the backside. Apparently, I had a 50 50 chance of getting it right, and failed. I glued the neck block and the end block and only after did I discover my error. Using some bit of intuition, I realized I could keep the tail block in place, augment one end with a glued veneer of mahogany from the scrap that came with the guitar in order to have enough height to account for the 5? back angle. But, I did have to remove the neck block to rotate 180? to expose the open dovetail to the top. Using a flat iron, butted up against the neck block, not touching, on wool, from the outside of the guitar, I heated up the glue. Rachel was kind enough to run out to Fred Meyer for an art supply spatula, which I used to separate the neck block from the sides. Rotated and reglued, but again erred in not getting the neck block perfectly square with the sides. I will have an interesting challenge in setting the neck if this out of square is too pronounced.
Installed the kerf lining per the instructions but managed to crack each one at the deep waist. Perhaps a bit of sprizting with water to soften the kerf before installing will prevent this next time, but I don’t know the effect of gluing wet wood (as it dries).
Built the front/back sanding block per instruction, but had a hard time crafting the 1.5? and 5? wedges to attach to the sanding block. These wedges create the proper sanding angle of the front/kerf lining and back/kerf lining. Need to discover a way to build wedges without having to invest in a band saw.
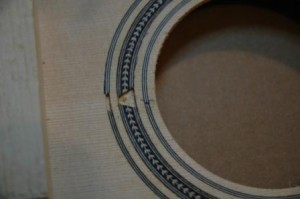
Installed soundhole rosette inlay per instructions but cut the inner ring inlay a wee bit too long and ended up driving one end into the routed groove a bit too deep. I can probably fill this with clear epoxy before sanding.
Installed top bracing per instruction. OOO kit came with dreadnought X brace pieces and instructed how to take included rectangular stock to craft the X braces for the OOO. Being lazy and not confident on my brace shaping skills, especially how to do so with loose braces not attached to anything (clamps would get in the way I think), I chose to use the dreadnought braces and adapt them. I suspect there will be an unnoticeable difference in tone, but I’m building this guitar for experience, not end product. Managed to crimp a few of the braces with the clamps, but can recover through shaving.
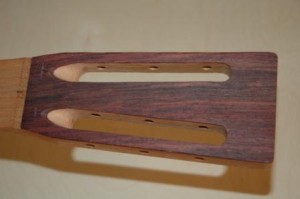
Glued rosewood veneer to mahogany headstock, drilled and filed out rosewood from tuner slots (OOO uses open headstock tuners). Made critical first error of knifing toward the grain rather than away, and over removed some rosewood. Will clean up with file and sanding later. Started rasping out string channels, angled grooves between open headstock and nut to account for string clearance. Found my rasping skills will need further attention as I gouged the inside back of the open headstock in several places, but not bad enough that it can’t be cleaned up. Also had to be careful not to open up the ends too wide where the channel meets the open headstock. More to be done here as I don’t thing the groove is yet deep or long enough.
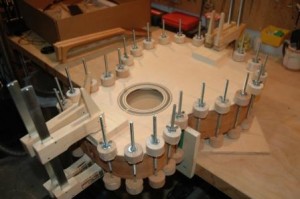
Built my own spool clamps. Saved a little money ($35 in supplies to build (round stock, cork sheets, carriage bolts, washers and wing nuts) vs. $80 to buy), but the cork didn’t stick too well (wood glue) and the sides of the spools chipped out from sawing, the spools were barely square, and even though I build a Rube Goldberg jig to hold the spools and line up my hand drill for center drilling, the holes came out everwhere. In the end they look OK, but I will have to be careful to avoid inside edge of spool clamp digging into top and back during clamping. As the top and back have a slight bow, this out of square may actually be to my benefit as I can assure, through rotation, full contact between the clamp and the guitar surface. But they’re still ugly.
Looked ahead for small things to do prior to receiving my brace chisel on order and noted that the binding instructions did not address the fact the top inlay used a tri-laminate. Kit comes with black outside binding and 2 white and 1 black plastic strips for top binding. Emailed stewmac with question and they were quick to respond: “It seems we haven’t updated the instructions for that kit. You need to laminate or join those pieces together using acetone before you attempt to put in place on the guitar. White, black, white is the correct order.” Appears to do this properly requires a binding laminator, which I’m not going to buy. I’ll either craft or use one at Girdis. Girdis is a guitar builder who also has Saturday “use the shop” sessions where amateur luthiers such as myself can use tools, jigs, etc. and get advice from a professional.
Next shipment of tools arrived and I was ready for brace shaving. Did quite well on the shaving, but it’s a skill that will improve over time. I over shaved the top braces, but not sure if that will effect future top strength or not. Installed and shaved back braces. Centerline flat braces installed, but I neglected to pretty them up, and they look a little raw. Using my homemade spool clamps, I installed top and back. Slight issue with bouts being different from true. Front bouts a little over 90?, lower a little under. This is certainly due to building the guitar without a full blown side jig. May look into procuring or building.
Attended my first Girdis workshop with body ready for binding routing. Girdis helped me with routing the top and back down flush with the sides. He stressed the importance of sanding very well prior to binding routing. Sharpened my scraper, smoothing and flattening the sides and edge, then rounding the corners into hooks. Used the scraper to flatten the sides, then sand to true up and remove “burn” from bending. Mistakenly scraped toward the dovetail opening and snipped off a small piece of top spruce, which I reglued. No harm as this piece will lie underneath the fretboard.
Also used bandsaw to trim fretboard and then used plane to clean up. Similar technique to shooting board.
Decided I needed a router and procured a Bosch Laminate router which also comes with an accessory to tilt the base which I will use for the 5? angle for the binding route on the back. Routed the top binding channel successfully, but perhaps a hair too tall, I must keep this in mind for the back binding routing step. Best to under route (duh), then scrape the excess binding overhang. Certainly, I routed the “herringbone” channel too tall. This channel is to accept the trilaminate plastic binding between the top and the outside binding. I tried to join the three strips using acetone as recommended by StewMac, but it never adhered. Since there is no going back from a too tall channel, I decided to try and glue in the binding and join the three pieces on the fly, as I was attaching to the guitar, and to avoid pressing it too deep into the channel, thinking I could scrape down to the binding surface later and create a clean top look. Had some trouble, snapped one of the thin white bindings, pressed some sections in too deep (Weld On cement starts to work fast, and I couldn’t recover some of my initial deep settings).
Installed the side dots, and of course installed dots on the wrong frets. Instead of 12 and 15, I installed 11 and 14. I added 12 and 15, and now have a dot festooned side to my fretboard. OK, as Larry says, I have a Spinal Tap side dot, “one that goes to 11”. Drilled for round abalone fret dots. The ¼” ones look great, but the 5/16” became chipped on one edge, I’m sure due to a less than perfect bit, and the hole itself had a small domed ring, as the outside bit surface was deeper than the center ring (sans the brad point). I think I can repair this with black epoxy or black super glue. Installed the dots, was worried about those rising above the surface, but sanding took them down nicely. It was the too deep one that ended up being the problem. I filled the chips with black epoxy and the inlays now look great.
Cut and cleaned up the end binding piece. Sawed the end block area to accept the piece. 2 major issues with this. First, the end block channel ended up too wide, and I seriously chipped out side mahogany during chiseling. Hopefully I can fill the side chips, and next time, I will make sure to synch up the end trim widths with the end block mahogany to under open the channel, and to avoid the chipping, I must saw a little beyond the depth of the channel to chisel.
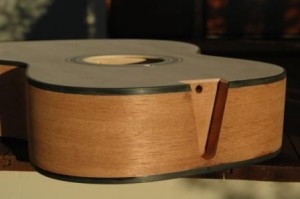
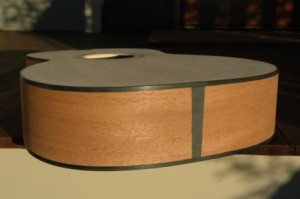
Installed the back binding and did not use the angle base for the router as the opening in the base is too small to accept the bearing router bit. I installed the binding and found that once again, the channel was a little too deep and too tall, meaning I had to scrape a lot of body and sides to flush up with the binding. The preferred would be to scrape binding down to the guitar. But, in the end, the finish should hide any minor blemishes. I do have some irregular edge on the end plate, but think I can fill that with wood putty.
Installed the frets, nipped and filed. Mounted neck in vice, attempted upbow, then glued the fretboard to the neck. It must sit for 24hrs. before removing the rubber band used to clamp the fretboard to the neck.
