Guitar 0208 – Let’s Get Started
Guitar Building Log – LMI OM Rosewood Guitar Building Kit
March 1st, 2008
Received kit (#LMPO) – LMI descripton and parts list: LMI OM Serviced – This kit has everything to make a high quality orchestra model (OM) guitar matching LMI’s historical standards. The major parts included in this kit are: AAA grade Sitka spruce top, 1st grade Indian Rosewood back and sides, Ebony fingerboard, quartersawn Honduran Mahogany neck, and Gotoh gold tuners. The binding and purfling scheme is curly Maple binding with a fine B/W/B laminate for the top and back. The 3 ring rosette is inlaid and the majority of the services are completed.
$550.00 Save 205.61 (25.6%) from the retail cost.
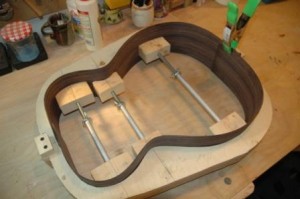
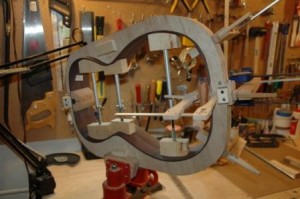
Reviewed DVD instructions several times before embarking. First step is to build a guitar mold. Referenced many sources for building the mold, but mostly followed steps in O’Brien DVD from LMI. Used 3 ply AXC plywood. End result errors: not enough neckside and heelside material left in place to install a removeable bolt at each end, ended up using a lag bolt. Inside of mold a bit “serrated”, not smooth enough for my standards, but didn’t have any tools to smooth. Used a scraper, sand paper on block, but should have had a drum sander mounted on drill press to finish nicely. After the fact, I will clean up this mold and rig something to extend the end blocks and install bolts so I can use for future OM construction. I also manufactured the spreaders per O’Brien’s DVD. Not totally satisfied with the shape of the end blocks on the spreaders, but I can revisit those as well when I clean up the mold smoothness.
Went bonkers ordering tools again. This time, in response to the building process in the DVD, ordered a Go-Bar assembly with 18 fiberglass bars, two radius dishes (15′ and 30′), and sanding disks from Blues Creek Guitars. And a band saw, and a new fine grinding wheel, and sharpening stone, and Bench Plane. Carl gave me his old Drill Press, which I need to clean up and mount on a stand.
First step: Insert prebent Indian Rosewood sides into mold. Mark center line, saw and return to mold. Shape neck block, first removing small amount of stock from truss rod hole end to bring dimension length to plan length. Use bandsaw to 45 degree angle cut outside edges (may have done too much). Do same for end block, and attempt to put a 20″ radius on end that goes against (glued) sides. Using a hand block to sand, I almost got the correct angle, but with a little too much round on the ends, and a little too flat in the middle. This is where a sanding station would help.
Took care to use wax paper between mold and sides before gluing.
The evidence of the inadequate shaping of the end block came with a gap on the outside edges and the need to pull in the sides at center to meet the flat center.
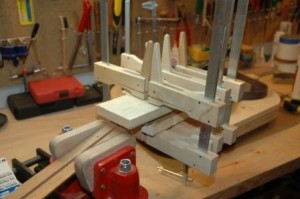
Took some diversions from the path shown on the DVD, and mounted the backstrip onto the back next. While trying to sand the back strip before installing I snapped into 5 pieces due to its fragility and my oafish mitts. But butted two pieces together and glued using my new go-bar contraption. I will mask the back and sand the strips again before notching out sections for back bracing.
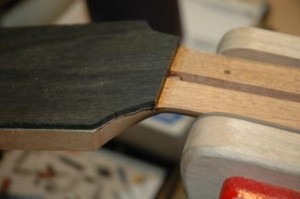
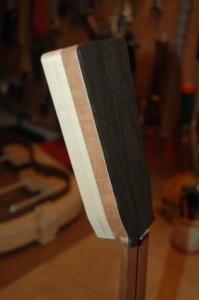
Another diversion was to mount the headstock veneer. Maple then ebony. Was able us use cauls from last guitar which incorporated the V notch. After drying, used the coping saw to remove veneer overhang, then fashioned a template headstock out of pine to properly trace and cutout the final headstock shape. DVD suggested screwing the template to the headstock, using the bandsaw to cut out final shape to near size, then finish with flush cut router bit. Flush cutting looked really good on one side but left some chatter marks on other side, and at the rounded top corners. Again, here is where a good sanding station would improve the quality of this procedure. I will avoid drilling the holes for the tuning machines until I have the drill press set up, as I am unable to accurately drill squared holes by hand (as evidenced in the template).
As I was trimming up the nut side of the veneer I was careful to use a fence and saw the correct angles, thinking I’d know when I’d made it through the veneer. I told Carol I sawed into my neck, and she was looking for blood when I clarified that it was my guitar neck. It was deep enough to be visible, I filled with super glue and am now worried about appearance, but not integrity.
You can see the chatter marks on the left side and the top left rounded corner. Maybe a block plane and a drum sander will clean these up.
I found a company in Seattle which makes custom inlays and inserts them into headstock veneer. I will visit soon to get my logo designed and implanted in the headstock. There is a 20 minimum order so I hope they have a variety of woods. Later….took in my neck and logo design to Gurian Instruments, and got them to produce inlays and set them in 20 headstock veneer, 1/3 rosewood, 1/3 ebony, 1/6 maple, 1/6 sycamore, and to inlay my headstock for this guitar.
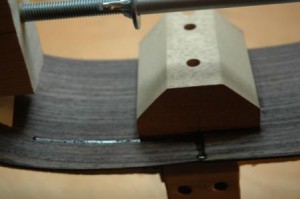
Next step, radius shape the sides, starting with the top at 30′. Used the radius dish and twist sanded the top edges by rotating the mold left/right until no daylight seen between guitar top sides and radius dish. Went quickly. While moving the guitar around and holding the back sides near the end block, I snapped a crack in the side, along the grain, above the end block (I was warned, but having done so, I am better informed). O’Brien recommended super glue in the crack and alas, it did the trick. See photo for super glued crack.
