Guitar 1001 – Joining plates and thickness sanding
September 6, 2010
The top has been planed down to .105″ in preparation for joining.
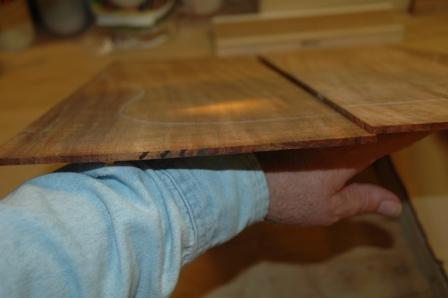
Using a shooting board and plane, the edge is jointed, then glued and secured in the joining jig.
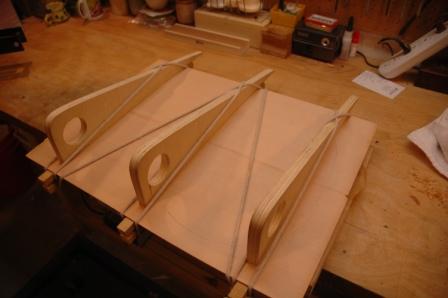
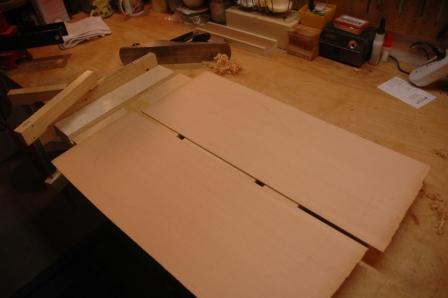
After an hour in the jig, the plate is removed and the glue squeeze out is removed with a cabinet scraper. The top is then fine sanded. The joint has been notched at both ends to positively locate the center line. The dreadnought top template is used to trace the top shape to the outside and locate the center point of the sound hole.
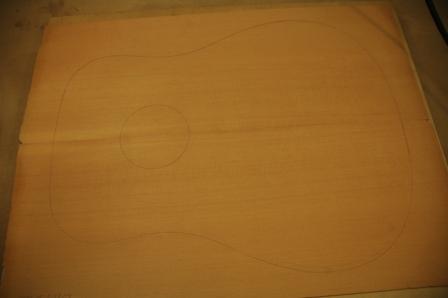
This is really a very nice piece of Sitka Spruce. It has lots of waterfall curl which is very subtle yet pleasing. The center of the soundhole is drilled with a 3/16″ bit and the plate is mounted on a workboard with a 3/16″ pin in preparation for routing the purfling channels.
The back plates started at .170″ and need to be thickness sanded down to .090″. My drum sander has a few issues which need resolution. First issue is the drive belt drifts off center and needs calibration. Second issue is that the drum is not within tolerance of being parallel (drum to drive belt). Additionally, koa tends to burn slightly in the drum sander.
Once these adjustments are made, and the sanding drum has been cleaned up to remove previously deposited burn streaks I will be able to sand down the back plates to approximately .100″ in preparation for joining.