Archive for the 'Guitar 1001 – Auction 2 Guitar' Category

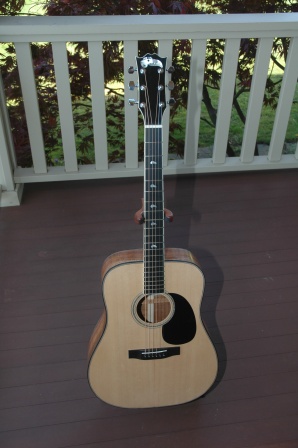
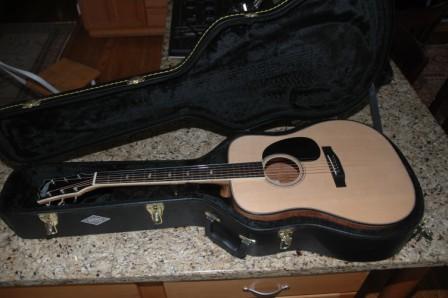
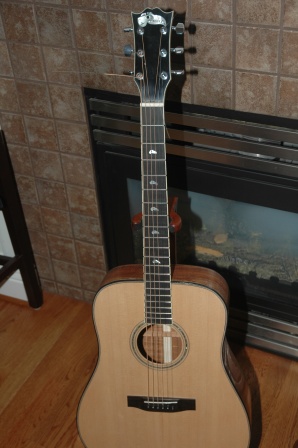
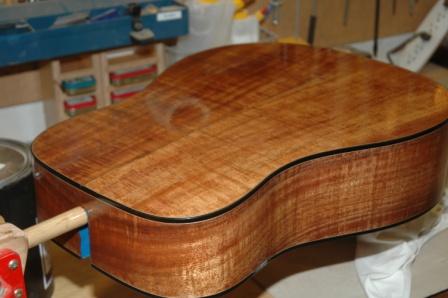
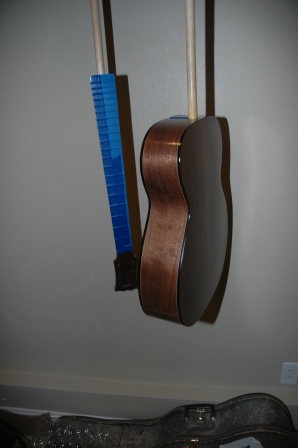
Guitar 1001 – Ready for Delivery

May 14, 2011

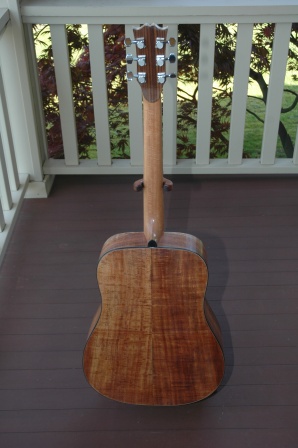
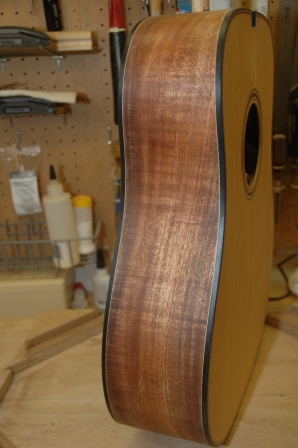
What with going to school and learning to teach, and actually then teaching, I have seen serious erosion of my time available to devote to building.  So it has been almost a year in elapsed time since I started this Koa Dreadnought.

Today, it is finished.  I have contacted the client to arrange pickup.  He can take his time, as I will get to play it more the longer he waits.  It’s hard to give up these guitars, I want to keep them all, but I have too many anyway to begin with.

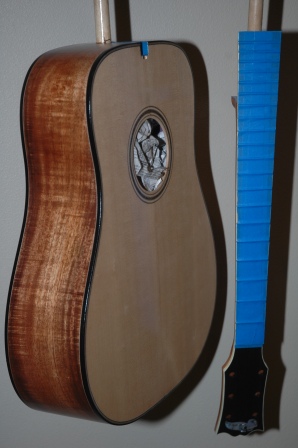
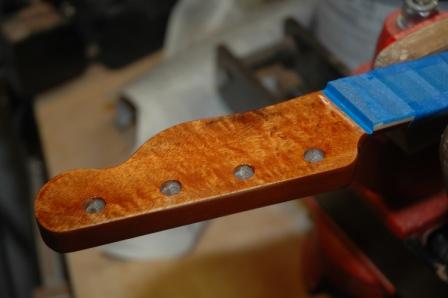
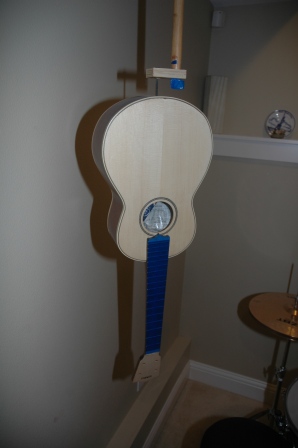
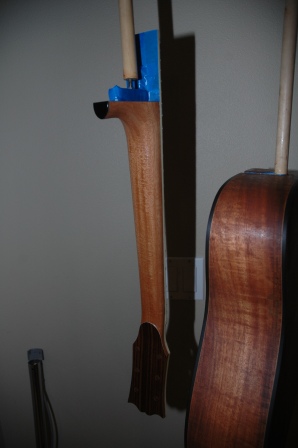
Today I crept down into the shop, trying not to wake my sleeping son who was crashed in the basement after his night out at the prom.  Dress the frets, polish the saddle and nut, oil the fretboard, install the pickguard, put the strings back on, whoops, clean out the ort from inside the box, install the label, then put the strings back on.  Tune it, play it, smile, weep, move on.

110514dredheadfront

110514dredheadback

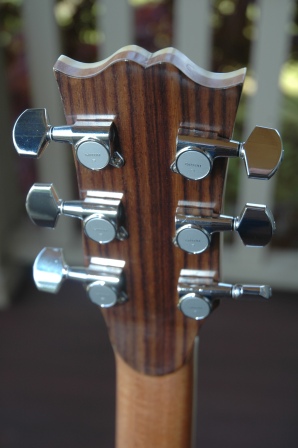
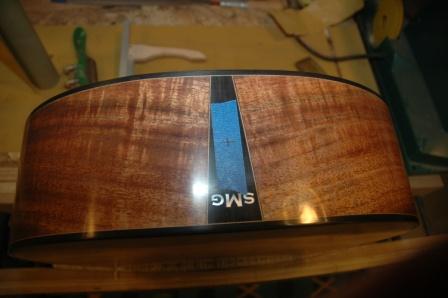
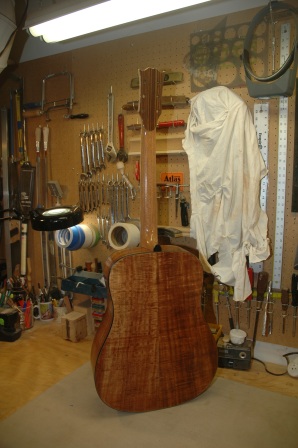
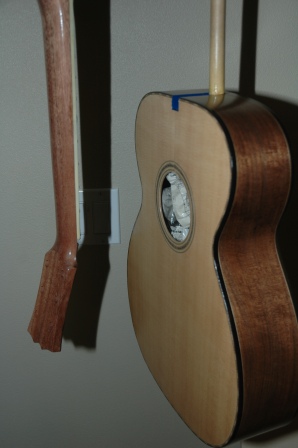
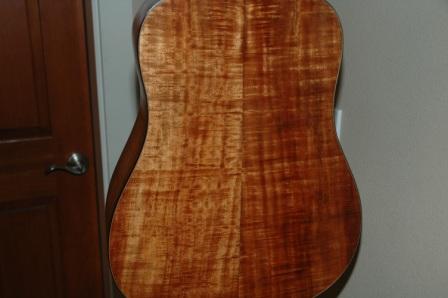
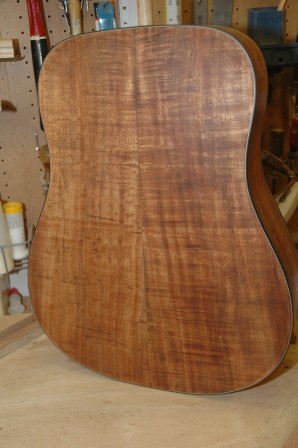
I like this little rosewood veneer backing.

110514dredbackfinished

110514dredfrontfinished

110514dredincase

Guitar 1001 – Moments from Completion

May 13, 2011

I predicted I would be done with the Koa Dreadnought by Sunday, and I even stuck my neck out and told the customer.  So damnit, I will finish it by Sunday.  The frets have been levelled and sanded as well as tapered.  The nut and saddle have been roughed out to approximate shape and dry fit onto the guitar.  The bridge pin holes have been tapered and string slots have been sawn in.

110513pinslots

I have employed Professor Cuthbert Calculus to do some work for me as you can see in the photo above.

I strung it up, tuned it and let the strings settle in.  To my amazement, my rough setup work was perfect.  The saddle is the proper height, the nut string slots are at the perfect depth, and the fret levelling was flawless.  I think all those previous guitar setups have proven to be useful.  Perhaps I now know what I’m doing.  Nice bold sound, as is the custom for a dreadnought.

110513strung

So, I’ll let it settle overnight, then tomorrow I’ll hit the punch list:

1.  Install sMg label after blowing out all the crud inside the box.

2.  Final buffing.

3.  Shape then polish nut, glue to neck.

4.  Shape then polish saddle, place in bridge.

5.  Dress frets and fretboard.

6.  Tighten truss rod for miniscule concave setting.

7.  Install pick guard.

8.  Clean case and attach sMg Guitars label.

9.  Call Steve and have him come pick it up.

Guitar 1001 – Knocked Down and Buffed Up

May 7, 2011

Happy Birthday Sister Cyndy!  In honor of your birthday, I did NOT work on your uke.  Rather, I finished knocking down and buffing the Koa Dreadnought.

The finish will get another buff after setup to bring on a real shine.  The lacquer under the fretboard extension was stripped off, and the neck was glued and bolted on.

110507clampneck

After setting, the end pin hole was drilled and the tuning machines were installed.

110507markendpin

110507neckmounted

The bridge location was determined using MATH!  The lacquer under the bridge was stripped in preparation for gluing.

110507stripbridgelacquer

The bridge was glued and clamped with the fancy bridge clamp from LMI.

110507bridgemount

Guitar 1001 – Knockdown Countdown

May 6, 2011

Spent several hours today knocking down the lacquer finish on the Koa Dreadnought.  A light first brush with 220 grit on the high spots, followed by a serious attack with 400 grit until NO shiny dimples remain.  A thorough dry sand with 800 grit leaves a very smooth flat surface without breaking through to the wood.

Tomorrow a quick wet sand with 1000 grit before the two stage buff on the buffing wheels.  The neck will be checked for fit and adjusted if necessary.  The lacquer on the top which is under the fretboard will be removed with Stryp-Eze then the neck will be bolted and glued in place.

Guitar 1001 – Knockdown!

April 23, 2011

The lacquer on the koa dreadnought has cured for two weeks so it is time for knockdown.  Knockdown is where you sand the lacquer with increasing fineness of grade sandpaper on blocks.  The key is to remove all high spots, orange peel and drips until the surface is mirror smooth.  Each decreasing grade of grit removes any scratch marks from the previously higher grade of sandpaper.  It’s critical not to sand through the lacquer.

220 dry to remove drips

400 dry to bring surface down to flat, removing orange peel.

600 wet

1200 wet

Buff!

110423neckfront

These shots are before sanding.

110423neckback

Note the rosewood veneer backing on the headstock.

110423frontlacquered

110423backandneck

The koa is just magnificent.

Guitar 903 and 1001 Lacquered

April 10, 2011

Guitar 903, the Walnut OM, and Guitar 1001, the Koa Dreadnought, have received their fair share of lacquer coats (12 to 20) and are resting for two weeks to cure.

110410lacqueredtocure

110410lacqueredbody

110410lacqueredtocure

The lacquer needs at least two weeks to develop a hardness which is appropriate for the final knockdown and buffing.  Neck install, bridge install and setup will finalize.

What is it?

March 19, 2011

Rachel returned from China/India Tuesday and she brought me a present.

110319chinainstrument_0

She’s not sure what it’s called, so what’s it called?  I need to restring, and I’m not sure what the bridge orientation should be.

Today I added more lacquer coats to the koa dreadnought (6 of 12) and the uke (9 of 12).  The uke is a disaster.  It became dislodged from the spray booth bracket and fell to the cement causing a reasonable amount of damage, including pebbles throughout the wet lacquer coat, a chip out of the headstock, and a segment of binding with road rash.  Oh well, file it down, keep going.  Thank god this is just a “test uke”.  I’m sure it will sound lovely, but it will look like shit.

I’m also refinishing a headstock on an eBay purchased Fender koa uke.

110319fenderhead

I have some aerosol nitrocellulose that I am using to refinish this headstock.  It’s got 4 coats now, and I’ll probably go as far as 10.

I devised a little jig for drilling holes in my uke bridges.  I’m going to use bridge pins with strings secured inside the body with bone beads.  I’ll get a picture up later of the string beads.

110319bridgejig

Guitar 1001 – 3 of 12 Lacquer Coats

March 18, 2011

Today is a day off school, so I’m spraying.  I’ve applied the 9th coat to the uke and the walnut OM, and the third coat (of 12) on the koa dreadnought.  It’s looking fine, after an exceptionally well executed pore filling step.
110318firstcoat

Guitar 1001 – Pores Filled, Ready for Lacquer

March 13, 2011

I knocked down the pore filler on the koa dreadnought.  After sanding and scraping the binding to clear off the pore filler haze, we’re ready to start the lacquer application regimen starting tomorrow.

110313backfilled

I must say, this pore filling process worked beautifully.  The surface is mirror smooth.

110313sidefilled


Spray Day – 6 of 12 and a little 3

March 11, 2011

Spray day today.  Added 3 more coats to Guitar 903, and Uke 1001 bringing them to 6.  Striving for 12.

110311sixthcoat

110311sixthcoat

Applied the first three coats to the neck for Guitar 1001 while the pore filler dries on the box.

110311thirdcoat

Between coats, I spent a wee bit of time inserting a temporary piece in the truss rod channel for Guitar 1002.  This is to assist in finding the centerline for the neck as I work on the taper.

110311insert

Next »