Archive for September, 2010

Ukes – Bending Mold

September 28, 2010

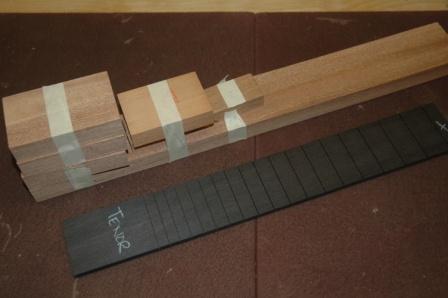
Now that I’ve settled on Tenor as the size for my first uke constructions, I need to make jigs and molds.  The side bending mold, which fits into my side bending machine will be the first to tackle.

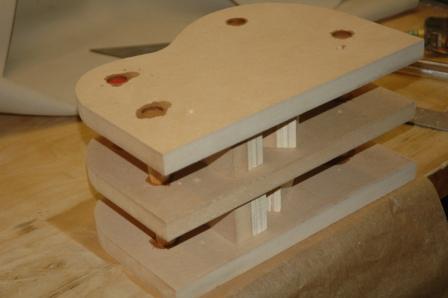
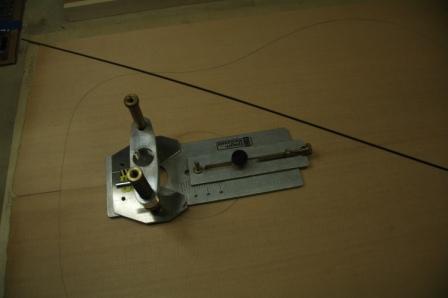
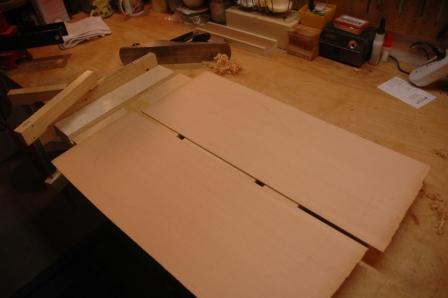
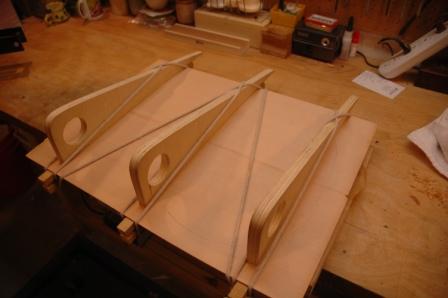
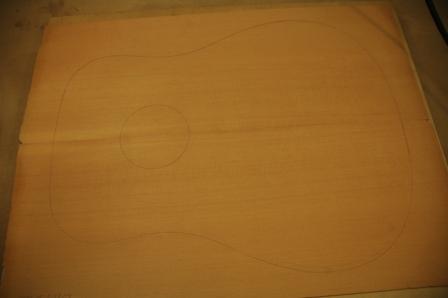
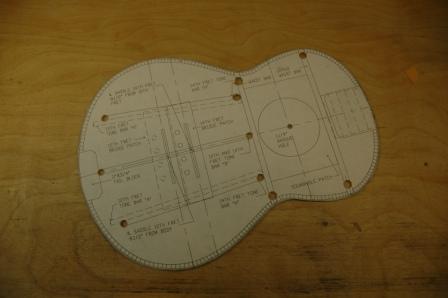
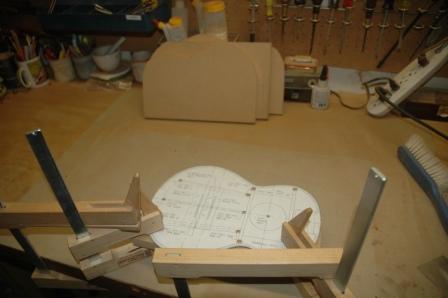
The mold is constructed from three pieces of MDF joined with 3/4″ dowel.  The master template shape is derived from the plexiglass template I created from the uke plans.  I rough cut 3 pieces of MDF for the bending mold and final shaped the first template piece.

100927platetemplate

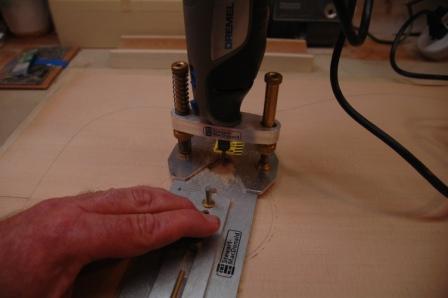
Once this piece is properly shaped, it’s used as a guide to shape the next two plates.  A router bit with bearing is used to do the finish shaping.

100927moltplates

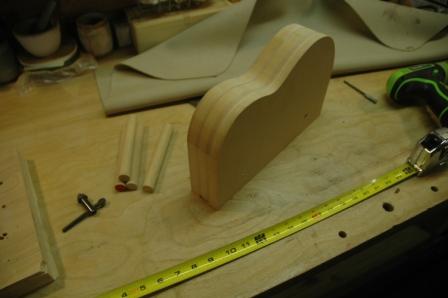
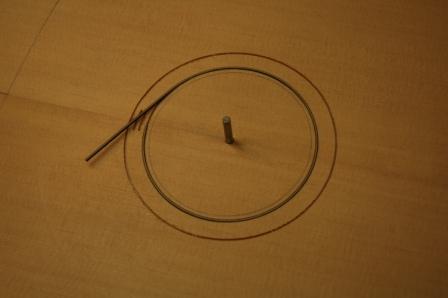
3/4″ holes are drilled into the plates to accept dowels, 4 @ 6″ lengths.  The plates are separated and held in place with spacers as the dowels are pressed into the holes.  CA glue is flooded into the seams, and voila, a side bending mold.  A channel needs to be sawn out at the waist to accept the holding plate on the screw press, then side bending can commence!

100927bendingmold

Guitar 1001 – Back plates joined

September 28, 2010

Spent some time squaring up the drum sander to ensure true surface sanding.  Ran the back plates through several times and brought down to .110″.  Used a shooting plane, then sanded to achieve perfect fit between plates (no sunlight shines through the joint).  Used spanish joining jig, let dry for 2 hours then took a first pass at orbit sanding both sides of the joined plates.

100926backjoined

Guitar 1001 – Epoxy headstock inlay

September 21, 2010

The black epoxy used to glue in the headstock inlay dried overnight.

100921epoxy

A wee bit of the shell can be seen peeking out from under the epoxy.  After sanding on the belt sander, the inlay appears.

100921inlayed

The center piece in the cheek moved a bit.  I will pry it out, refinish the cavity and cut a new piece to fit.  Also, I will score some of the border lines wider to further accent the demarcation between pieces, then flood more epoxy.

Guitar 1001 – Headstock inlay installed

September 20, 2010

Now that the inlay for the headstock has been cut and mounted on card stock, it was centered and glued to the headstock.  The perimeter of the inlay was used as a guide to score the ebony faceplate.  A knife was used to pry off the glued inlay.  Left behind is a nice scored outline of the inlay, and a dremel tool with an end mill is used to route out the cavity.

100920cavity

The inlay was dry mounted into the  cavity to check for fit.  After a few adjustments, the inlay rests nicely in the cavity.

100920incavity

Black epoxy is mixed up and the cavity is flooded, the inlay squooshed in and then more black epoxy is glooped on to the surface.  Parchment paper is laid on the surface, with a wood scrap on top weighed down to press epoxy into any gaps.  This will be left to dry for 24 hours before sanding to reveal what I hope is a very nice design.

Guitar 1001 – Headstock inlay

September 19, 2010

The raven design size will by 80% of the original to fit nicely on the Gibson-like headstock shape.  Using reproductions glued to MOP and paua, the shell is cut out in sections.

100919shelljig

The majority of the design will be in MOP with accents and teeth using paua.  This photo shows the first sections ready for cutout on the shell sawing jig.

Once the MOP is all cut out, the paua accents are cut.

100919ravenmop

After cutting the final pieces, they are glued to card stock.

100919ravencutout

After the glue dries, the card stock will be trimmed flush with the shell, then any rough or misaligned edges will be filed smooth.  This assembly will then be glued to the headstock and a cut line will be scored all around the inlay.  The glued inlay will be removed from the card stock and the headstock and the cavity will be routed out using a dremel.

The individual pieces will be placed in the cavity to determine final shaping of each piece before gluing in with black epoxy.


Guitar 1001 – Headstock design confirmed

September 8, 2010

Headstock design has been finalized.


Guitar 1001 – Rosette construction

September 8, 2008

Rosette construction for the Koa Dreadnought begins with locating the center of the soundhole, drilling a 3/16″ hole then mounting on a center pin on a workboard on the workbench.  This pin matches a dremel circle cutting jig.  A downcut end mill is used in the dremel to cut channels for the rosette purfling.

100907acirclecutter

First and second pass is for the inside and outside rings with a 3/32″ end mill.

100907broutechannels

After the channels are routed, the purfling is installed with white glue.  Each purf strip is pressed in and the glue squeeze out is cleaned up.

100907cinstallpurf

Before routing the center channel, the installed purf is allowed to dry and then scraped down to plate surface level.

100907doutsiderings

The center channel width is 2 purfs plus a .063″ center teflon strip.  The teflon strip is the same width as the Abalam shell which will go between the inside and outside purf in the center channel.  The channel is prepped with white glue and the purf/teflon/purf sandwich is pressed into the center channel.

100907fteflon

After drying, the teflon strip is pulled out, the cavity is cleaned up to remove any dried glue clumps, then curved Abalam strips are pressed into the cavity.  CA glue is flooded onto the Abalam.  Several applications of CA are needed to fill the channel before the rosette rings are ready to be scraped flush and sanded.  Only after the rings are flush will the soundhole be cut out.

100907gfloodshell

Guitar 1001 – Joining plates and thickness sanding

September 6, 2010

The top has been planed down to .105″ in preparation for joining.

100905topplates

Using a shooting board and plane, the edge is jointed, then glued and secured in the joining jig.

100905spanishjoin

After an hour in the jig, the plate is removed and the glue squeeze out is removed with a cabinet scraper.  The top is then fine sanded.  The joint has been notched at both ends to positively locate the center line.  The dreadnought top template is used to trace the top shape to the outside and locate the center point of the sound hole.

100905topjoined

This is really a very nice piece of Sitka Spruce.  It has lots of waterfall curl which is very subtle yet pleasing.  The center of the soundhole is drilled with a 3/16″ bit and the plate is mounted on a workboard with a 3/16″ pin in preparation for routing the purfling channels.

The back plates started at .170″ and need to be thickness sanded down to .090″.  My drum sander has a few issues which need resolution.  First issue is the drive belt drifts off center and needs calibration.  Second issue is that the drum is not within tolerance of being parallel (drum to drive belt).  Additionally, koa tends to burn slightly in the drum sander.

Once these adjustments are made, and the sanding drum has been cleaned up to remove previously deposited burn streaks I will be able to sand down the back plates to approximately .100″ in preparation for joining.

100905platethickness

100905backplates

Uke Prep

September 6, 2010

The new venture of building ukes starts with making jigs, molds, templates and patterns for uke construction.  I will need:

1.  Bending mold for use in the side bender.

2.  Template for back and top.

100905template

3.  Workboard and side mold.

4.  Shooting board (to cut tapers for sides and fretboard).

The top and back template is complete, and is used to trace out the bending mold.

Ukes – The Journey Begins

September 1, 2010

I’ve already generated some interest in ukes, and several clients are awaiting the outcome of the first few before making a commitment.  I’ve gathered some plans and materials to start building tenor ukes.

The first will be a Bubinga back and sides with an Engelman spruce top.

100901bubingaandspruce

Once this first “test uke” passes final inspection, I’ll make any necessary adjustments and build a couple of koa ukes with some mighty fine stock I procured from my friend Bruce at Notable Woods.  I may be presumptive calling Bruce my friend, but I have used lots of his wood (koa and walnut) and did pay him a visit on Lopez to hand pick the uke wood.

100901koabackandtops

This is the stock I’ll use for the backs and tops (enough for two ukes).

100901koasides

The side wood is nicely flamed and should produce some handsome ukes.

I found a supplier in Hawaii which sells slotted fretboards and mahogany neck stock.

100901neckfret

Next »