Guitar 1202 – Butt Graft
January 4, 2013
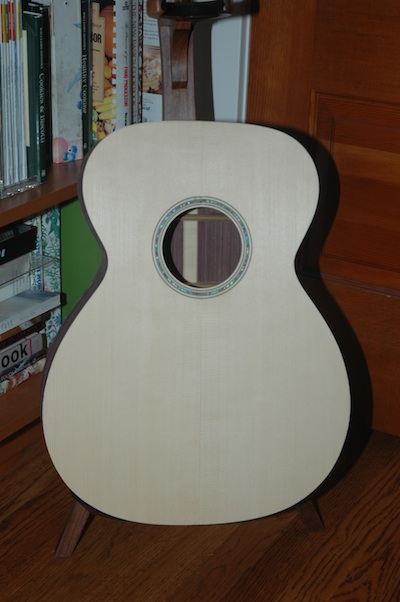
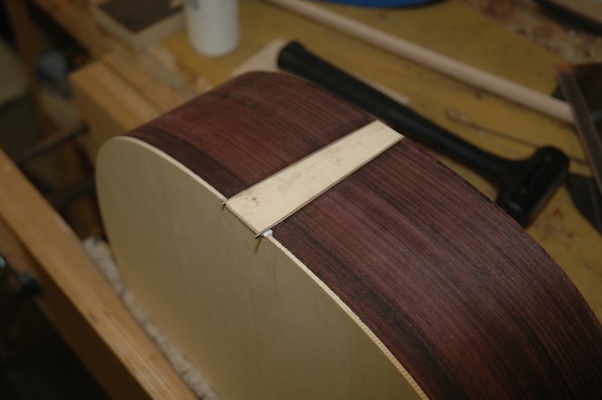
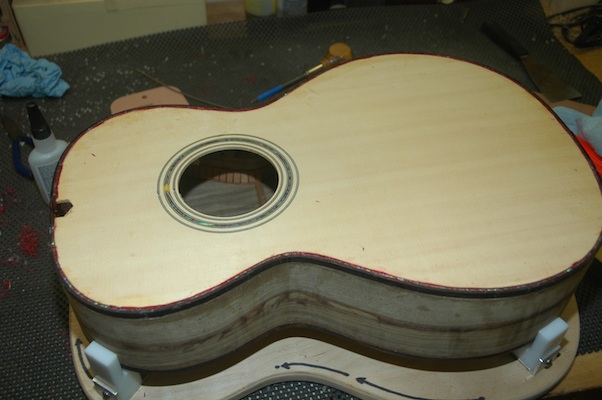
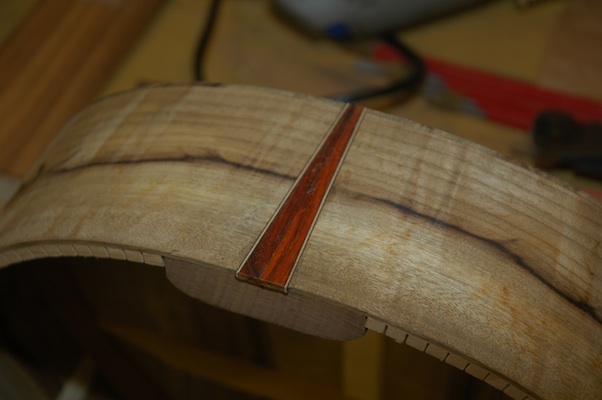
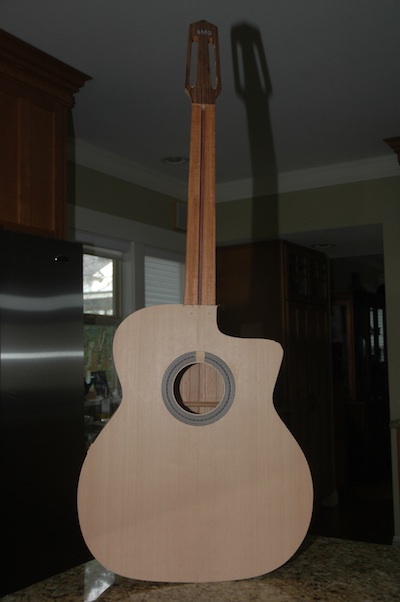
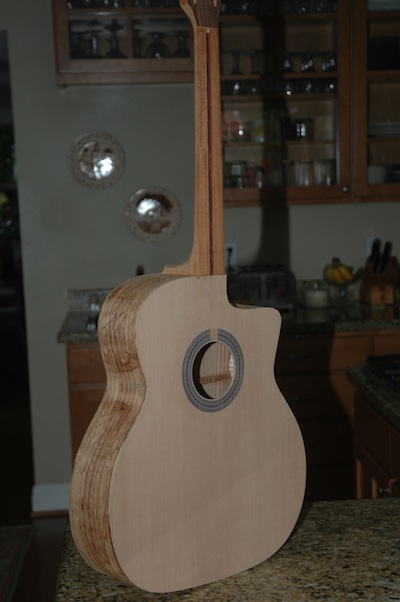
Love to say “butt graft”. Attached the top, cut off the scarf and installed the butt graft. Next, binding!
January 4, 2013
Love to say “butt graft”. Attached the top, cut off the scarf and installed the butt graft. Next, binding!
January 3, 2013
Good news from LMI: KTM9 water based lacquer has shipped from the manufacturer. Availability to me starts January 9th.
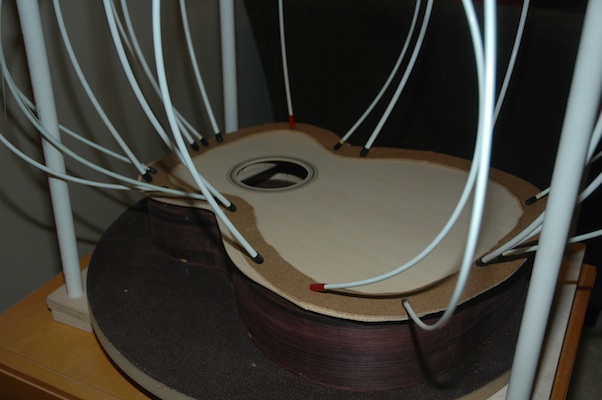
Did some packing of the uke after fully prepping it for lacquer finish. I’ve sent it off to Athens, GA for finishing.
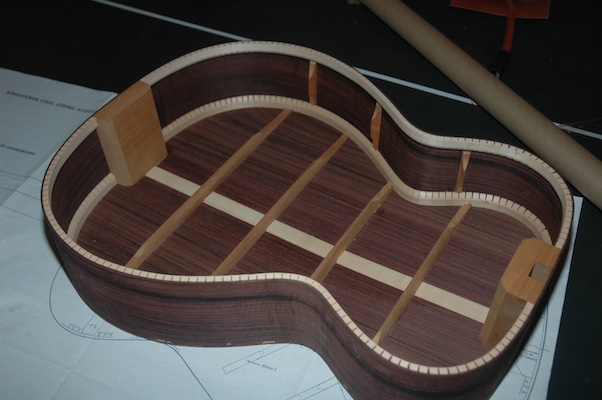
The box for the OM aka “Bob” is closed in. I did neglect to install the electronics, but justified my mistake by saying that I need practice installing these after the fact anyway, so we all say.
First, completed sanding and prepping the back and sides to accept the top.
In the past I have wreaked havoc on spruce tops while bracing. I learned since to mask the top while I’m bracing to avoid dings and dimples.
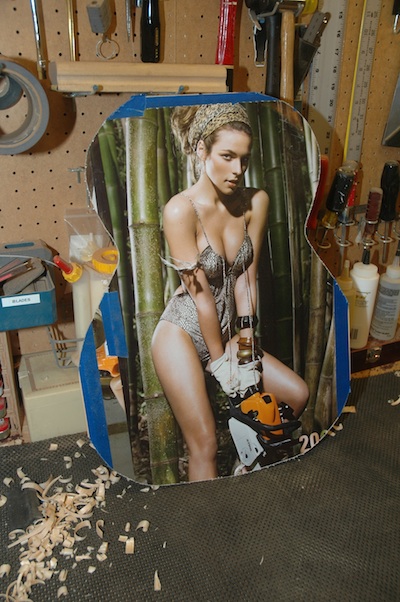
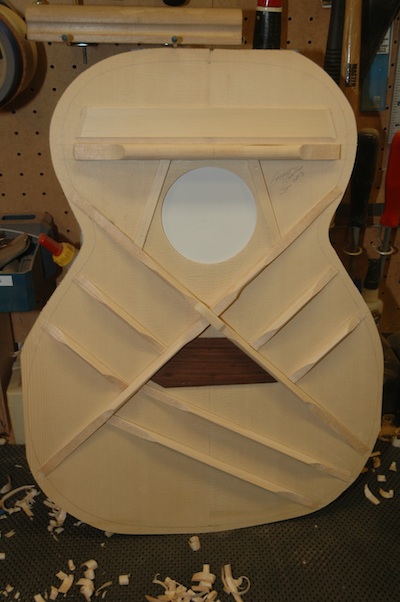
Hey, it was from a calendar my WIFE gave me. The top is all braced and trimmed back ready for installation.
A couple of hours to dry, then I can cut off the scarf and start thinking about the binding and purfling.
August 28, 2012
The box is constructed, and we have an intact uke. This morning I removed the kerf clamps.

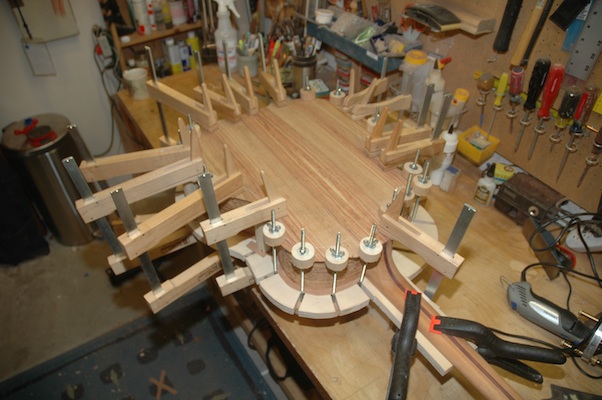
The back was radiussed to 15′ in a sanding dish. The back was trimmed to outside the side line and the braces were finish sanded. Using the uke workboard, the back was glued on and held in place with spool clamps. It was allowed to dry for 2 hours, then the scarf was removed using a laminate router.

Before tackling the binding, I will install a butt graft. Still pondering the binding options. Remind self to bind before gluing on fretboard.
August 27, 2012
Finished attaching top and kerfing. Back bracing is clamped in and glued and home made back reinforcement strips have been glued in. I tapered the neck and profiled the soundhole end.
August 26, 2012
Yeah, Guitar Camp was awesome, and now I’m home counting the days before I start back teaching. I took a uke and an OM to camp, and as usual garnered a lot of interest from fellow campers who claim they “must have one”. On the last day of camp advice is given to those of us returning to the non-camp world. One bit of proper advice was, “Wait three weeks before accepting a proposal of marriage from a fellow camper.” Same goes for committing to a new uke or guitar.
I’ve resumed where I left off before camp. The Hybrid for Jim has a first coat of pore filler (an epoxy resin) and is lined up for the spray booth.
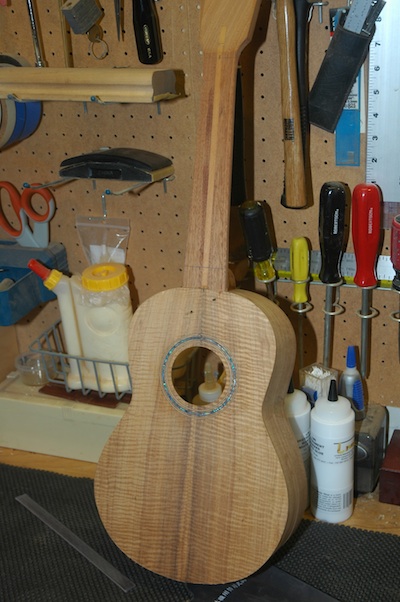
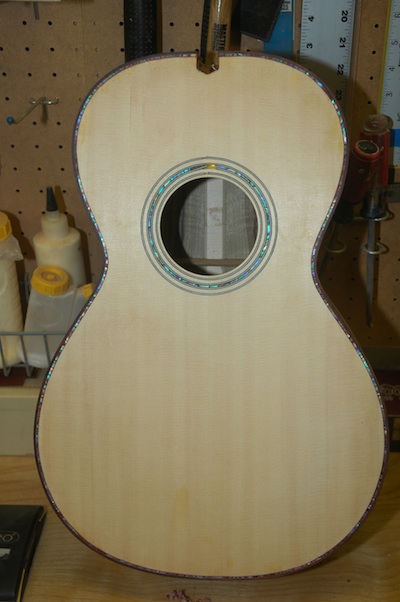
I’ve installed all binding on the Myrtle Parlor.
I then did what all good builders should do, I burnished my cabinet scraper. Ah, what a difference! Several smooth strokes across the top, and the binding is trimmed flush with the top.
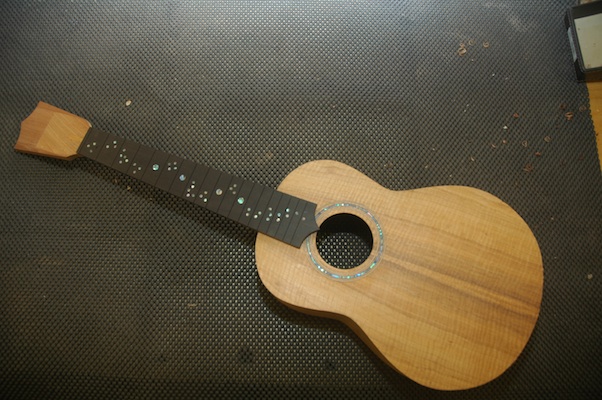
I’m so in love with my first uke. I played it at camp and caught the bug. The uke I’m working on now is really for me (so I’m differently motivated). The top is braced, the tonebars are installed and the neck and top have been joined.
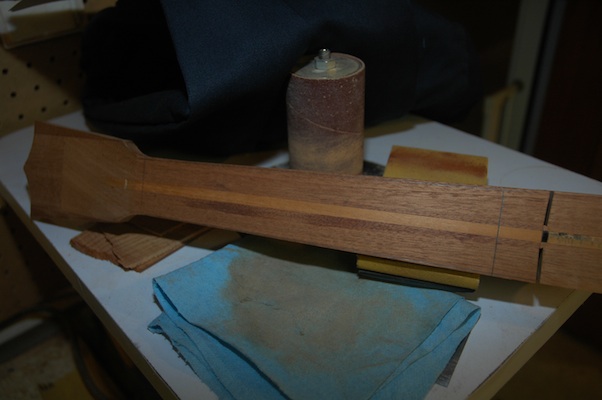
The neck has been stabilized with a graphite rod which lives under the mahogany strip in the center of the neck.
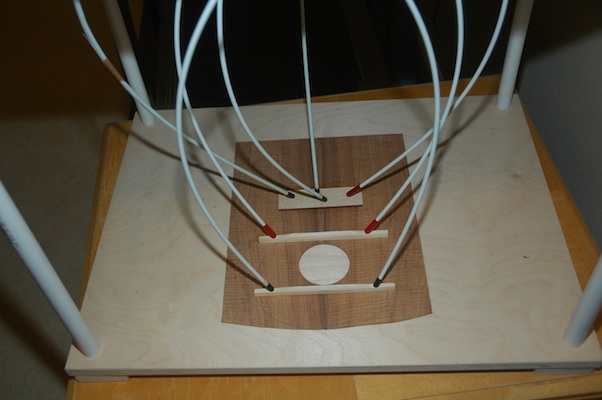
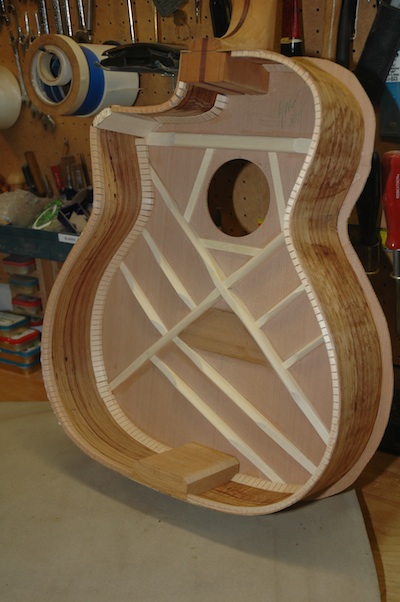
First the bracing and bridge plate were installed.
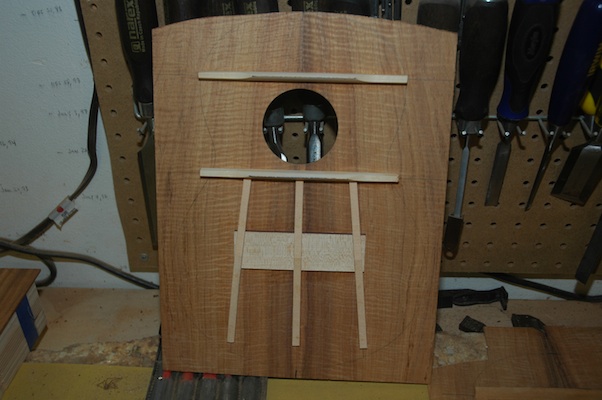
Then the tone bars.

Finally, the neck and top can be joined.
July 31, 2012
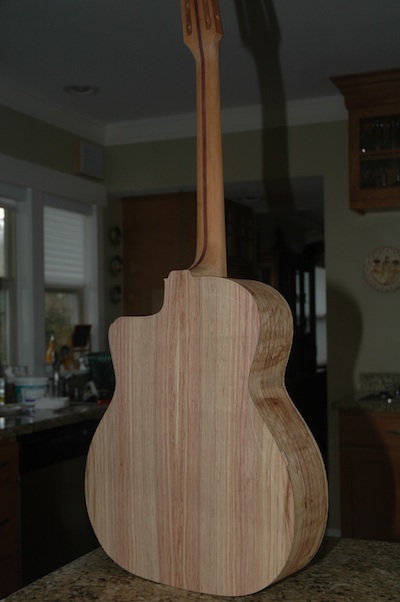
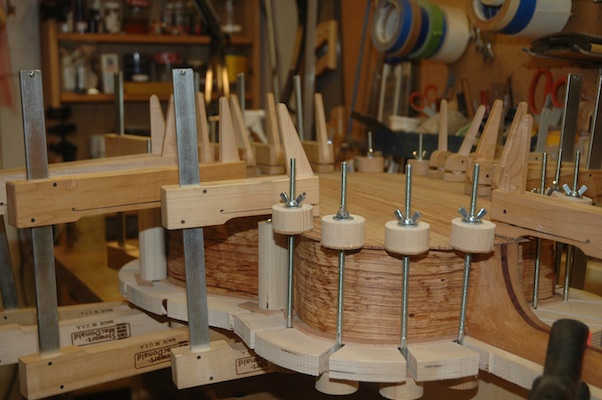
Back and top braced, sanded and installed. Between back and top install, added butt graft in cocobollo, which is also the binding wood.
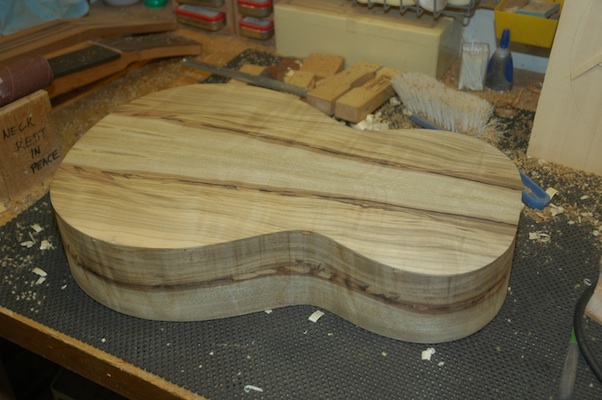
The pattern on the Myrtle is stunning, and came together nicely after the back install.
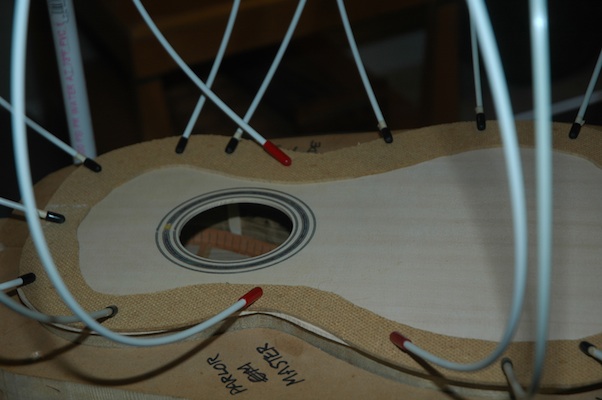
While the top gluing cured, purfling was added to the binding then bent in the “machine”. Later this afternoon I should be able to install the binding.
June 1, 2012
I’m madly working on 5 guitars at a time right now. As I attend to finishing Guitar 1102 and the Girdis Parlor, I’m building necks and boxes for Guitar 1201 (Rachel’s Myrtle Parlor), Guitar 1202 (Susan’s Rosewood OM), and Guitar 1203 (Em’s Walnut Double Cutaway Parlor). This appeals to my desire to make recognizable progress. The sanding and prepping of an almost finished guitar is slow going and the progress seems snail-like.
The myrtle parlor wood is spectacular. It’s in the mold, with butt block and neck block attached.
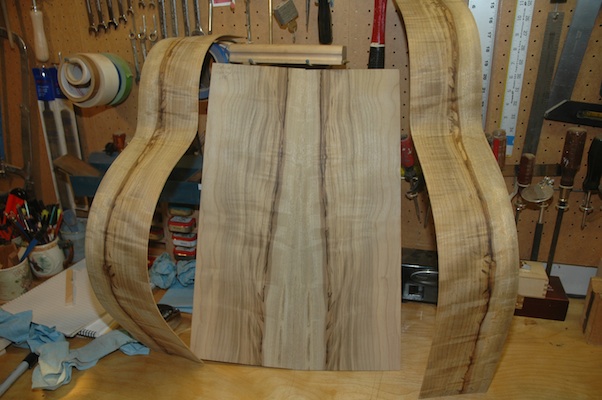
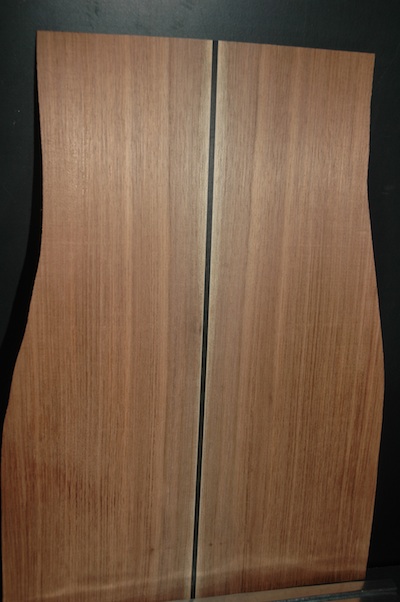
The rosewood OM too is a fine hunk of wood, very red/purple, with excellent grain lines.
The walnut double cutaway parlor is understated. The sides will be thicknessed and bent once the myrtle comes out of the mold.
February 12, 2012
The top and back scarf was removed using a router. It looks like a guitar and thumps like a guitar. This is the first moment one can test the resonance of the box. Thumb thumps on the lower bout, front and back, give a bold timpani like sound.
February 12, 2012
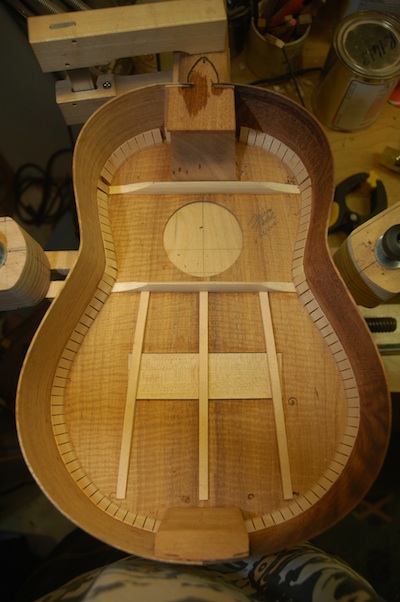
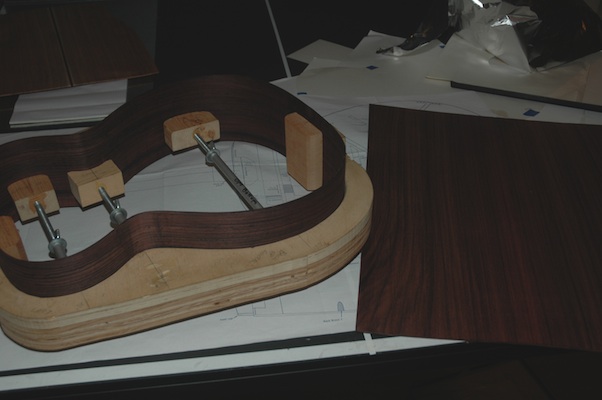
Before attaching the back to the sides, the sides need to be radiused to 15′. This is done with a sandpaper covered dish.
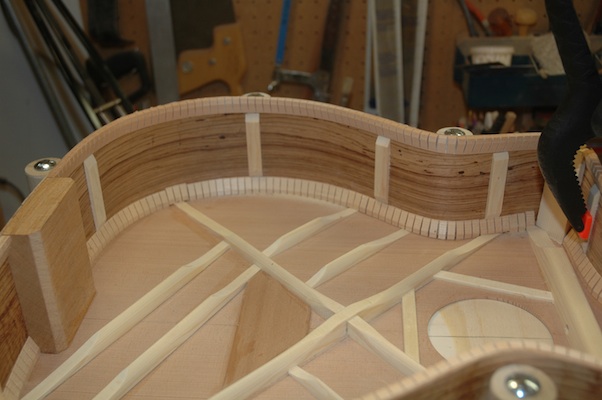
The kerfed sides have been trimmed down to the approximate dimensions, then the box, still attached to the workboard is sanded by rotating through the center point of the dish until flush.
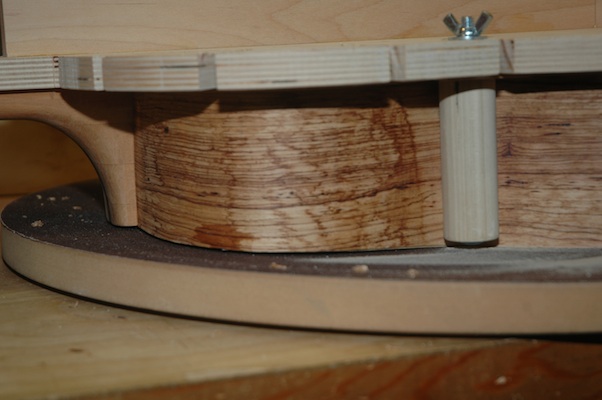
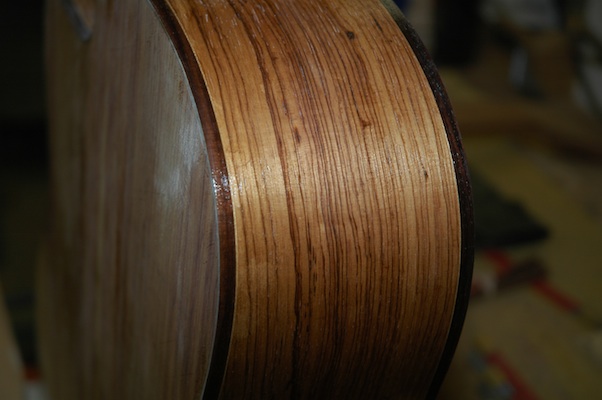
A gap between the upper bout and the dish is shown. The staining on the sides is from the bending process, and goes away after sanding.
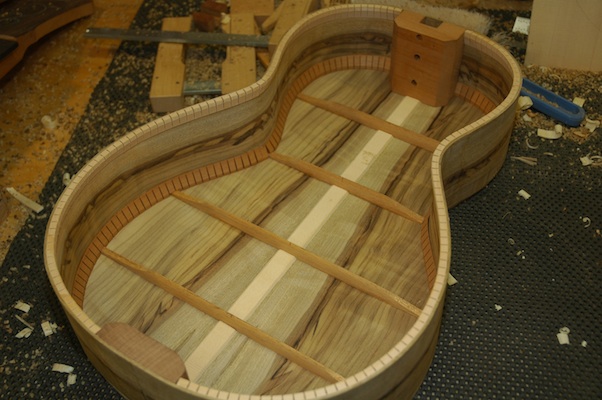
Once the gaps have been closed, the back is dry fit on the sides to check for the location of the bracing, where the sides and kerf must be relieved so the bracing fits “under” the kerf.
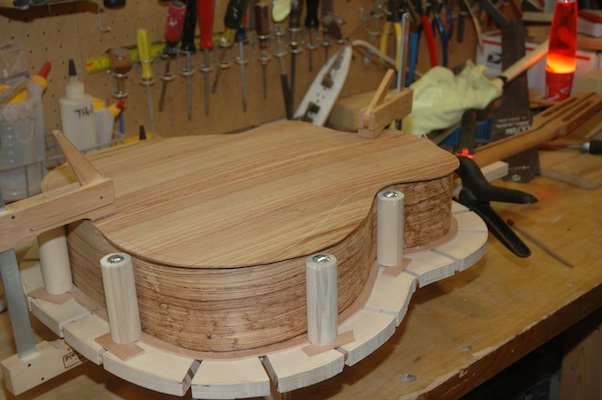
After a round of dry fitting the back to the sides with spool clamps, glue is applied to the kerf and the back is attached.
The clamps will stay for several hours before removed, then the scarf can be removed with a router using a bearing flush cut bit.
February 5, 2012
The sides have been trimmed down to the approximate height to simulate a 15′ radius. I used my wee little finger planer which served well. Before using the radius sanding dish, the kerf for the back was installed.

Additionally, side supports were glued in. These serve to keep the integrity of the sides and avoid cracks along the grain.
The box is ready to be radiussed. Using a 15′ radius dish mounted with sandpaper, the kerfed sides are dimensioned to a dome shape, tapering down from the butt end to the neck end. Once this is done, the back can be installed. I will use spool clamps with the box on the workboard to secure the back to the sides.
