Archive for December, 2009

Wintergrass 2010

December 24, 2009

Wintergrass is a family-friendly Bluegrass music festival, with concerts and dances at 4 different stages. There are also two Academies, workshops, impromptu jams, and a chance to see and hear some great music.  This year it is being held in Bellevue, WA, Februrary 24 – 28.

I will be displaying guitars 905 and 906 as part of the Seattle Luthier’s Guild exhibition.  If you are attending, drop by the exhibition hall and take a look.

Guitar 905 – Rebraced, box assembled, ready for binding

December 20, 2009

I reinstalled two new lower bout braces to bring the back to a 15′ radius dome.   The first step was to remove the original braces then put the back on the 15′ radius dish held down by the go-bar clamps.  Once the new braces were shaped and kerf was removed where the braces meet the sides, they were glued in place and clamped in the go-bar platform.  Kerf was then reinstalled over the braces.

After drying, the top was glued on.  The back and sides were no longer in the mold, so to ensure the back dome remained, I clamped the back down through the soundhole, then glued the top to the sides.  After setting, I removed from the go-bar and trimmed the top and back scarf using a flush router bit, sanded the hell out of the whole thing then installed the butt graft.

091219backbetter.jpg

091219endblock.jpg

I sawed fret slots through the installed inlay and sanded the headstock in preparation for binding the headstock.

091219fretboard.jpg

091219head.jpg

To protect the top during the remainder of construction I applied a light coat of shellac.  It will be sanded off prior to finishing with lacquer.  Here’s a first look prior to binding and installing the neck.

091219whatitmigt.jpg

Guitar 905 – Teapot dome

December 19, 2009

Discovered that the backplate dome had compressed.  This means that the natural dome shape of the back had flattened.  This is not a good thing.  Many options, but the best was to remove the lower bout braces and replace, then assure the dome is retained as the top is installed.

091219bracesremoved.jpg

So the first step was to use the dremel to scour out the bottom two ladder braces and keep it in the go-bar clamp to teach it to be radiussed in preparation for installation of new braces, a little beefier and spruce instead of mahogany for lateral integrity.

0912219bracesinstalled.jpg

Once the braces are installed, new kerf pieces were installed to hold the end pieces of the braces down and retain the dome.   I’ll hold the back braced box in place in the go-bar clamp until I’m ready to install the top.

The top is fully braced and has the appropriate tap tone and is therefore ready for installation.  I’ll let the back and braces sit overnight to cure before I install the top.

091219bracelandscape.jpg

I’ve used a scallop approach to bracing the top.  After repeated tapping, I think that this arrangement will produce the tone I’m looking for.  The top is around .120 to .115″ thick, the bracing is sufficiently scalloped and feathered to zero toward the kerf line.  As guitar building is controversial, some will say “don’t feather, you idiot” or “the soundboard is not a speaker cone, you idiot” or “did you hear the falling of the water over the pebbles of Buddha” or “what were you thinking?”.  All of these comments are valid, but we must take our own journeys and arrive at our own conclusions.  I think, based upon what I hear, that this guitar soundboard will sing.  If not, many of us will be disappointed.

091219topbraced.jpg

I signed the top plate, and tomorrow it gets installed.  Whee.

“From ding ding to wobble wobble”

December 5, 2009

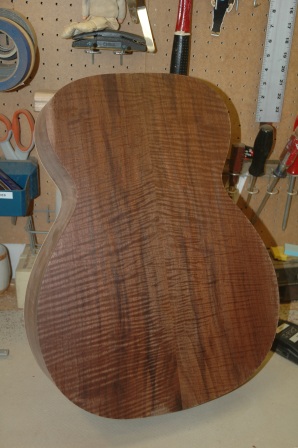
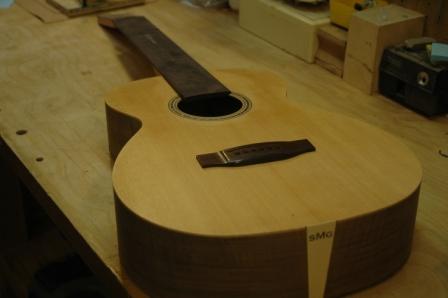
Today I had the honor of working with Rick Davis on soundboard tuning.  Suffice it to say that it is a non documented process with very little scientific evidence that allows one to say what you do or how you do it.  The title of this post is as close as one can get to putting it into words.  Fundamentally, a guitar top plate joined and thickness sanded down to 0.125″ will have a sound, kind of like a ding ding.  A note, or set of notes which ring out and sustain.  The counterintuitive piece is you want to eliminate that ding ding and get more of a wobble wobble, a lack of distinct notes.  If those distinct notes are left in the soundboard, they will be excited by complementary string notes, and not by others, meaning that notes across the spectrum will be treated unequally resulting in wolf tones, dead tones, and select rich tones.

After the top is braced and preliminary shaping is done, the soundboard still has some ding ding to it, and the removal of bracewood is done until the ding ding turns into wobble wobble.  There is a very thin window which goes from wobble wobble to an exploding soundboard:  one which will not sustain the tension of a fully strung guitar.

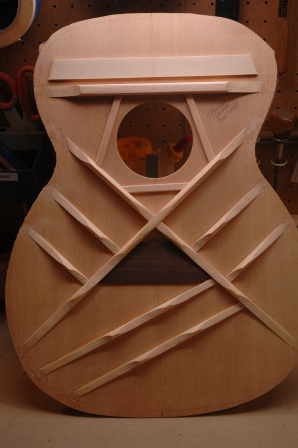
We spent considerable time discussing the function of each brace, and whether their function is structural, tonal, or both.  Essentially the braces from the soundhole side of the X-brace toward the neck joint are structural.  The X-brace itself from the X toward the butt is both structural and tonal, and the remaining finger braces in the lower bout are purely tonal.  Now before I go on, Rick mentioned that everything he says is wrong, but that it works for him.  There are a thousand ways to look at soundboard tuning and the understanding of brace shaping and function, but they are all wrong.  Which boiled down means; if there was a right way to do it, we would all be doing it.  Since there is no right way, there must be all wrong ways.

So, you start with a ding ding braced soundboard, using bracing patterns that are generally accepted, then you start shaping and listening until you just hit wobble wobble.  First, preshape the braces into a taper (except where the X-braces join), glue them to the soundboard preferrably using vacuum clamping or go-bar clamping.  Next taper the ends, down to nothing for the tone bars, and down to 1/8″ thick for the structural braces.  Then scallop all the braces below the X with diminishing peak height toward the sides.  All during this process, listen to the tap tone and hear the changes and work toward the wobble wobble.

Guitar 906 – Oooh it is looking good

December 3, 2009

The inlay is looking really fine.  After the epoxy dried, I was able to start sanding down to see the eventual end product.  Here’s the headstock.

091203head.jpg

The fretboard needed lots of sanding.

091203sandit.jpg

The result was quite nice.

091203sanded.jpg

Put together, you can imagine what the end result might look like.

091203wholeguitar.jpg

Carl asked me about the issues with the fret slots after the insertion of the inlay.  Yes, it is an issue, but I laid out the inlay so as to avoid as many fret crosses as possible, and to align the leaves at the appropriate frets.  In the end I had to saw through the frets where they were crossed by shell.  It worked out well, and I’m ready to install the frets.

Carl, are you there?  I’m thinking of adding a little bit of additional inlay, but it may be a bit too self aggrandizing.  Take a look at the following and let me know if you are ammenable to allowing me to self promote.

091203carl.jpg

It might be too much to drill my initials into you fretboard, but I thought I’d ask.

Guitar 905 – Prepping for headstock and fretboard inlay

December 3, 2009

Used my newly acquired skills to outline the headstock handprint inlay then saw out then lay on the headstock for tracing.  Did the same lay on the headstock with the peghead shell procured from Luthier Supply.

091203head.jpg

The customer wants a torch style inlay on the fretboard, which I also procured from Luthier Supply.  I showed him two options, 5th fret or 12th fret, suggesting the 5th fret would be better as there will be fewer fret crossings which hide the inlay.

0912035thfret.jpg

09120312thfret.jpg

Guitar 906 – Fretboard and Headstock Inlay

December 3, 2009

Completed the fretboard and headstock channelling after receiving new end mills.  The headstock work came out extremely well, and after losing a piece of shell for the fretboard (oh, it’s on the floor somewhere, but I need a better set of eyes to find it) I whipped up some black epoxy and koa dusted epoxy and inlaid the shell.

The fretboard looks gooey now, but aggressive sanding will result in a gap free surface.

091201gooey.jpg

091201fretboard.jpg

The headstock inlay place well, and very minor gaps will hopefully be invisible.  I used koa dusted epoxy, and although the headstock looks stained, it should sand out.

091201head.jpg