Neck jig – Box balloon

July 9, 2011

Just a heads up on a few new jigs/techniques.  In order to keep dust and such out of the box during final sanding and prep, I blew up a balloon while dangled in the box, then tied it off.

110709balloon

I am now using a recently completed neck shaping jig.  It’s just a vise mounted platform that allows me access to shave and shape the neck.

110709neckjig

Jigs and Workboards

June 20, 2011

Working on jigs and workboards today.  I’ve decided to create a neck shaping jig, simply a platform to clamp the neck to so I can stick it in the vise and have clearance to shape the backside of the neck and heel.

110620negjig

I’ve continued to fine tune the Hybrid workboard.  First step was to hollow out the surface to a 28′ radius to compensate for the bridge area bulge.  I marked a few elevation lines as guides.

110620workboardtopography

I used a router with a rounded bit set to 4mm depth for the center, then dropping 1mm for each of the next elevation lines until the final shelf was routed to a depth of 1mm.

I used the table saw to complete the slots from the edges in toward the center where the dowel clamps go.

110620workboardslotted

Finally, a tripod stand was mounted to the back for resting on the workbench or clamping into the vise.

110620workboardstand

Uke 1101 – Plane sides, bend, mold up!

April 16, 2011

I use a Wagner Safetee Planer to thickness sides.

110416safetyplaner

It’s used with a drill press.  First thing is to calibrate the table it’s parallel side to side and front to back.

110416planercalibrate

The sides are run through and taken down to .070″.

110416planesides

I practiced on a scrap piece to ensure all adjustments to the table were correct, then test bent the scrap to confirm temperatures for the koa.  After planing the real koa sides, I used the new bending mold.

110416bendsides

After bending a side, it was clamped into the holding mold.

110416sidemoldhalf

Next side bend, then inserting into mold (ends were trimmed to butt flush).

110416sidemoldfull

The bends were adequate if not tight enough.  I have an electric bender which I can use to tighten up the bends on future ukes.  It’s tricky to get both sides into the holding mold if the bends aren’t tight enough, and yes, I did crack both sides while inserting.  The cracks were repaired with CA glue and won’t be visible once sanded and finished.

What is it?

March 19, 2011

Rachel returned from China/India Tuesday and she brought me a present.

110319chinainstrument_0

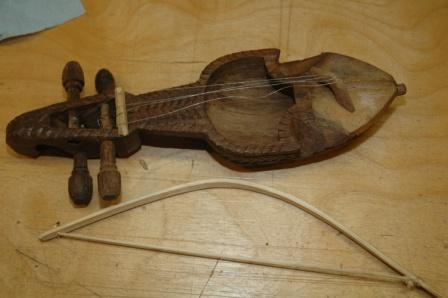
She’s not sure what it’s called, so what’s it called?  I need to restring, and I’m not sure what the bridge orientation should be.

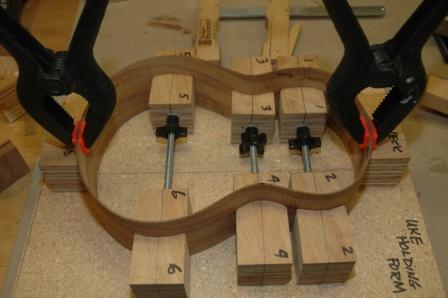
Today I added more lacquer coats to the koa dreadnought (6 of 12) and the uke (9 of 12).  The uke is a disaster.  It became dislodged from the spray booth bracket and fell to the cement causing a reasonable amount of damage, including pebbles throughout the wet lacquer coat, a chip out of the headstock, and a segment of binding with road rash.  Oh well, file it down, keep going.  Thank god this is just a “test uke”.  I’m sure it will sound lovely, but it will look like shit.

I’m also refinishing a headstock on an eBay purchased Fender koa uke.

110319fenderhead

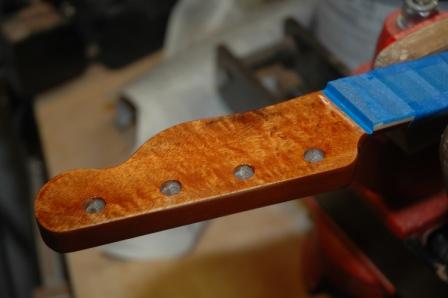
I have some aerosol nitrocellulose that I am using to refinish this headstock.  It’s got 4 coats now, and I’ll probably go as far as 10.

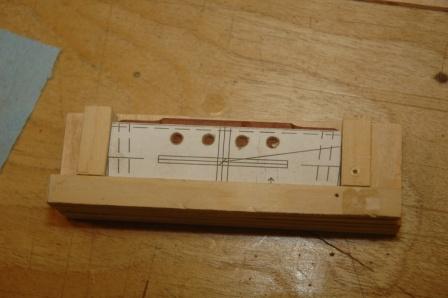
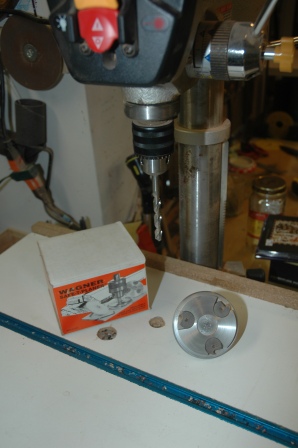
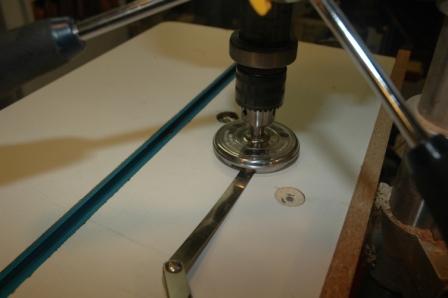
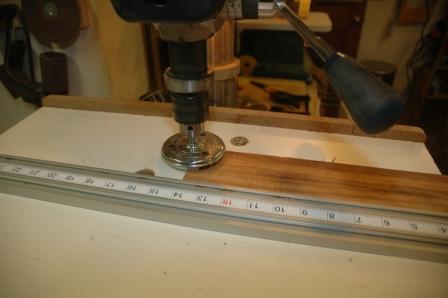
I devised a little jig for drilling holes in my uke bridges.  I’m going to use bridge pins with strings secured inside the body with bone beads.  I’ll get a picture up later of the string beads.

110319bridgejig