Archive for April, 2008

Guitar 0208 – Neck Set

April 30, 2008

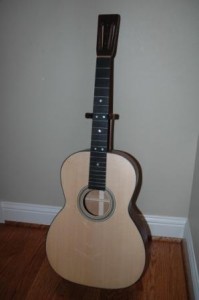
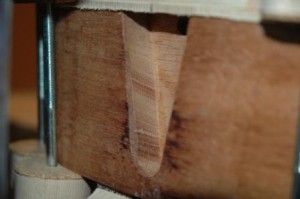
As mentioned earlier, I took too much off the top of the neck block which created a shallower upper body depth and left the neck proud when inserted into the neck block. I knew I was going to address this later when I discovered the error. I used a rasp to shave off 1/16″ on the rounded end of the tenon. The brought the neck down flush except for a mm proud on the right side which meant I needed the shave a bit off the tenon on the proud side and insert a shim on the opposite side to level the neck and still have a tight fit. I also had to open the holes up a bit to accomodate the fact that the nut holes dropped 1/16″. Also had to open up the hole for the truss rod as well. Dry fitted the neck and inserted the truss rod.
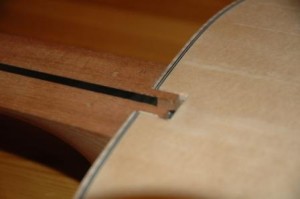
Next steps are to measure the distance between a straight edge set on the neck at the bridge location to assure the correct gap which indicates the neck angle is right. If not I’ll have to shave the portion of the neck that meets the upper body to create the correct angle.
Continue Reading »

Guitar 0208 – My logo design is ready

April 29, 2008

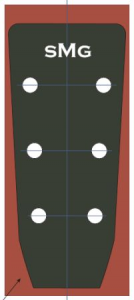
Got a pdf from Gurian Instruments with my logo design. I approved, and they will make a sample. If I approve the sample, they will produce 20 headstock veneers with my MOP inlay. 1/3 ebony, 1/3 rosewoood, 1/6 sycamore and 1/6 maple. I’ll also ask for a loose MOP which I can inlay myself into guitar 002’s headstock.

Guitar 0308 – My first commission

April 29, 2008

I sent out an email to all my friends and relatives making an offer to build an instrument of their choosing if they would pay for the materials.  Carol thought I was nuts, and she’s probably right.  But, I wanted to generate some “financing” for my guitar building and this seemed like the right thing to do.

Surprise, surprise.  I have received several queries, many of them serious, and one firm commission.  My good friend and music buddy, Larry Madison, jumped in as he didn’t want to wait behind others who want to take me up on my generous offer:  you decide what you want, you pay for the materials, and I donate my labor and deliver a custom made instrument.

We logged on to the LMI kit wizard, started with the Serviced OM kit and swapped out most everything for alternative components.  It will be a curly maple back and sides, spruce top, maple neck and fretboard with scads of rosewood binding, back center strips, fretboard binding, and a rosewood accented neck (really a trilaminate with maple/rosewood/maple).

The big departure for me is that I will have to carve my first neck from a neck block.  There’s still decisions to be made on the rosette, but we’re thinking something abalone with BWB purfling accent.  We ordered a solid wood rosette ring that we might use as the centerpiece of the rosette, but we’ll play around before cutting any channels in the top.

There’s a remarkably similar picture of a guitar in Cumpiano’s Guitarbuilding book of a maple cutaway that has the dark wood binding like we dreamed it would be.  I’ll see if I can scan a picture and put on the blog.

Two weeks before the serviced parts are ready (side bending, top and back thickness sanding and joining, fretboard grooving).  We requested the fretboard to be radiussed, but LMI nixed that as maple doesn’t come out of their radiussing machine very pretty (lots of chipping).  I’ll have to Brutus my way through sanding in the radius with my sanding block.

Guitar 0208 – April 27, 2008 – on to the neck

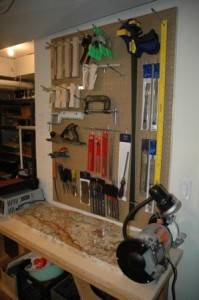
Over the past week I took a little diversion. I have a homemade workbench in my shop (really the furnace room, which may, temperature/humidity wise, be a bad choice for a workshop). The setup of the room is quite nice for the one person guitar maker. I have been acquiring hand and power tools over the past 3 months and have run out of space for storage and work surfaces.

There was unused wall space behind me, as I face the workbench. My orignal bench was built from plans I found on the interweb, and it is essentially two by fours with a solid core door mounted on top. It is sturdy and has proven to be an excellent work area. I modified the plans to be a shallower, L shaped workbench to nestle into the wall and around a corner. It took me a week to build, and most of the time was trips to the hardware store for supplies. Dunn Lumber always has a supply of odd stock at a good price which helped keep the cost down. I scrounged two by fours from our sukkot which we haven’t erected for years. The top, instead of a solid core door, is a laminate of two 3/4″ ACX plywood.

It is now the proud holder of my bench grinder, the massive slap of marble I scrounged two weeks ago, a new sanding station, my sharpening stone jig, and the go-bar platform. The final bonus is another pegboard reserved exclusively for guitar making tools (even though many remain on the old pegboard).

Continue Reading »

Guitar 0208 – Late April 2008

April 16, 2008

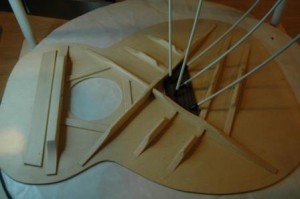
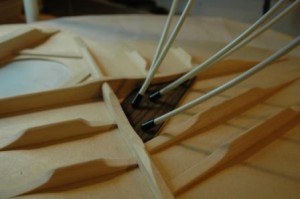
Spent considerable time planing, filing, chiseling, and sanding the top braces. I recovered sufficiently from my over sawing the braces. Still, there remain some hard angle edges in the brace scallops, and the X brace internal scallop, even though I started from scratch, came in nicely, to about a .4″ depth. This depth may not be enough, but I still have the opportunity to deepen them. I also gouged the top inside several times when chiseling for rounding in the areas where I could not get my finger plane. Not deep enough to cause damage, but cosmetically disturbing.

I installed the bridge plate, and next I will 220 sand all the braces and the the spruce top inside to make real pretty before gluing on the top. I also need to clean up after my epoxy (mixed with mahogany dust) of the back brace entries into the kerfing. I did the epoxy to clean up after the too large slots I put in for the bracing. I shouldn’t have to do this if I slot accurately next time. I also need to round file a slot in the brace between the large brace and the neck block to accommodate a truss rod wrench.

Continue Reading »

Guitar 0208 – Early April 2008

April 1, 2008

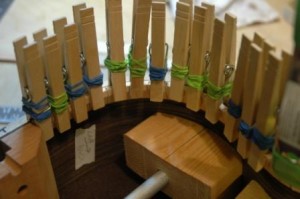
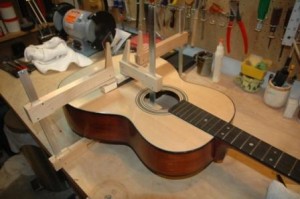
After radiusing the top, I left the guitar on the 30′ dish and started the block plane process of bringing down the back sides to the 15′ radius (roughly). I taped the approximate depth on each side so not to over plane. I was very nervous about the planing as I have never performed this step. I took my old trusty Stanley block plane and cleaned it up and used my new Japanese wet sharpening stone to put a fine edge. This did the trick and the planing went very well. Using the 15′ dish to check for daylight, I continued to plane until I got it just so. Radius sanded (and the superglue fix to the sides at the end block held firm) to prepare for kerfing.

Continue Reading »

Guitar 0208 – Let’s Get Started

Guitar Building Log – LMI OM Rosewood Guitar Building Kit

March 1st, 2008

Received kit (#LMPO) – LMI descripton and parts list: LMI OM Serviced – This kit has everything to make a high quality orchestra model (OM) guitar matching LMI’s historical standards. The major parts included in this kit are: AAA grade Sitka spruce top, 1st grade Indian Rosewood back and sides, Ebony fingerboard, quartersawn Honduran Mahogany neck, and Gotoh gold tuners. The binding and purfling scheme is curly Maple binding with a fine B/W/B laminate for the top and back. The 3 ring rosette is inlaid and the majority of the services are completed.
$550.00 Save 205.61 (25.6%) from the retail cost.

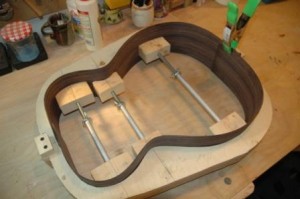
Reviewed DVD instructions several times before embarking. First step is to build a guitar mold. Referenced many sources for building the mold, but mostly followed steps in O’Brien DVD from LMI. Used 3 ply AXC plywood. End result errors: not enough neckside and heelside material left in place to install a removeable bolt at each end, ended up using a lag bolt. Inside of mold a bit “serrated”, not smooth enough for my standards, but didn’t have any tools to smooth. Used a scraper, sand paper on block, but should have had a drum sander mounted on drill press to finish nicely. After the fact, I will clean up this mold and rig something to extend the end blocks and install bolts so I can use for future OM construction. I also manufactured the spreaders per O’Brien’s DVD. Not totally satisfied with the shape of the end blocks on the spreaders, but I can revisit those as well when I clean up the mold smoothness.

Went bonkers ordering tools again. This time, in response to the building process in the DVD, ordered a Go-Bar assembly with 18 fiberglass bars, two radius dishes (15′ and 30′), and sanding disks from Blues Creek Guitars. And a band saw, and a new fine grinding wheel, and sharpening stone, and Bench Plane. Carl gave me his old Drill Press, which I need to clean up and mount on a stand.

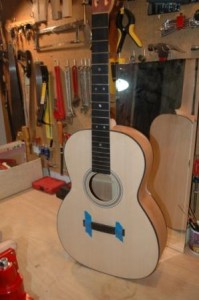
First step: Insert prebent Indian Rosewood sides into mold. Mark center line, saw and return to mold. Shape neck block, first removing small amount of stock from truss rod hole end to bring dimension length to plan length. Use bandsaw to 45 degree angle cut outside edges (may have done too much). Do same for end block, and attempt to put a 20″ radius on end that goes against (glued) sides. Using a hand block to sand, I almost got the correct angle, but with a little too much round on the ends, and a little too flat in the middle. This is where a sanding station would help. Continue Reading »

Guitar 0108 – March to completion

March 7, 2008

Cheated it by a day. Started sanding and polishing. The polishing used a foam disk on my power drill and it was a chore to keep everything stable while I tried to polish. I’m not sure the lacquer finish will be my choice for future guitars, but if it is, I need to look into a buffing wheel, perhaps mounted on my bench grinder.

After buffing, glued on the neck. It wasn’t as good a fit as I desired, as the dovetail is a difficult prospect. My next guitar has a bolt on, and I’ll compare the quality and ease of working.

Followed with the bridge. Found I didn’t have clamps to reach the 5″ reach from the sound hole to the bridge ends so foolishly clamped directly to the top and back. It was a technique of desperation and it worked out well, but could have been a disaster to the box. I will need to acquire the proper clamps for the next guitar.

Continue Reading »

Guitar 0108 – January February log

January 26, 2008

Released the neck/fretboard from the rubber band clamp, cleaned up the dried glue squeeze out.

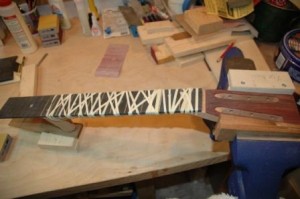
Made a significant order from StewMac for finishing supplies and a bench vise. Arrival due next weekend. In the interim, I carved out the neck around the headstock diamond, filed down the fret ends, trimmed up the fretboard to be flush with the neck stock, and sanded the neck. Still need to clean up the neck foot which I glued the end cap to. Prior to receiving the finishing supplies, vise, and special fret beveling file, I can begin the process of shaving and shimming the neck dovetails. Should be interesting, as this seems to be the most technical and accuracy will be at a premium.

Neck dry fit to body

Continue Reading »

Guitar 0108 – Log Entry – December 2007

December 25, 2007
Received kit (#5297): OOO Mahogany Dovetail neck joint. $395.00. Review of printed instructions and instructional DVD made it evident that acquiring tools was going to cost more than the kit.
December 26, 2007 – January 19, 2008
Reviewed printed and DVD instructions several times before embarking. First steps included determining which side of the prebent mahogany sides was the top vs. the backside. Apparently, I had a 50 50 chance of getting it right, and failed. I glued the neck block and the end block and only after did I discover my error. Using some bit of intuition, I realized I could keep the tail block in place, augment one end with a glued veneer of mahogany from the scrap that came with the guitar in order to have enough height to account for the 5? back angle. But, I did have to remove the neck block to rotate 180? to expose the open dovetail to the top. Using a flat iron, butted up against the neck block, not touching, on wool, from the outside of the guitar, I heated up the glue. Rachel was kind enough to run out to Fred Meyer for an art supply spatula, which I used to separate the neck block from the sides. Rotated and reglued, but again erred in not getting the neck block perfectly square with the sides. I will have an interesting challenge in setting the neck if this out of square is too pronounced.

Continue Reading »