Happy New Year to All
December 30, 2012
This will be my last post of 2012. Some things were accomplished in 2012, but all in all, the pace of this year’s building has ebbed in relation to previous years. I could chalk that up to a new career teaching mathematics, but really it’s a case of shifting priorities. I have endured a few crisis moments all around finishing with spray lacquer. As reluctant as I was to put down the spray gun, it is for the better. I cannot continue to subject my families health and my health to the lacquer fumes inherent with nitrocellulose lacquer application. My options are twofold: send guitars out for spray services ($500) or procure hard to find water based lacquer and spray with this less toxic alternative. I’m still on the hunt for water based with mixed results.
I have been working diligently on my uke, Rachel’s parlor and Susan’s OM. What follows is an except from recent work.
Rachel’s parlor has taken a step forward with neck shaping and fret dot design.
The fretboards for Rachel’s parlor and Susan’s OM are seen below the beautiful Myrtle back.
The parlor neck is on top with the Cocobollo headplate. The OM neck is shown with the rosewood headplate.
I’ve managed to shape bracing and install the back to the sides as well as lay down the top bracing for the OM.
The second picture shows the back after the scarf has been trimmed.
Uke Lacquer – Uke Cure – Myrtle Join
November 6, 2011
Devin dropped by today and we polished up his frets, nut, saddle, and installed a pickguard. Looks like it’s really done.
I’ve been applying lacquer to the Bubinga Uke and the Koa Uke. The Bubinga is fully lacquered and is sitting in cure mode for a couple of more weeks.
The Koa uke has 16 coats, and I think 24 will be the cat’s pajamas. I should be able to get the 24 applied by Tuesday evening.
Between lacquer applications (wait one hour please) I’ve been bracing the Myrtle Parlor (for Rachel) and I joined the back plates.
I’m liking this myrtle, and it seems like it will be nice to work on. It planed easily while preparing the plate joint.
Parlor Neck Reset
March 26, 2011
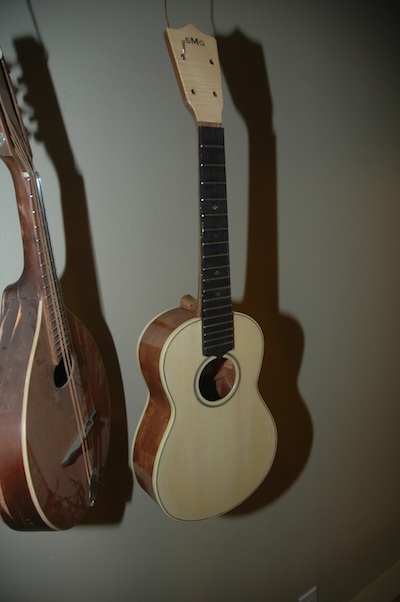
My guilt has taken command of me. I’ve had Tom’s parlor guitar sitting waiting for me to do a neck reset since, oh I don’t know, 2008.
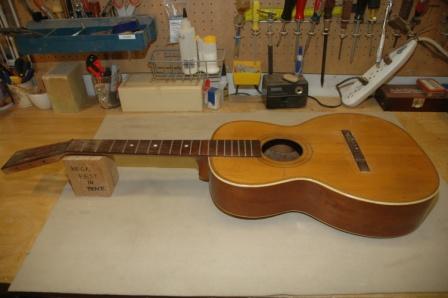
The neck is beginning to come away from the body down at the point where the heel meets the back, essentially pulling up, depressing the top and creating massive string height.
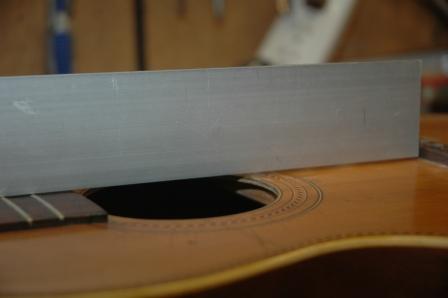
This photo shows a straightedge on the fretboard meeting the bridge at its’ base. The straight edge should hover just above the bridge surface.
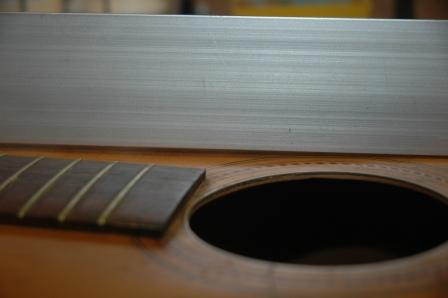
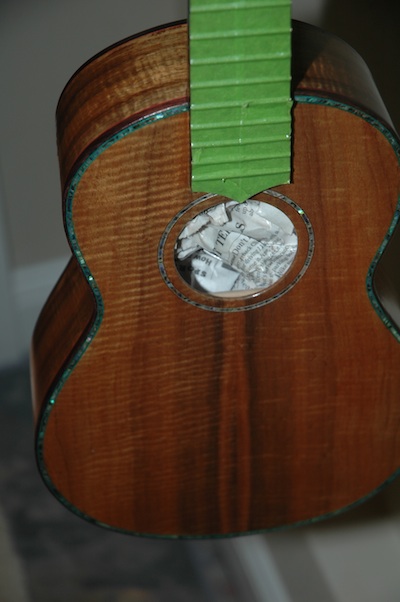
When the straightedge is placed on the lower bout area of the top, you can see the depression of the top surface around the soundhole.
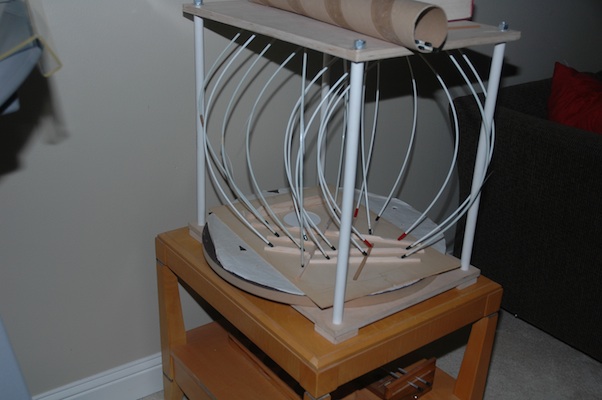
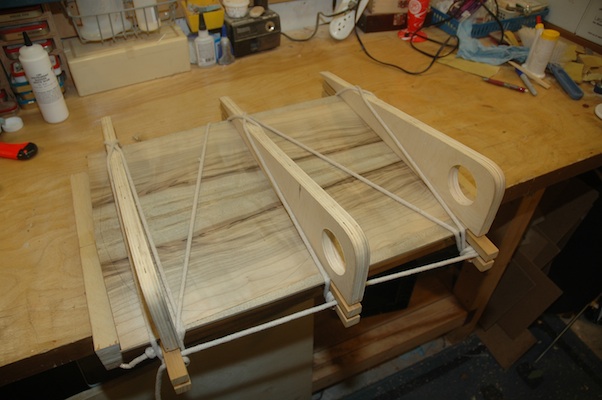
Neck removal starts with releasing the fretboard glued to the top between the heel and the soundhole. I tried several configurations of a heating blanket on the fretboard to warm it to allow the glue to be softened.
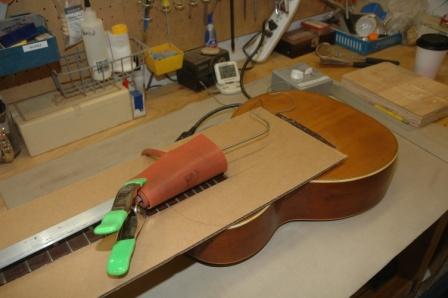
Multiple attempts to loosen the glue went naught. Insertion of a spatula under the fretboard went nowhere. I’m concerned the glue is of the ilk that won’t respond to heat to release. I’m tempted to procure another tool, which is specific for heating the fretboard end for loosening.
Once the glue is released, I will be able to steam out the dovetail joint and remove the neck. Only then will I be able to determine what needs to be done to remove the depression in the top, and what the new neck angle will be.