Archive for September, 2008

Guitar 803 – Reset neck, then keep shaping

September 30, 2008

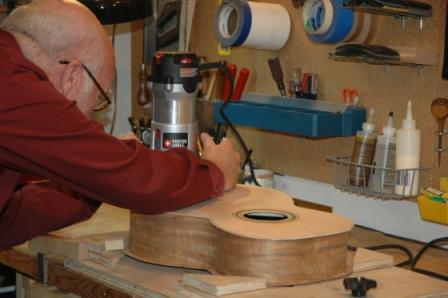
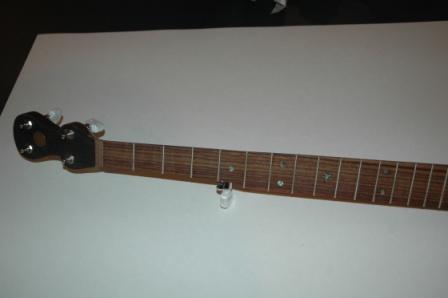
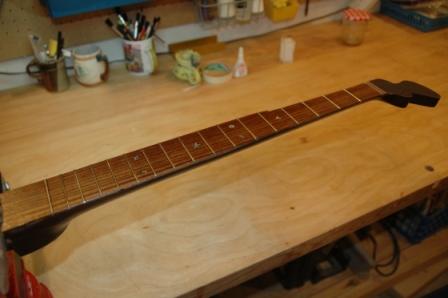
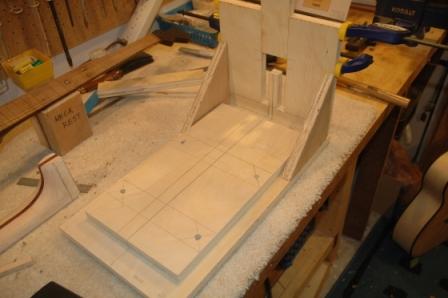
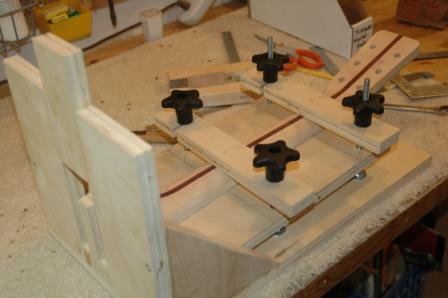
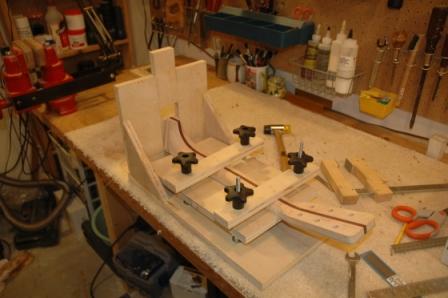
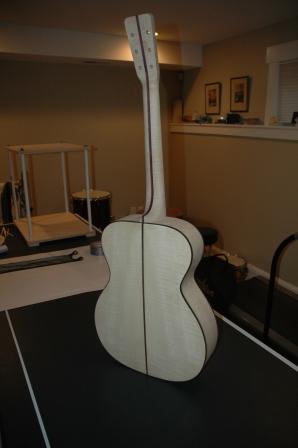
As the neck needed further “adjusting”, I remounted the neck in the jig, knowing that I needed to increase the neck angle ever so slightly.  I just barely adjusted the angle from the original setting, and rerouted out a new angle, and, viola! it was dead on.

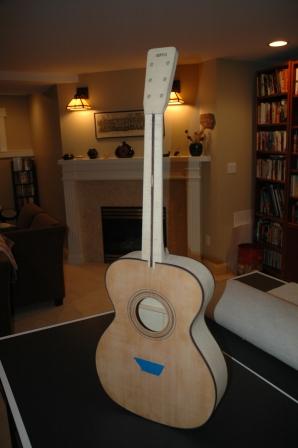
Took a measurement on the neckand the fretboard, marked up, and continued rasping toward the perfect shape.

080930raspingneck.jpg

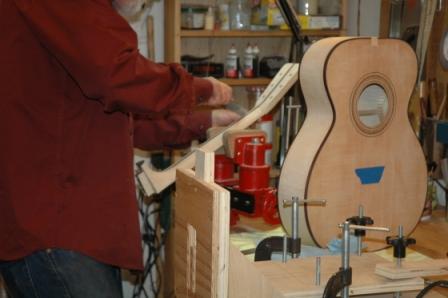
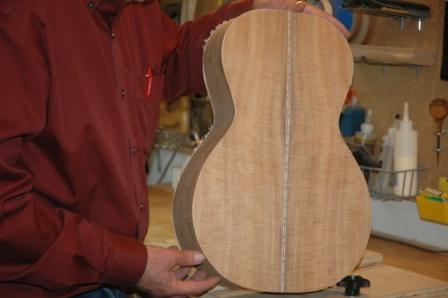
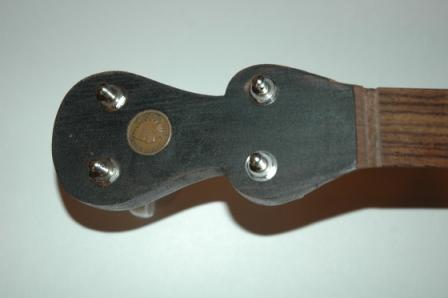
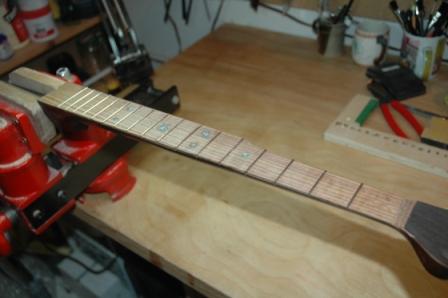
Mounted the end cap with a scrap of rosewood, then tested fit of everything.  Just a bit more neck shaving to do to get it to the same dimension as the fretboard.  I think I have the right shape, but will have Larry hold and suggest any adjustments.  Hey, there’s a benefit to a custom, you can get the neck shape just as you like it!

080930checkingfretfit.jpg

Guitar 804 – OK, one more thing

September 30, 2008

I let the body dry overnight in the go-bar platform.  Did a good job with just enough glue and got no squeeze out from the kerf/top and kerf/back joint.  Did have a little at the neck block, but up underside, invisible to all without mirrors.  I signed the spruce top on the inside before gluing up (a hedge against counterfeiters, hah!).

Here’s the body before triming the overhang.

080930postgobar.jpg

I used my body mounting jig clamped to the workbench to hold the body still while I use the megarouter to remove the scarf (if that’s what you want to call the overhang) with a flush cut router bit.

080930readytotrim.jpg

I can’t use this monster router to cut the channels for the purfling/binding as it’s too heavy.  I need to use my palm router, which is out of commisssion until I get a replacement collet.

080930removingscarf.jpg

Next step:  sand it sand it sand it, then wait.

080930trimmed.jpg

Guitar 804 – Back and Top joined to sides

September 29, 2008

Finished trimming down braces on back, removed excess backstrip, and glued back to rim in go-bar platform.

080929backtosides.jpg

I use a masonite “ring” cut to the outer shape of the back, with the middle removed to accomodate the radius and provide a caul to protect the back from the go-bar rods.

080929backingobar.jpg

Added a cross of fabric over the top of the top x-brace to fill gaps and add strength.  Used the approach of feathering the brace ends that meet the kerf down to nothing so I didn’t have to notch the kerf.  Glued it up and attached the top in the go-bar platform.

080929toptosides.jpg

I special ordered a replacement collet and nut for my palm router (I broke the original).  It probably won’t come for a few weeks, so the next step of routing the channels for the purfling and binding will have to wait.  Tomorrow, I’ll continue the process of shaping the neck for the OM Maple.

Guitar 804 – Top and back braced

September 28, 2008

This weekend I completed the bracing of the top and back.  Used my sanding machine to shape the braces and am very pleased with the outcome.  Last time I mounted raw braces (after radiussing) and chiseled them to shape.  This time I shaped the braces to a sharp peak using the belt sander after using the Luthier’s Friend to taper the ends.

First step was to install the back strip, then cut out the space for the back braces.

080928backandfront.jpg

Then I radiussed the bottoms of the back braces to 15′ and the x-braces for the top to 30′ using the contour dishes.

080928radius30.jpg

Glued in the back braces in the go-bar clamping deck.

080928gobarback.jpg

Did my best to square up all the braces, but they came out a skosh askance.

080928backbraced.jpg

Just finished gluing in the top braces.  Only the x-brace is radiused.  The bridge plate is dry fitted until I can free up some go-bar rods after the top brace glue dries (later tonight).

080928gobartop.jpg

You can see that the Parlor has far fewer braces than the OM as it is a smaller footprint.  I’m going to shave all braces down to zero as they approach the kerf line.  The small size won’t require as much brace strength, and I think the tone will improve with less brace material.

Banjo repair – neck finished?

September 27, 2008

I’ve finished the first phase of the banjo neck refret, resurface, and installation of tuning pegs.  Next steps will be taken after consultation with Tom.

080927banjohead.jpg

Tom had me install a 1907 penny in headstock.

080927banjo5thpeg.jpg

Inlay looks good, gotta polish that fretboard.  5th string tuning peg just dryfit, not secured.  Need to set the little bone/plastic peg in the fretboard to guide the string.

080927banjoneck.jpg

It’s a nutless neck.

Guitar 804 – Rosette flooded

September 27, 2008

Went throught the process of routing out the center ring channel to accomodate the BWB/Abalone/BWB.  In the end, it was a little too wide.  By using a flooding method to secure the abalone, it will all come out looking fine, but ultimately it would be cleaner with a narrower channel.

First glued in the BWB/Teflon/BWB.

080927teflonin.jpg

After drying, removed the teflon strips.

080927teflonleaving1.jpg

080927teflonout.jpg

Based upon recommendation from C. Fox, I coated the open channel vacated by the teflon with vinyl sealer.  I’ll be using superglue to secure the abalone, and apparently the sealer will keep the BWB from bleeding when confronted with superglue.

After the sealer dried, I carefully laid the abalone in the channel, which is when I realized it was too wide for my abalone chips.  I centered the abalone in the channel and attempted to butt each strip up close to the next.  My hope is that the gaps between the chips and each other and the side wall will disappear with the superglue flooding.

080927rosettetobeflooded.jpg

Several applications of superglue later, sufficient drying time (overnight as it was very thick), I sanded down and am somewhat pleased.

080927rosetteflooded.jpg

Next time:  narrower channel, shallower channel, multiple thin applications of superglue, rather than few thicker.

Guitar 804 – Groovin’ the Rosette

September 24, 2008

Larry is going to procure an LR Baggs pickup for his OM Maple, but that’s not the reason I’ve sidelined to work on the parlor.  I am going to resume neck shaping on the OM, but wasn’t in the mood tonight.

I decided to begin installing the rosette for the parlor.  This will be my first foray into using abalone.  Charles Fox suggested a method which I will employ:  Rout the channel for the BWB Abalone BWB center ring, glue in the inside BWB with a strip of teflon where the abalone will go followed by the outside BWB.  Let it dry, remove the teflon, then press in the abalone arcs (after dressing the cavity with vinyl sealer), then flood the abalone with superglue.

In order to get the channel just right, I devised a rosette jig, a scrap piece with the properly measured channels pencilled in with a small routed channel about 1″ long for each.  This will allow me to reproduce the dremel settings without doing “test cuts” on the actual guitar top.

080924rosettejig.jpg

First, I’ll rout the inner and outer channel and install the BWB, let dry, scrape, then tackle the center ring.

080924rosette8.jpg

Ring one! (Outside)

080924rosette9.jpg

Ring two! (Inside).  I slapped some wax paper on, set on a caul and put my old heavy bench plane on top to hold down.

Banjo Repair

September 24, 2008

Mixed a wee bit of Z-poxy and applied to fretboard.  Used a scraper to squeegee into the pores and smooth off.  It added a nice darkness to the rosewood, and after lightly sanding I’ll determine if it needs a second coat.

080924banjoneck.jpg

Banjo Repair

September 23, 2008

Set in new frets, trimmed and filed.  Next step is to apply Z-poxy pore filler on rosewood veneer fretboard surface.

080923banjofret.jpg

080923banjofret5.jpg

Guitar 803 – Neck dry fit

September 21, 2008

Yes, it’s been 3 weeks since I’ve posted anything to the blog.  I haven’t made much progress up until today.  I spent quite some time working on the neck, shaping with a spoke shave and rasp.  It’s getting very close to the true shape.  Next step was to build a jig to allow the shaping of the tenon on the neck at the right angle.

080921neckjig1.jpg

I used the jig on the O’Brien DVD as a model.  It took two weeks to complete, but mostly due to inactivity rather than difficulty.

080921neckjig2.jpg

The slot in the rear is for the router to shape the tenon.

080921neckjig.jpg

The platform can be adjusted to ensure level, and angle based upon the angle measured between the guitar top and the top of the rim.  It took me quit some time to devise a way of discovering the angle, then transferring it to the jig.  Suffice it to say it includes using a level, a sliding bevel and pencils.

I did run into several problems, including an improperly seated router bit which damaged my collet.  As I could not find a replacement collet quickly, I bought a new router (which I needed anyway).  It’s a man thing.

The end result is reasonable, and I was able to dry fit the neck to the body.  What remains is some selective shimming, marking the end of the neck to drill the holes for the neck bolt receivers.

080921neckdryfit.jpg

080921neckdryfit1.jpg