Archive for January, 2012

Guitar 1002 – Cutaway Bend

January 31, 2012

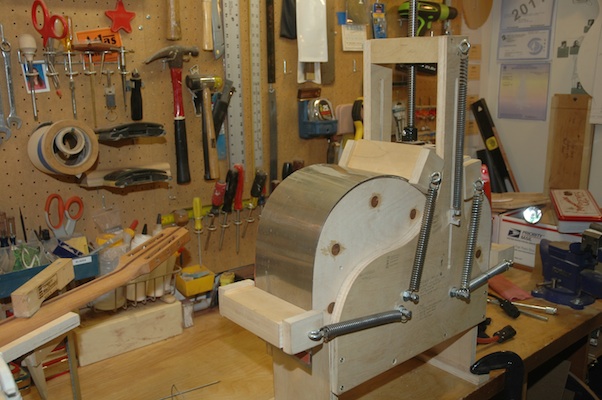
I finally bit the bullet and went headlong into the cutaway bend.  First I needed to locate the pivot point for the cutaway ram to be mounted on the bending machine.  After several dry runs, I committed to a hole location for the ram pivot. I drilled the holes, installed the ram and placed the side sandwich in the bender and cranked up the heat.  I bent the butt end first then took a deep breath.

120131cutawayram

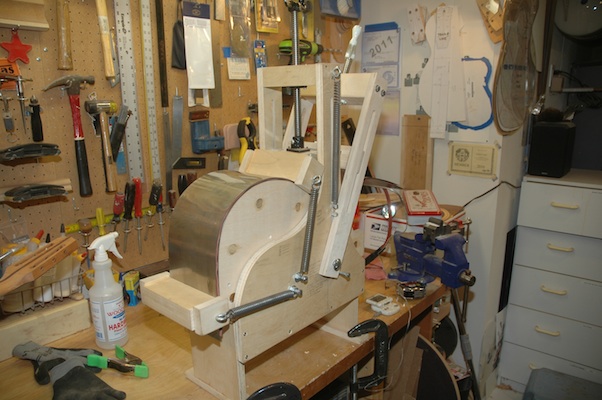
The concern is that the bend is severe, and the side wood tends to crack.  The ram is screwed down tight into the vee between the waist and the rise in the upper bout.

120131cutawaybend

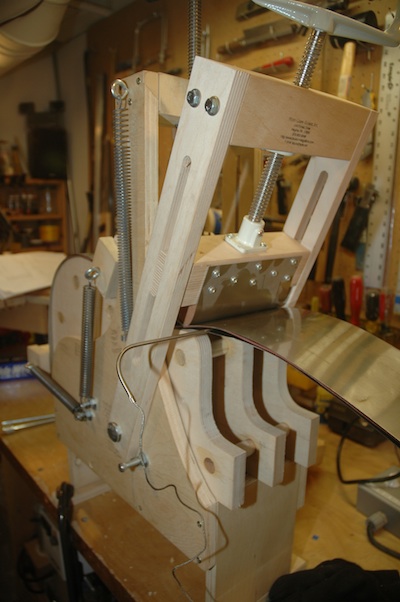
As the ram is pulled away from the waist, it must be released to follow the rise of the upper bout.  Just at the point the bend starts down, the ram must be pulled while advancing the press screw then immediately start to push the ram as it travels down the cutaway until it reaches the bottom of the cutaway.

120131cutawaybent

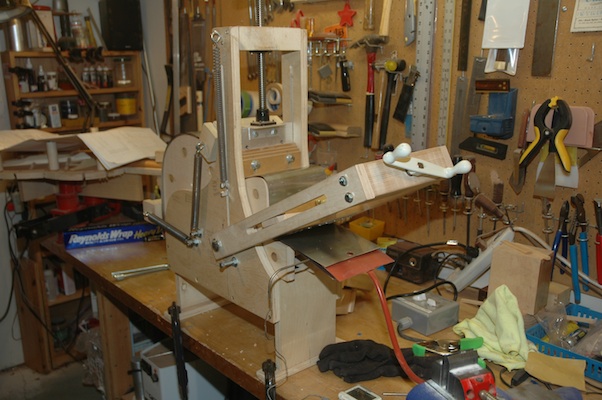
The waist press, up to this point, has only been advanced to an eighth of an inch from bottom.  Finally, the waist press is clamped down to push the waist down and pull the sides “in” onto the bouts.  A quick inspection from the side of the sandwich showed the tight bend did indeed crack, but to what extent, and knowing if it is useable will only be discovered when the package is opened.  A spring bar was draped over the upper bout at the cutaway bend to add pressure at the bend.  One more round of cranking up the heating blanket then a cool down may very well improve the roundness of the side bend at the cutaway peak.

Guitar 1002 – Butt Block and Side Bend

January 29, 2012

I finished detailing the bracing on the top and trimmed back the ends to make room for the attachment of the sides to the top.  The butt block was radiused and trimmed to length (about 1/8″ longer than actual) and glued to the top.

120129buttblock

I also trimmed the sides to the same width as the butt block height then proceeded to bend the non-cutaway side.

120129sidebend

After heating and bending, the side is allowed to cool, then the heat is turned back on for 15 minutes, then the side will sit in the mold overnight.  After removal, it will need more hand bending to bring it to the desired curve to avoid having to spring the side into the workboard, which puts stress at the butt block and neck joint points which can cause splitting.

The cutaway side remains to be bent, but first I have to devise where the cutaway ram will be mounted on the bending machine.  Hope I get it right.  I’ve been avoiding this bend for months, and I am fully prepared to order new sides if I muck this up.  So much for practicing on throwaway stock.

Guitar 1002 – Topside Workboard

January 22, 2012

I built this workboard several months ago.  It’s adapted from the workboard I used for the ukes and examples I’ve seen at luthier suppliers.  The next step is to shape and dimension the butt block then glue it in place in preparation for the attachment of the sides.

120122topworkboard

Guitar 1002 – Neck to Top Join

January 22, 2012

The neck was notched on the router table to accept the top.  The center lines were aligned, pilot holes drilled, and the neck has been glued to the top.  After drying, the neck and top will be mounted to the workboard in preparation for attaching the butt block and joining the sides to the top.

120122necktotopjoin

Uke 1001 – Wrapped Up and Ready to Play

January 18, 2012

It’s a snow day, a day before my son’s 19th birthday, and the birth of my second uke.  The finish is KTM9, a water based lacquer which I believe I will continue to use for future instrument finishes.  I took several months to apply, knockdown and buff the finish, and I believe it improved the results.  Also, 24 or more very thin coats proved to be the right approach.  I avoided drips and orange peel effect, and the knockdown was more straightforward.

120118finished

There’s nothing like a fire, dog and uke to complete a snow day at home.

Uke 1001 – Home Stretch

January 15, 2012

Tomorrow this uke will be making music.  The finish is all knocked down and polished, and today I mounted the bridge.  After setting overnight it will be a quick transition to get the strings installed.

120115bridgemount