Guitar 906 – Gallery
July 1, 2010
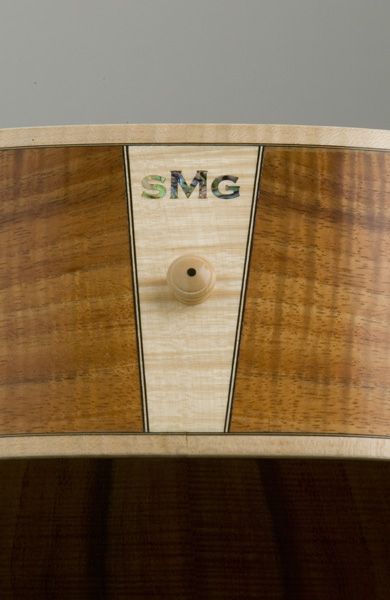
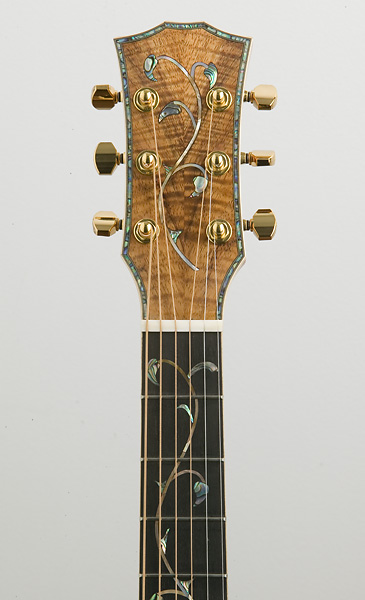
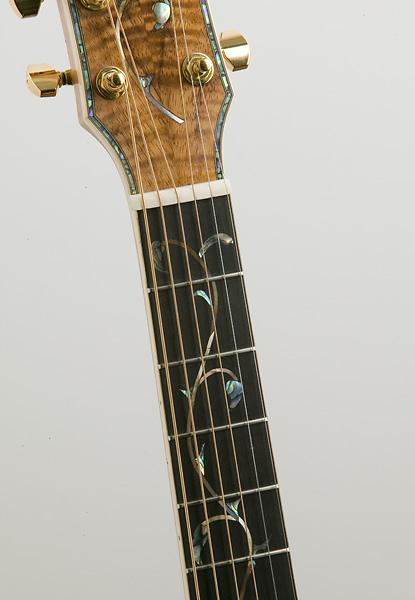
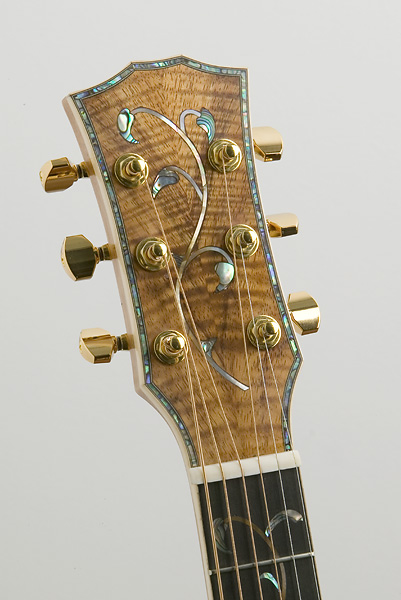
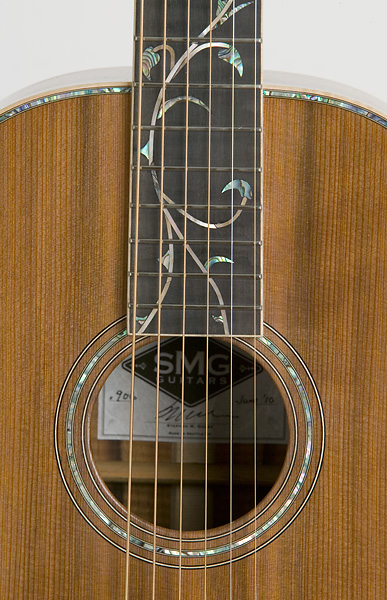
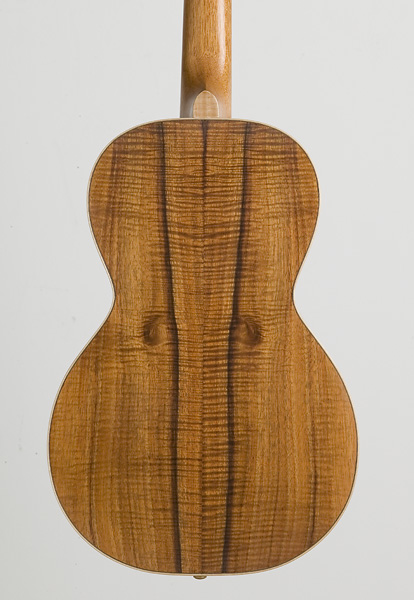
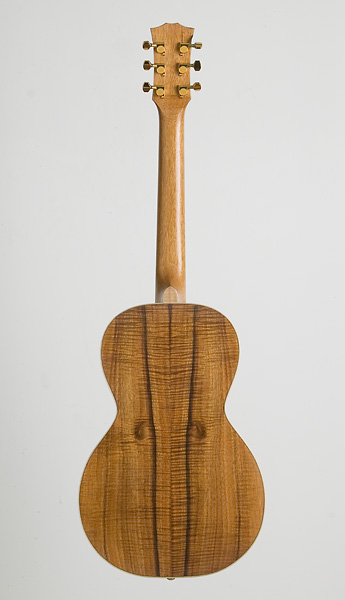
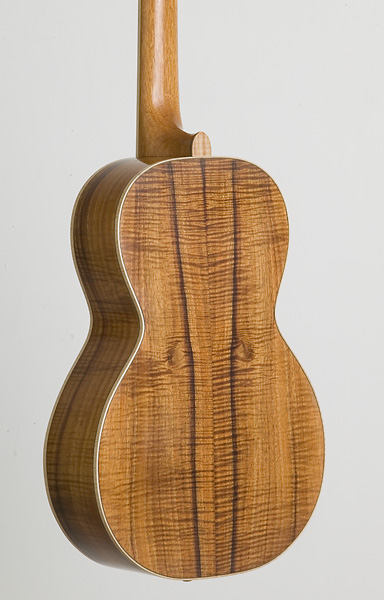
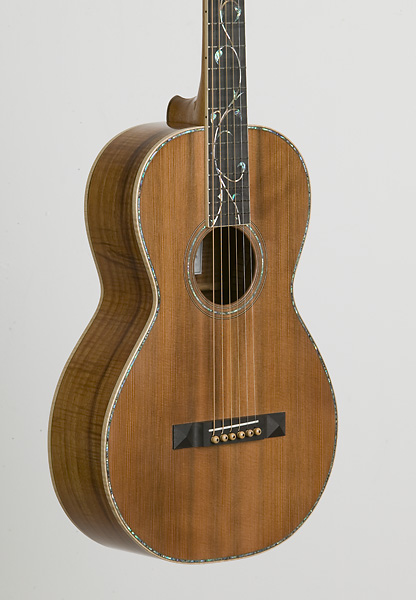
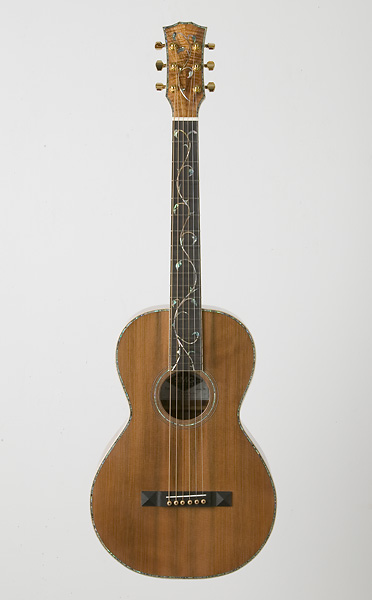
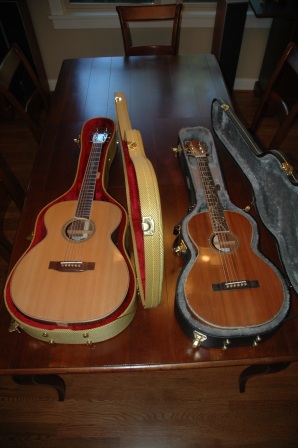
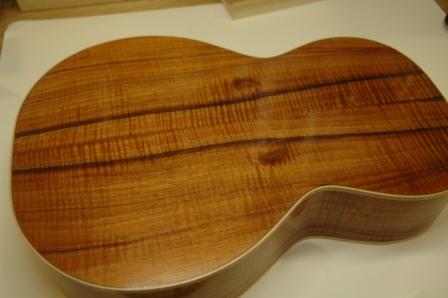
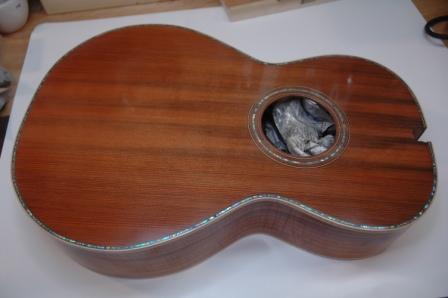
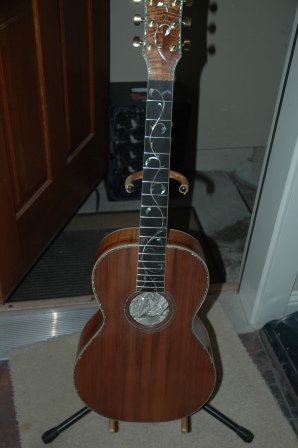
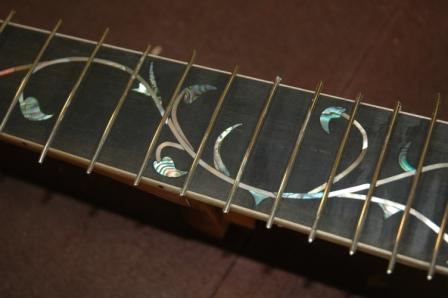
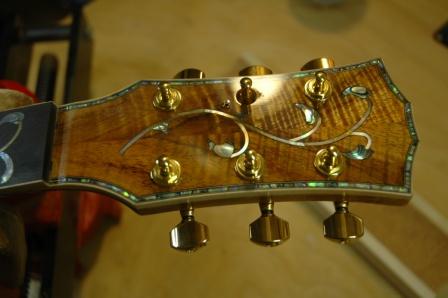
Photos of Guitar 906. Very proud of the inlay.


July 1, 2010
Photos of Guitar 906. Very proud of the inlay.
June 24, 2010
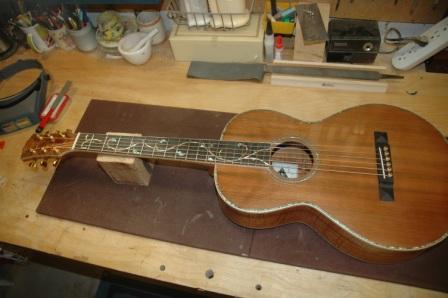
Tomorrow, Tom does his photo documentation of these guitars as the final step before turning them over to their owners. Carl picks up 906 on Saturday, and I ship 905 to John on Monday. I have lots of time to play them before they go on their way.
June 22, 2010
Well, nothing is ever really complete, but I can semi-safely say that guitars 905 and 906 are complete. Of course there’s still that buff this and tweak that and maybe there’s a little buzz on the 7th fret second string that I could frizzle out, but oh my, they are done.
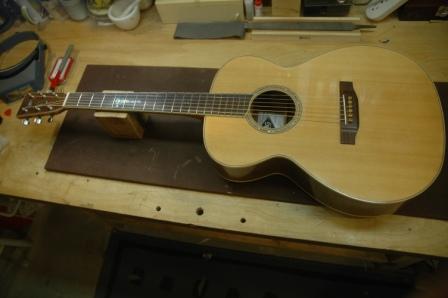
There’s a lot I can say about each, but essentially I’m very pleased with the sound. That’s the one thing you don’t know until you finally string them up and play them. Everything you do is directed toward how they will sound in the end (and of course how they play, but if they sound like crap, who cares how they play). Both these guitars sound like heaven. I’m still amazed, to this day, that you can get so much sweet sound out of a small box parlor. It’s not a room filling volume of sound, but rather a resonant sweet tone.
The OM continues to impress me with its’ fullness and subtlety. This guitar was walnut, and I very much like the warmth and sustain that walnut gives.
The parlor was my nth foray into Koa, and I am continually impressed with Koa as a guitar tonewood. Not only does it have beautiful visual quality, but it really sings, especially in the smaller body guitars.
So next is to do some polishing, label installing, and playing before I send these off to their respective owners.
Oh, and some other news…..even though I build guitars, I have to support myself and my family through the concept of a day job. I have been accepted into a program where I can get my secondary mathematics teaching certificate. Soon, I will be a high school math teacher.
June 15, 2010
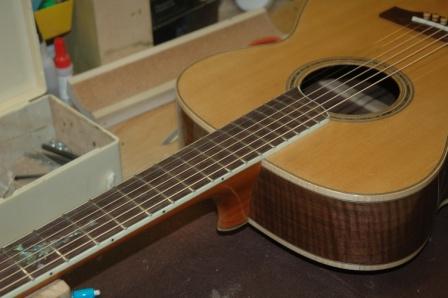
After the neck set, I located the bridge position, masked off the surface and applied lacquer stripper to remove the lacquer in preparation for the bridge mounting.

This is still a process that I’m not fully comfortable with. As careful as one can be with the stripping of the lacquer, there is still a wee bit of contamination of the lacquer outside the area to be stripped. This can be seen at the edge of the bridge after mounting. It is so very slight, but still evident. Other approaches would be to mask the box where the bridge will go prior to spraying. Same goes for the neck/fretboard where it meets the upper bout.
Once the lacquer was removed and the surface roughed up, the bridge was glued and clamped in place.
After it cures, bridge pin holes will be drilled and tapered in preparation for setup.
June 11, 2010
Carl comes to visit on the 25th. I have been the great pretender for too long. His guitar will be ready when he arrives. No excuses. I made a giant leap toward that goal today by knocking down that finish to a glorious sheen. The buffing wheel does wonderful things. I have learned, though, that there’s only so far that buffing wheel can hide incomplete sanding. And, I have learned how complete I must sand in order to buff to my desired finish.
I have also learned the importance of grain filling. As I tend to finish on the light side (too much lacquer effects the sound, yet too much lacquer hides all blemishes), I can see every leftover crease, unfilled grain-ule, and divot from the sharp edge of the bench vise. Grain filling is that step before finishing where you level off the surface with a filler, and with most tropical hardwoods, there is a bit of open grain. Since I don’t rely on the final finish to fill the grain, I must be much more diligent in my grain filling step(s). I will not, I repeat, I will not proceed to the finishing step until every grain has been filled and leveled.
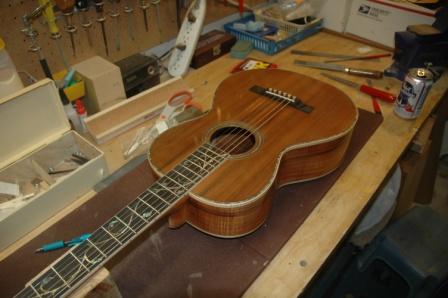
Now, the guitar in question, Carl’s Koa Parlor, does have a very interesting “grain feature”. The finish is not glass smooth, but accented with the natural grain of the wood. Visually it is pleasing (unless you want glass), but tonally, it will be for the best, as the lacquer is just enough to protect, but not enough to deflect from the sound the wood wants to make.
After buffing, I dry set the neck and checked the neck angle and masked the area arount the end of the fretboard where it will be glued to the top. The neck angle on this guitar is much closer to my preferred than any previously. What that means is that no matter how diligent I may be determining the neck angle, after all comes together and it’s time to install the neck, it’s always a little steeper than I planned. This guitar, a victim of multiple neck angle experiments, is much closer to ideal.
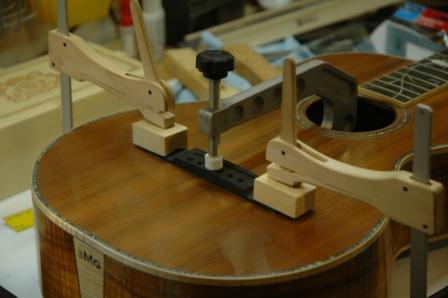
Strypeeze is used to remove the lacquer from the top where the fretboard will be glued. The following picture is a product placement, from which I have been handsomely compensated.

Once the goop has been carefully scraped away and neutralized with water, the neck can be glued to the body. I use a mortise and tenon bolt on neck, but the surface of the guitar top is glued to the fretboard for stability. This means that in future neck resets, only the section of the neck attached (glued) to the top needs to be heated and relieved.

June 9, 2010
I may have already mentioned this, but the neck is ready for setting. Just a little more sanding of the body and a nice polish.
May 19, 2010
Carl, just an update to comfort you. I filled the hole with koa dust, capped with clear epoxy and let dry overnight. Filed down, sanded, buffed, and…you can’t tell it’s a hole! It looks like it belongs there.
Guitar making is just like professional golf. The good ones are the guys who can recover from a bad shot.
May 18, 2010
Set the frets and trimmed overhang.
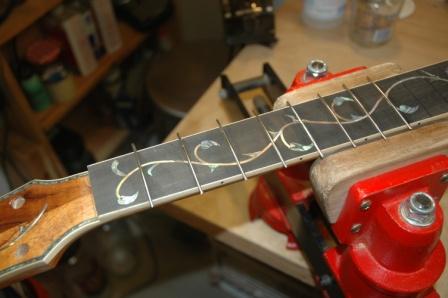
I positioned the tuning machines on the headstock then drilled the tiny screw anchor holes and drilled clean through the headstock on one of the screw holes. Aaaaargh. Well, it will appear that the headstock veneer has a small “knothole”. Damn. Well Carl, your guitar will have character now. It was perfect up until today.
April 1, 2010
2 guitars have just come out of the cure phase for the lacquer. This week I begin the process of cutting and buffing. They look great, no gaps left to fill, and they should buff up nicely.
February 14, 2010
Just finished application of the sixth coat of lacquer for both guitars. Minimum of 6 more coats before setting aside to cure for 7 to 14 days.
