Archive for July, 2008

Guitar 803 – Scrape and Rout

July 27, 2008

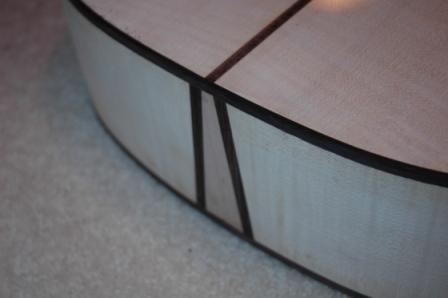
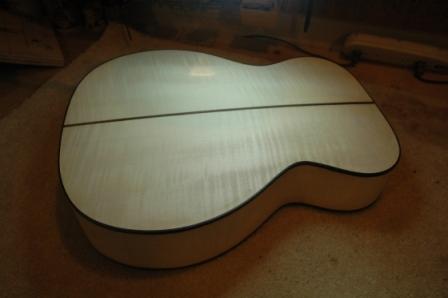
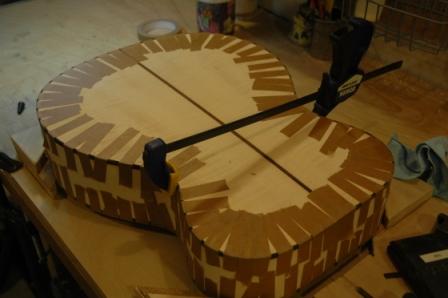
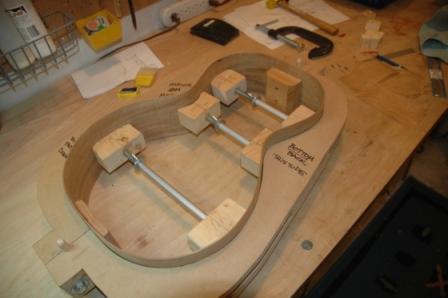
Spent a lot of time today scraping down the binding and purfling.  I was finally able to burnish my scraper properly and it made the effort of bringing the binding down flush with the body all that less difficult.  Scrape scrape scrape, and the result is really nice.  I’m left with very few gaps which will need filling.

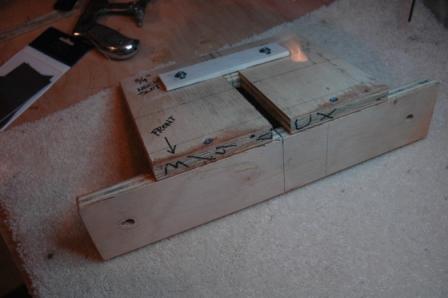
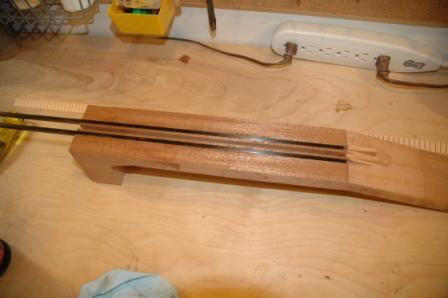
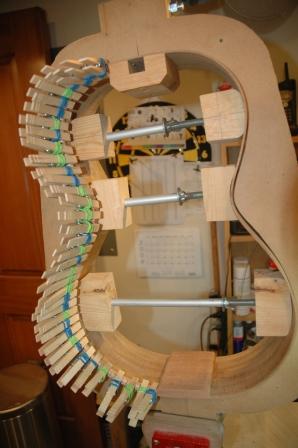
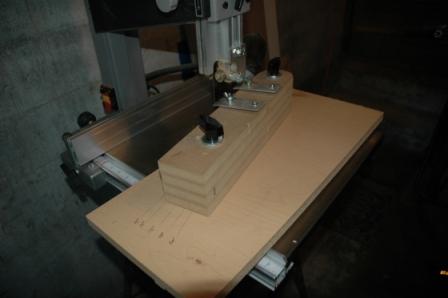
Next step was to rethink the jig for routing the mortise into the body.  I came to the conclusion that I could incorporate it into the body vise which I built last week.

dsc_1024.jpg

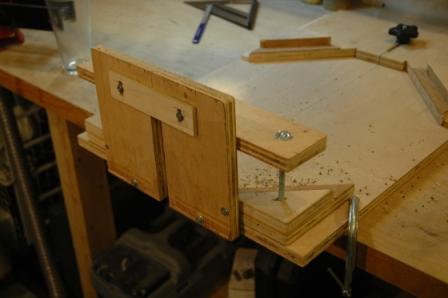
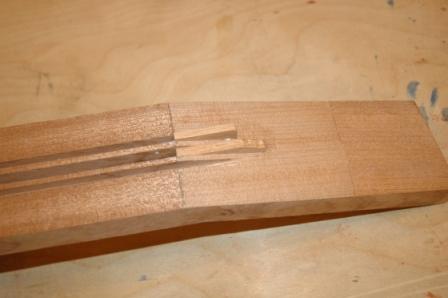
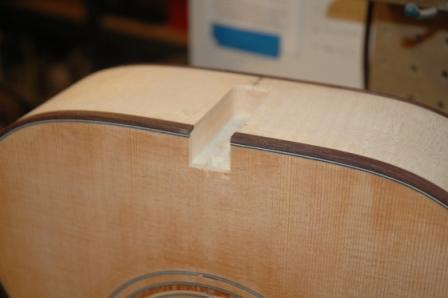
This really helped with alignment, as I can secure the body in the vise, then align the center lines on top and bottom to ensure a square mortise channel.  I have to sit on the floor and run the router up and down the guide channel.  First thing I did was let the router get away from me and I hosed up the guide channel on the right side, and the end result was a beautiful left hand wall, and funky wavy wall on the right side.  I will be able to recover, but I need to rebuild the jig as it is battle worn.

dsc_1025.jpg

Lesson learned:  Find a way to route channels where the router is sitting on the thing to be cut, or be more careful.

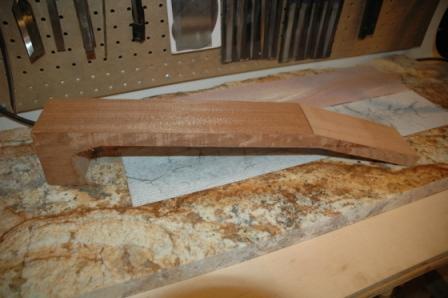
Next step is to build a jig for the tenon (neck), determine the correct neck angle, carefully cut the neck to leave the tenon, and check fit.  I can also insert the neck bolt receivers into the neck and dry fit the neck onto the body.

Guitar 803 – I cannot burnish

July 25, 2008

I scrape, I file, I do the voodoo that I do so well, but I cannot burnish. I finished gluing the binding and the purfling for the OM Maple and I next must scrape. Months ago, Rob Girdis kindly showed me the method for “sharpening and burnishing” my scraper.

Let me say now, that my scraper is the best thing ever. I love my scraper. i love to scrape. But some time has gone by, and my scraper needs to be sharpened and burnished. I cannot burnish. My burnisher is a simple steel rod on a wooden handle. I put my scraper in the vise, and held the burnisher against the scraper and pressed and pulled and pushed and forced and……nothing happened. It’s still a rectangular piece of steel without the requisite curled, sharp edge. Crikey.

The only good news from this sad story is that I scraped and filed the hell out of this guitar box, and I am slowly moving toward a beautiful piece of finished product. It is becoming a fine maple box with binding and purfling without gaps, and I must say I am very happy. I consider the butt block area a confluence of rosewood and maple which makes the best freeway overpass collector distributor blush in comparison.

dsc_1022.jpg

And, my dull sraper allows me to draw and pull along the guitar body without fear of gouging and I can attack and attack with positive results.

dsc_1021.jpg

I’m also working on a jig for the neck mortise and tenon cutout. Square is your friend.

dsc_1023.jpg

Label everythig. Your memory will fail. God is love.

Other – Tom wants me to fret his banjo

July 20, 2008

My friend Tom got a beater banjo off eBay and asked me to refret.  I traded some photo documentation of my guitars for the fret job.  The fret job has turned into a:  veneer the neck, install the frets, inlay the dots, install the tuners, and add missing head brackets.

dsc_1016.jpg

Guitar 803 – I’m binding (and it’s not intestinal)

July 20, 2008

Went the whole 9 yards and got into the binding and purfling. Spent lots of time assuring the channels would be right, and also dealt with the not so tight bends in the binding at the waist. Can’t wait to strip off the binding tape to see how good (or bad) the binding job is.

dsc_1020.jpg

Guitar 804 – Neck ready for schmeckling

July 20, 2008

OK, it’s been a bit since I wrote, but I have been busy. I received the spruce top and sought out the best side and position for the top orientation. Penciled in the form, and it’s ready for bandsawing.

Attacked the neck some more, sanding down and flattening the fretboard surface, and using the L. Friend for bringing the neck/headstock pieces fully square. I also rerouted the truss rod channel as inserting the graphite strips narrowed the original channel.

dsc_1017.jpg

Guitar 804 – I went to the table, and I sawed

July 13, 2008

I went to Carl’s house on Vashon, and I worked with him and his table saw and I found God.  A table saw is the holy grail of woodworking.  I covet the saw.  I need the saw, but yea, I have not the room.  I will make the room, I will find the room, I will build the room if necessary, but I will have the table saw.  Some day, some how (should those words bump into each other?).

So, I channeled the mahogany neck for the koa to accept graphite rods and the truss rod, and I milled a whole shitload of bracewood, both mahogany and spruce.  It was fun, it was dusty, and it prepped me for epoxying in the graphite rods and such (such? what’s that mean?).

Here’s the end result of the graphite rod channel, and even though the rods are a bit over the surface, I think I can sand down the graphite quite easily even though I’ve not worked with it yet.

dsc_1014.jpg

I also did the kerf install on the top for this guitar.  Oddly, I love to kerf.  I’m looking forward to making my own kerf lining someday, even though it seems something best left for someone else.   If I want to use the Fox version of kerfing, the one which contributes to the side shaping, I’ll have to make my own kerf.  I’ll keep it in mind.

dsc_1012.jpg

I’ve got one more picture.  What is it?  Let’s go see.

dsc_1013.jpg

Oh yeah, I’m going to insert little laminated pieces of mahogany into the slots I made for the channels.  Then I’ll chisel down and flush up before gluing down the headstock veneer.  I was going to install the graphite rods in the maple neck, but I already trimmed the neck back and didn’t leave myself a square surface for channeling.  Since I have inserted a rosewood laminate center, I’ll depend on that to keep the neck from twisting and warping (the purpose of the graphite).  Only time will tell.  Larry will call me when his neck goes south.  Iris’s neck will maintain its integrity for time immemorial.

I also have mentioned before, but it begs mentioning again, I’m going to use a spruce top for this guitar, not the mahogany I originally planned.  Mahogany should not be used for tops.  Carl mentioned that to me in an aside whisper.  I’m glad I came to this conclusion before it was too late.

Cheers.

Guitar 804 – Neck cut jig, glue in the blocks

July 13, 2008

Taking a cue from Charles Fox, I built a jig for cutting the headstock piece off the neck blank.  Being the conservative I am, I used MDF scrap from the previous mold construction.

dsc_1010.jpg

Did have a small problem with the fact the neck blank was a skosh out of square.  Minor issue that will resolve when I trim down the headstock and carve the neck.

dsc_1009.jpg

Trimmed the sides, glued in the butt block and the neck block (newly purchased from StewMac).

dsc_1008.jpg

As I look more and more at the mahogany top piece, I’m thinking the top should be spruce.

Guitar 802 – filling the headstock chipout

July 13, 2008

I’m repeatedly filling the headstock chipout with lacquer. I suspect I need to let it cure for a week before I attack with the sandpaper.

dsc_1011.jpg

Once Again – I’ve changed my numbering scheme

July 13, 2008

Time and time again, especially when writing an entry here, I stumble on my guitar numbering scheme.  Bottom line, I don’t like it.  So, I’ve changed it again.  First digit, year, second two digits sequential from 01.

My first guitar, the 000 Mahogany, is now 801.

Rosewood OM – 802.

Maple OM – 803.

Koa Parlor – 804.

Guitar 0208 – Plan of attack

July 9, 2008

  1. Continue to sand in stages.  220 – 440
  2. Move to next stage 600 – 1200 – buff
  3. Clean up neck/fretboard/body lacquer valley of despair
  4. Clean up back brace glue squeeze out
  5. Clean inside of guitar / blow with compressed air
  6. Fill headstock chipout
  7. Level frets
  8. Install bridge
  9. Do a little dance, make a little love, get down

Next »