Guitar 1002 – Redo Binding

April 29, 2012

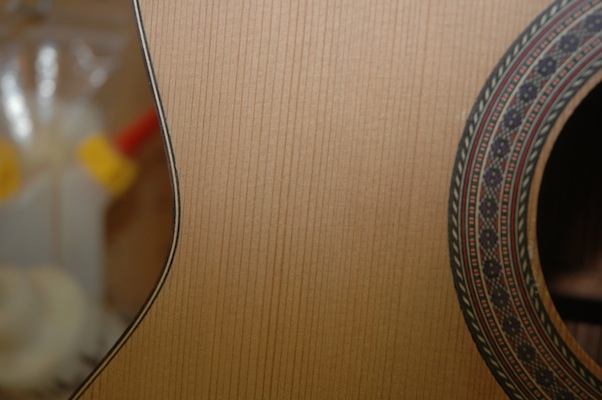
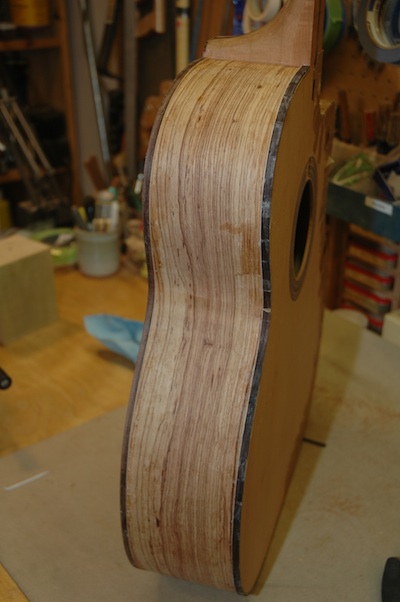
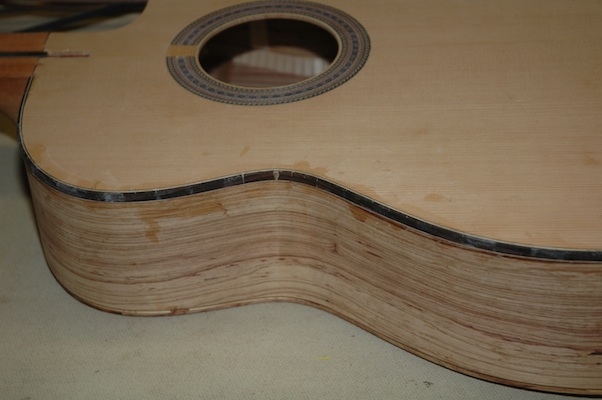
I just wasn’t happy.  The binding on the front of the guitar, the binding everyone will see and admire, was just not right.  Too thin in places, poorly fitted around the cutaway, and even a few cracks that needed repair.  I ordered additional rosewood binding strips, which arrived yesterday, and set out on removing the first application of binding and installing it again.

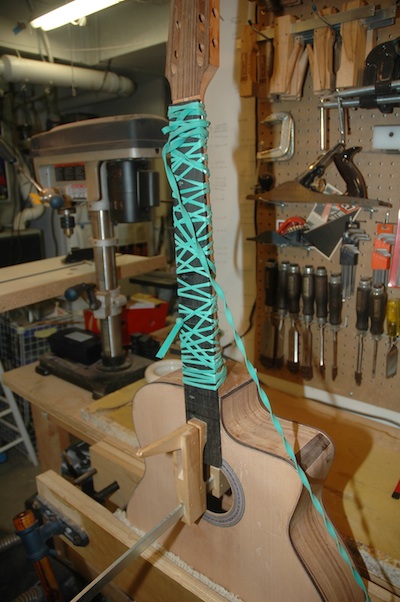
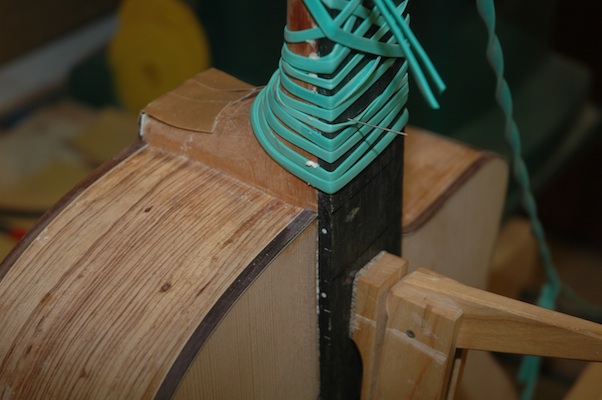
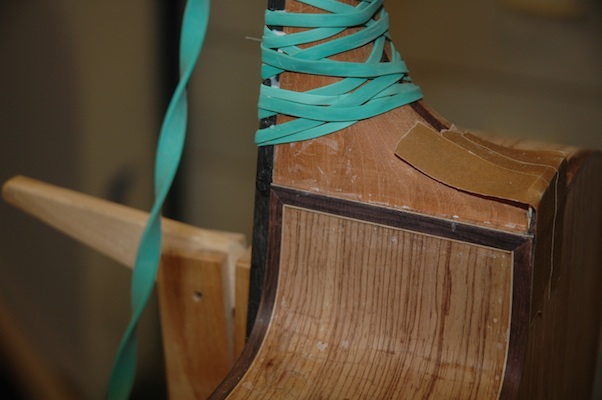
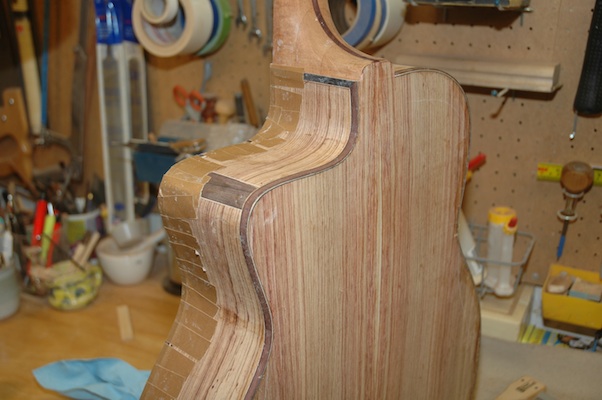
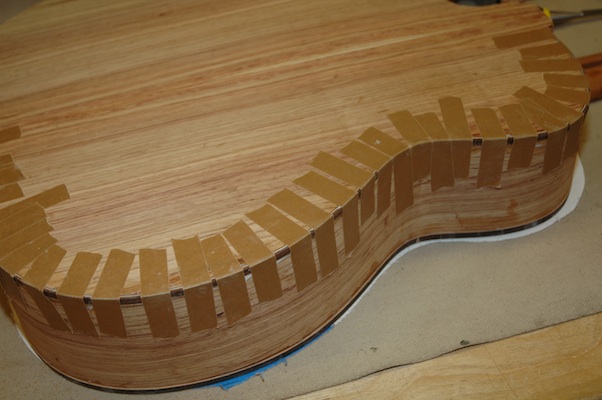
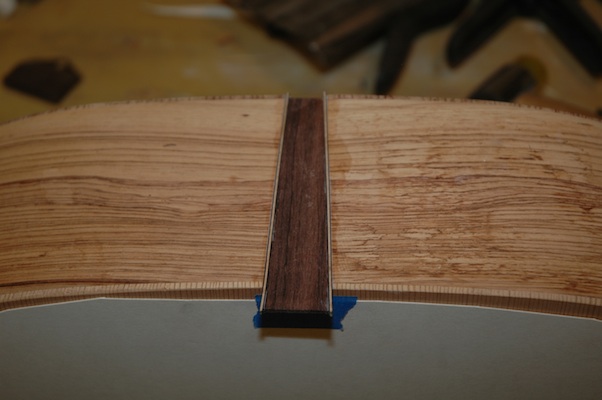
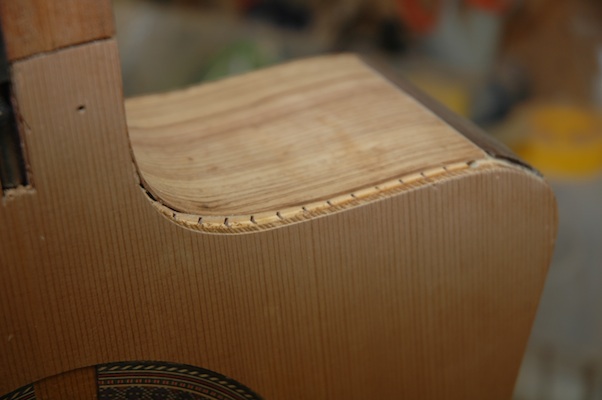
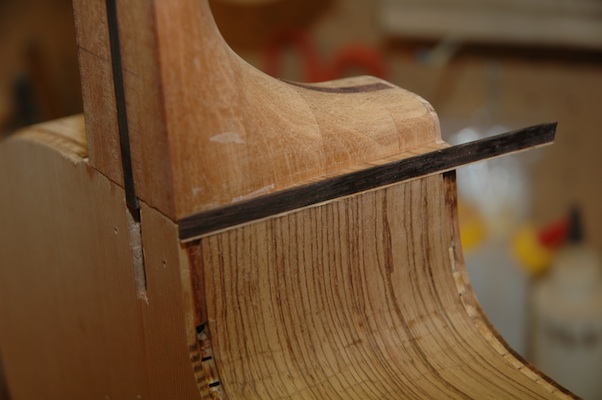
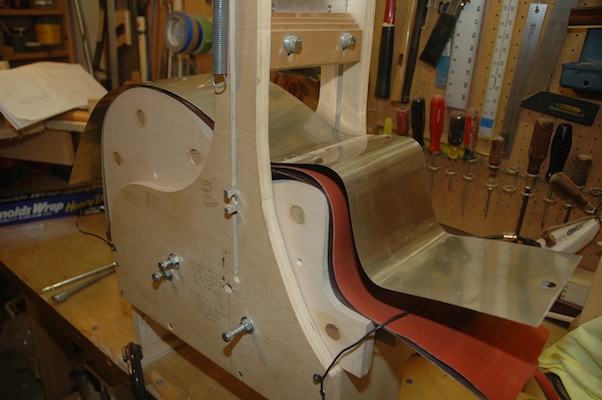
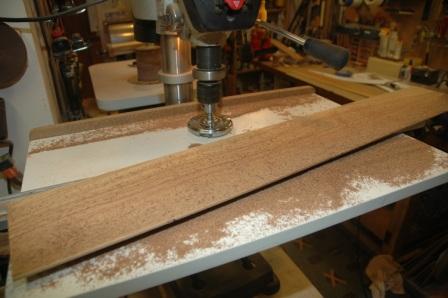
I routed out a binding channel for the top binding with a depth considerably deeper than the original.  The first pass at installing this binding included thinning of the binding strips to assure a clean bend around the cutaway.  What I discovered was that I could tightly bend even full width binding if I got my iron hot enough and patiently bent the binding strip a wee bit at a time.  Bending, then checking, bending then checking, until I had a nice tight bend with no cracks or pullaway of wood fiber on the outside of the bend.  (What I did find is that my insulated gloves don’t work as well as I would like, and my fingers are a bit crispy).

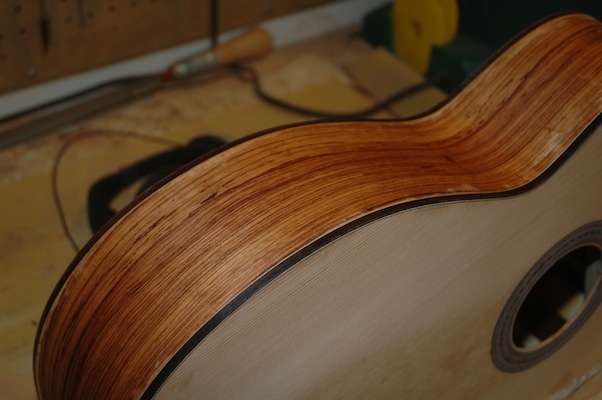
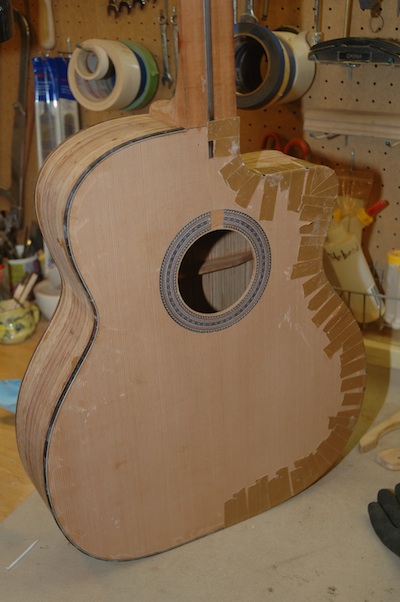
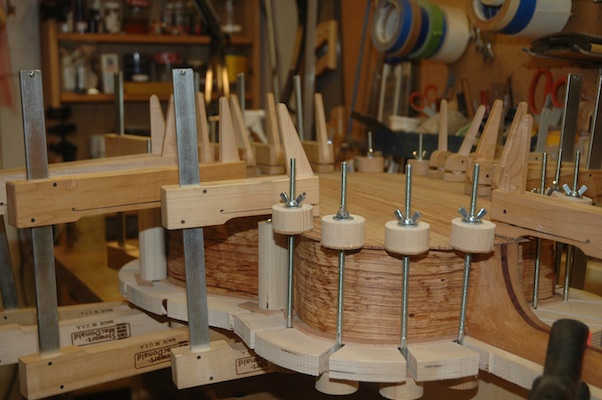
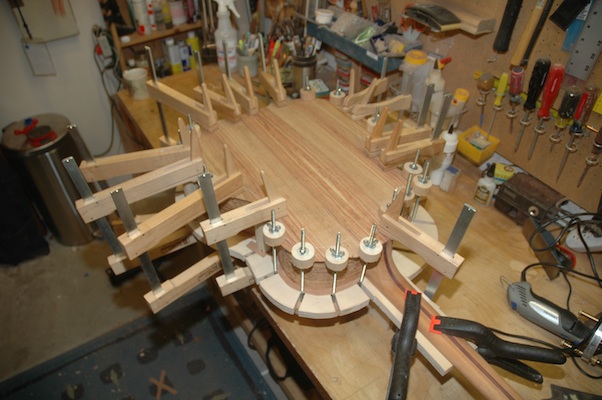
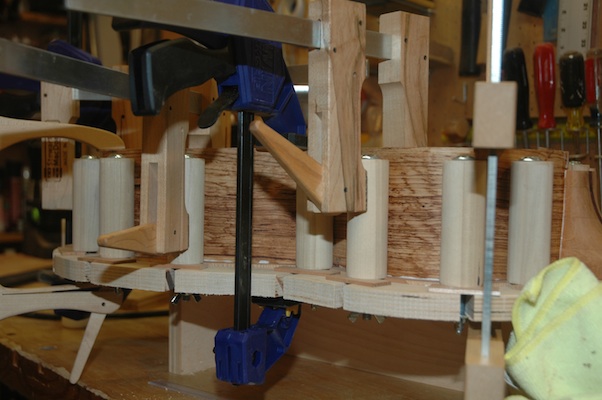
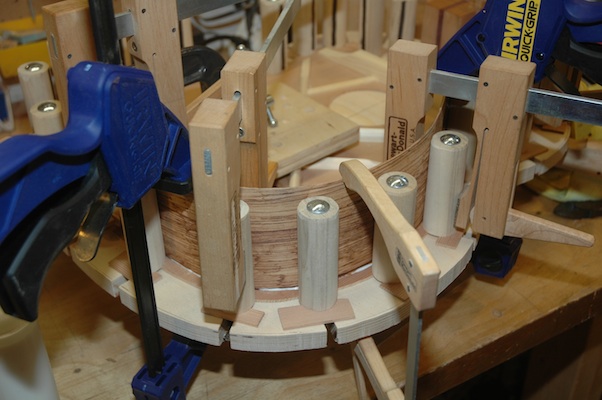
A good tight bent binding and purfling make for a spectacularly easy application of the binding with binding tape.

This will be way better.  I am no longer afraid of the tight bend of the cutaway.

Guitar 1002 – Fretboard Binding Heel Cap

April 22, 2012

All binding is on and trimmed.  I decided to install a rosewood heel cap and did so by routing out the heel cap material to allow installation of a maple veneer topped with rosewood cap.  The heel cap will be flush with the body.

Side dots were inserted onto the fretboard, it was trimmed to match the profile of the neck, then indexing pins were located to hold the fretboard in position while it was glued and held in place with the amazing 40 foot rubber band.

120422fretboardmount

The binding, heel cap and fretboard all meet up in various spots around the guitar.  Next steps will be to flush up all the joints and prepare for detailed finishing of all the surfaces.

120422neckfretboard

120422cutawaybinding


Guitar 1002 – Binding Trimmed, Now the Tedious

April 9, 2012

The binding is installed (save one small section on the neck heel).  It’s been trimmed close to the body and now the scraping begins.  Using a cabinet scraper, nicely burnished, I’ll draw down the binding flush to the sides, top and back.  I enjoy this process, yet it takes a long time to do it right.

120409roseandbind

The Palo Escrito looks fine treated with naptha.  The blotchy parts still need further sanding to remove the glaze of wood glue still on the surface.

120409sidebind

120409fullback

120409back

An hour here, an hour there, then some more here and there, and the fretboard goes on.

Guitar 1002 – Binding continues

March 19, 2012

I’ve attached the cutaway side binding after hand bending.  I’m pleased with the process, and am no longer flummoxed by tight binding bends.  All went swimmingly, and installation was straightforward.  A few minor gaps which can be filled with rosewood shims.

120319frontbinding

120319sidebinding

I still need to install binding and purfling around the heel cap area.

120319cutawaybinding

Guitar 1002 – Binding

March 18, 2012

I like this part.  The binding puts the real finishing touches on the body.  This one is more complicated due to the cutaway and the heel shape.  I’ve taken the first “easy” steps of binding the non-cutaway side.

120318bindingtape

The binding, pre-bent, and a purfling strip are glued into the channel, secured with binding tape.  I like to glue the crap out of it, which makes the cleanup more labor intensive, but these puppies need to be secure.

120318binding

After the tape is removed, it almost looks like a guitar.  I will trim back the excess with a cabinet scraper before the final sanding.  The cutaway side is next, but I will need to hand bend the binding and purfling strip for the severe bend around the bout at the cutaway.

Guitar 1002 – Binding

March 12, 2012

The binding process for this cutaway is quite a bit more complicated.  I’ve got some tricky executions especially around the neck.

120310buttgraft_0

First I installed the butt graft, and had to recover from oversanding after I installed and trimmed.  I almost sanded through the sides around the butt block and had to go inside and reinforce with resin to restore the thickness and strength of the sidewalls.  After that recovery, I routed out the channels for the binding on the top and back, having to pull short as I approached the neck.

120310bindingchannel

The continuation of the channels was achieved with a chisel and saw, but I still have some decisions to make around the end graft for the neck.

120310binding


Guitar 1002 – Sides Radiused, Back Installed

February 12, 2012

Before attaching the back to the sides, the sides need to be radiused to 15′.  This is done with a sandpaper covered dish.

120212preradius

The kerfed sides have been trimmed down to the approximate dimensions, then the box, still attached to the workboard is sanded by rotating through the center point of the dish until flush.

120212radiuscheck

A gap between the upper bout and the dish is shown.  The staining on the sides is from the bending process, and goes away after sanding.

Once the gaps have been closed, the back is dry fit on the sides to check for the location of the bracing, where the sides and kerf must be relieved so the bracing fits “under” the kerf.

120212fitprepback

After a round of dry fitting the back to the sides with spool clamps, glue is applied to the kerf and the back is attached.

120212backdetail

The clamps will stay for several hours before removed, then the scarf can be removed with a router using a bearing flush cut bit.

120212backclamped

Guitar 1002 – Unpack the Sides, Glue to Top

February 4, 2012

As mentioned previously, the cutaway bend probably cracked.  I let the bent sides sit in the bender overnight so as to allow the bends to settle, then opened the bender carefully.

120204openthebender

The underside of the sandwich was held in place with a bit of wire to keep it from springing up and pushing against the bent side.  After removing from the machine, the crack was evident.

120204seethecrack

Two cracks, on either side of the outer bend can be repaired with CA glue, then the bend can be rounded on the hand bending heater before attaching to the guitar top.  This piece is salvageable and will be fine.  After aggressive sanding and fairing, there should be no evidence of the crack.  I might consider gluing a small spruce caul into the inside of the bend to provide stability.

I began installing the non-cutaway side.  First I increased the bends on the hand bender, determined the position of the cut for each end to shorten the side piece, applied glue to the butt block, neck slot and joint between the side and the top.  It slipped into the workboard easily, and followed the trace of the joint nicely, so I was able, on the first pass, to clamp down.

120204sideinstall

120204sideinstall1

Guitar 1002 – Cutaway Bend

January 31, 2012

I finally bit the bullet and went headlong into the cutaway bend.  First I needed to locate the pivot point for the cutaway ram to be mounted on the bending machine.  After several dry runs, I committed to a hole location for the ram pivot. I drilled the holes, installed the ram and placed the side sandwich in the bender and cranked up the heat.  I bent the butt end first then took a deep breath.

120131cutawayram

The concern is that the bend is severe, and the side wood tends to crack.  The ram is screwed down tight into the vee between the waist and the rise in the upper bout.

120131cutawaybend

As the ram is pulled away from the waist, it must be released to follow the rise of the upper bout.  Just at the point the bend starts down, the ram must be pulled while advancing the press screw then immediately start to push the ram as it travels down the cutaway until it reaches the bottom of the cutaway.

120131cutawaybent

The waist press, up to this point, has only been advanced to an eighth of an inch from bottom.  Finally, the waist press is clamped down to push the waist down and pull the sides “in” onto the bouts.  A quick inspection from the side of the sandwich showed the tight bend did indeed crack, but to what extent, and knowing if it is useable will only be discovered when the package is opened.  A spring bar was draped over the upper bout at the cutaway bend to add pressure at the bend.  One more round of cranking up the heating blanket then a cool down may very well improve the roundness of the side bend at the cutaway peak.

Guitar 1002 – Sides Planed

April 16, 2011

Using the same setup for planing the uke sides, I brought these sides down to .070″ in preparation for bending.

110416sideplaning

110416sidesplaned

I’m tempted to thickness the cutaway side even more, as there is a sever bend in the upper bout.  Both sides will go through the drum sander tomorrow to clean up the planer marks left behind from the Safetee Planer.

Next »