May 13, 2011
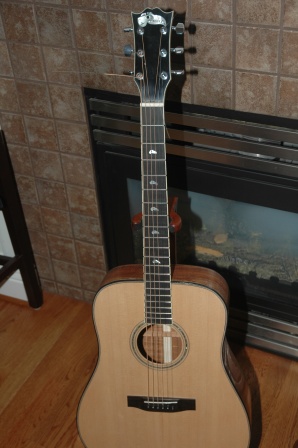
I predicted I would be done with the Koa Dreadnought by Sunday, and I even stuck my neck out and told the customer. So damnit, I will finish it by Sunday. The frets have been levelled and sanded as well as tapered. The nut and saddle have been roughed out to approximate shape and dry fit onto the guitar. The bridge pin holes have been tapered and string slots have been sawn in.
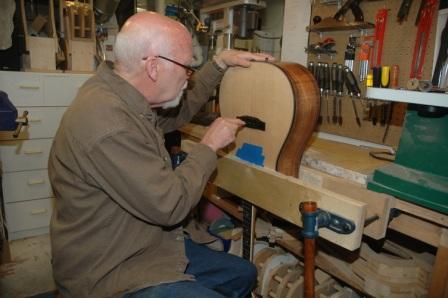
I have employed Professor Cuthbert Calculus to do some work for me as you can see in the photo above.
I strung it up, tuned it and let the strings settle in. To my amazement, my rough setup work was perfect. The saddle is the proper height, the nut string slots are at the perfect depth, and the fret levelling was flawless. I think all those previous guitar setups have proven to be useful. Perhaps I now know what I’m doing. Nice bold sound, as is the custom for a dreadnought.
So, I’ll let it settle overnight, then tomorrow I’ll hit the punch list:
1. Install sMg label after blowing out all the crud inside the box.
2. Final buffing.
3. Shape then polish nut, glue to neck.
4. Shape then polish saddle, place in bridge.
5. Dress frets and fretboard.
6. Tighten truss rod for miniscule concave setting.
7. Install pick guard.
8. Clean case and attach sMg Guitars label.
9. Call Steve and have him come pick it up.