Guitar 905 and 906 – Neck shaping, end graft, fretboard install
January 19, 2010
Doubling up on two guitars is working well, as the tasks I perform on one are repeated on the other and the muscle memory benefits both. After installing the neck bolts I moved on to further shaping of the necks and fine tuning the joint between the neck and the body. Getting both down to fine flush joints was fortunately easy and the result was more than acceptable. I bound each fretboard, radius sanded and flattened the back of each fretboard. I bolted each neck onto the appropriate guitar (careful not to Frankenstein them), and rechecked the neck angle, making sure the neck and body were aligned and that there was a 2mm gap between a straight edge laid on the fretboard and the body at the bridge location. I then checked, with the fretboards resting on the neck, that the gap was 7 to 8mm. If not, I would either have to adjust the neck angle or thin the fretboards to get this gap. Well, my friends, experience is paying off. The gap was there, was right, on both guitars, and I needed no further adjustment.
I unbolted the necks from the body and attached the fretboard. Here’s what 905 looks like after gluing and wrapping with a long elastic (excellent as it applies lots of pressure, and self centers).
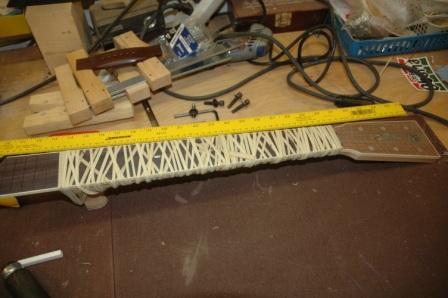
This will dry overnight before I remove the band and begin to scrape and shape the neck further.
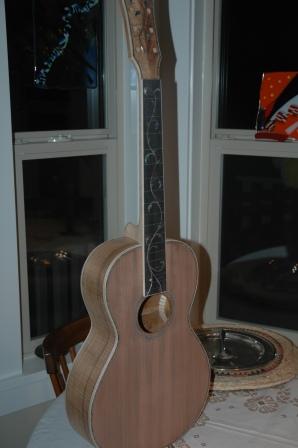
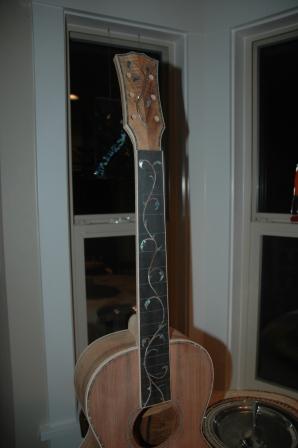
Earlier today I did the same for 906, and the neck/fretboard came out of the band about an hour ago. Nice result, and you can see the fretboard bound with curly maple.
Both necks are still Stephen thick. I’ve had the tendency to keep my necks thicker than they should eventually become. Thicker from fretboard through back of the neck. It stems from fear of taking too much off. But….I really know how thick these necks should be, and there’s nothing amiss from further shaving after the fretboard has been installed, which is exactly what’s next on the agenda.
Neck shaving, final sanding, then these guys go into the spray booth. I’m going to defer the fret install until after the finish spray. New approach, as I always installed frets then sprayed. I like this as I can easily mask the fretboard without frets. With frets, it’s a tedious masking process, and I’m lazy. The only thing I can think that would make this a bad decision is that there might be some potential finish cracking when pounding in the frets. But that problem exists for all refret work, so hell, think of it as a refret.
Essentially, these boys are guitars.
Pete Brown on 31 Jan 2010 at 2:32 am #
Hi Stephen, glad I found your site – I’ll be keen to follow your progress.
I’m interested in your decision to install frets after finishing and it’ll be good to see how it turn out for you as I’m about to take the same route. I asked Matt Mustapick about this and he was good enough to provide the following information. Hope it helps. Best wishes, Pete
Addam Stark lives here in Santa Cruz and does my lacquering for me. He tapes of the edge of the fingerboard but if I fret first, overspray gets under the tape and has to cleaned up and it’s very difficult to get a beautiful, evenly sanded sheen across the fingerboard if you have to clean up with the frets in. There are some tips for fretting after the lacquers on. Addam masks the fingerboard but I still have to use a razorblade to clean up the buildup that accumulates at the edge of the tape. So I use a blade to clean up the front of the board, then I sand it clean with 220-320, and I also hit the corners of the fingerboard a little bit, to take away the lacquer near the corner. Then I continue this up to 1500 micromesh. This is important because when I fret, I tap down the overhang of each fret so that it kinks very slightly where the tang ends to accommodate the binding, so that there is no chance of loose fret ends.. If I had not taken the lacquer off the corner, then the lacquer on the side near the corner will chip from tapping down and kinking that fret end. After I fret, I use a flat file to mill the fret ends on an angle, as everyone does. I go a bit into the wood of the fingerboard when doing this, so that the wood edge of the fingerboard is bevelled, like you find on a Goodall guitar. Then before I sand the fret ends, I use masking tape on the side of the fingerboard going up to where that bevel starts and I sand with 220 up through the higher grits of micromesh. Then use masking tape to mask the board between the frets, then I level, recrown and re-polish the frets.