Archive for October, 2010

Guitar 1001 – Sides thicknessed

October 3, 2010

I have thickness planed the sides down to .108″.  I still need to get them closer to .090″ before I send them off to the side bender (me, I’m the side bender).   Once they are an acceptable thickness for bending, I can start the bending, end block, neck block install, followed by kerfing.

Back and top braces still need to be cut from stock then radiussed before installing.

Guitar 1002 – Hybrid Cutaway

October 3, 2010

I’m starting a new guitar for a friend.  Jim has asked for a Macaferri style guitar with a cutaway (my first), a steel string neck width, and nylon strings.  I’ll be referring to this new guitar as a hybrid.

All the components have been ordered, or were already in hand.  Jim is responsible for the tonewoods and the tuners, which he will deliver later this month.  He’s chosen Red Cedar for the top and Palo Escrito for the back and sides.  The headstock will be open and use classical tuners.

Most of the design choices have been made, but much detail to be determined as I progress.

Ukes – Taper Sled and Fretboard Inlay

October 3, 2010

Happy October everyone.  I’ve been working on ukes this weekend, which means focus on jigs and such.  I crafted a taper sled, which allows me to make taper cuts on the table saw.  It’s just a slab of 3/4″ birch ply with two t-channels, channel clamps, and a guide strip on the back.  Fingerboards need to be tapered, and after marking the taper line, clamp the fretboard into the sled and slide it through the table saw, and shazam!
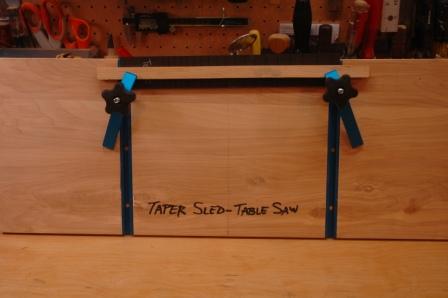
101003tapersled

Prior to doing the taper cut, I need to inlay the fret markers.  I’m using diamond shaped paua.  The fretboard is marked with a center line, and additional lines are scored at the 5th, 7th, 10th and 12th fret.  Note that ukes don’t use the same fret marker patterns as guitars.

The shell is glued to the surface of the fretboard to allow for later scoring around the shell.
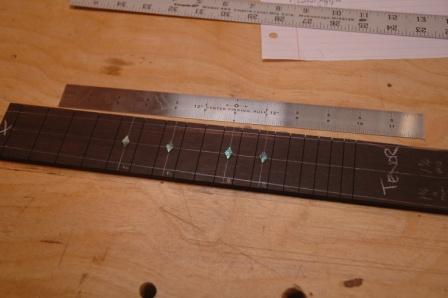
101003layoutshell

The shell is removed after scoring, then the cavity is cut out and black epoxy is added to the cavity.  The shell is pressed in, and additional epoxy is glooped over the top to fill any gaps.  After 24 hours, the fretboard can be sanded.
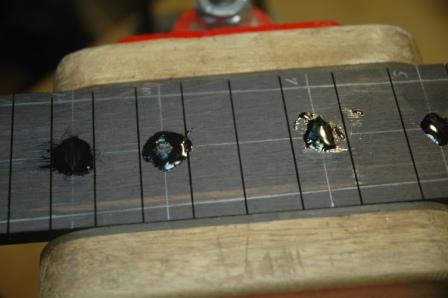
101003epoxyshell

Looks funky now, but it’s like unburying treasure once you sand it down.

« Prev