Archive for the 'Guitar Building Logs' Category

Guitar 805 – Wood arrived

November 12, 2008

The wood for the 12-string dreadnought arrived today.  Very nice stuff.  The top is cedar.

081112cedartop.jpg

This will be my first try at thickness planing and joining.  I’m wavering between visiting a colleague with a drum sander or trying the Safe-T-Planer on the drill press.

The back and sides are walnut, with very interesting pattern.  There’s some heartwood on the sides that I may try to incorporate.  I’ll have to avoid the knot, but there’s enough length to include or exclude the heartwood.

081112walnutsides.jpg

081121walnutsidedetail.jpg

The back wood is quite thick and a little warped.  I’m still not sure how to proceed with the thickness planing.  Do I try and relieve the warp first?  Or plane through the warp?  Hmm.

081112walnutback.jpg

081112walnutbackdetail.jpg

Guitar 805 – Doing some design

November 9, 2008

Geez, the bold button won’t turn off.  I’m not shouting, I promise.

OK, there it goes.  I’m applying water based lacquer to guitar 803 after the greening endeavor.  In between lacquer coats I have completed the construction of the side bending machine.  I’ve received the stainless sheets and silicon heating blanket, and the final step will be to build the guitar specific molds, in this case, a dreadnought.

I have also embarked on designing the binding, purfling, rosette, and headstock.  I took measures on my Taylor 12 string to see the differences between the dreadnought pattern and the 12-string guitar actuals.  As expected, the neck is wider, and the headstock is much larger.  Much larger so that I was worried I wouldn’t have enough neck stock.  The width at the tip of the headstock was of concern, and at 3.25″, my mahogany neck blank is just that, so I’ll have enough width, and length if I carefully build the neck stack to be “just right”.  In other words, I won’t have much room for oversizing.

Also, my sMg headplates aren’t large enough for a 12-string headstock.  I’ve got some Ideas about a chevron type design for the headplate, but will have to experiment to assure it doesn’t look too much like a clown suit. 

I’ve gone out on a limb to create a multi line purfling which won’t be too busy, but will be striking (I hope).  For the top binding it will be curly maple/brown white black purfling (see gallery).  The back strip is complementary to the purfling for the top (see gallery).  The back binding will be curly maple/ black white/ walnut back.  The sides will be curly/bw.  I’ll use a curly maple end graft and heel graft.  The rosette will be (starting from the outer ring)  BWB cedar BWB abalone BWB cedar BWB.

Still awaiting the delivery of the wood.  I have all the components for the rest of the guitar, and am ready to start upon receipt of the back/sides/top.

Guitar 803 – Greenbacks

November 3, 2008

Larry dropped by and we made greenbacks!  Oh yes, it’s green.

081103greenback.jpg

081103greensides.jpg

Guitar 803 – Gold!

November 2, 2008

I’m scrambling to be ready for Larry when he comes over tomorrow as I promised I would be ready to stain.  I really need to get the surface baby bottom smooth, and make sure I get any surface glue sanded away to ensure an even stain absorbtion.  I’m working with 100 grit paper to get all the rough spots levelled down and all the glue from the binding shaved off the maple surface.  In between sandings, I’m wetting the wood to expose where there are still glue patches.  The wetting also pulls grain up out of the interior of the wood to the surface, allowing further sanding and assuring of a completely smooth surface.

081102wetback.jpg

I found an old post where I documented the stain we will be using.  I say 75% green, 25% tobacco brown in a 65% solution (whatever THAT means!).  I think it’s this….if you use 10 drops in 2 oz. of water, then 7.5 drops green and 2.5 drops tobacco brown at 100% for 2 oz. water.  65% fewer drops = .65 x 7.5 green = 5.5 drops.  And .65 x 2.5 tobacco = 1.6 drops.  Make 10 oz. of solution with 28 drops green and 8 drops of tobacco brown.

I finished fretting the neck as well as post stain will be a sanding sealer (50% solution of KTM9) over the entire guitar body and neck (including frets).  Then I start the spraying of 100% KTM9 in 3 coats an hour apart, dry overnight, then repeat the 3 coats up to 12 coats, then let cure for one week before installing neck and bridge.  Oooh, it’s getting close!

081102fretting.jpg

Larry picked gold frets to go with his gold tuners.  They look pretty good!

081102fretdone.jpg

Here’s the guitar with the fretted neck dry fit.  I realized I have the inner ring of the soundhole rosette fully exposed, so had to insert a little BWB sliver in the top gap.  It looks OK!  Only I will notice that it’s not one continuous piece.

081102fretteddryfit.jpg

Guitar 805 – It’s a walnut and red cedar 12-string

October 28, 2008

It’s been decided.  My next guitar will be a 12-string dreadnought.  I’ve procured some red cedar for the top and walnut for the back and sides.  Since I’m getting this from an alternate source than LMI, it won’t be joined, thickness sanded, nor bent.  Hence all the activity trying to build a bending machine.  I’ve chosen curly maple for the binding and some interesting purfling and matching backstrip.

purfling.jpg

Second from the top will be the backstrip.

purfling2.jpg

4th from top will be the purfling.  I’ll bind the fretboard with ivory, use Grover Chrome mini tuners, and abalone shell rosette.  I’m going to also accent all binding both top and back with a B/W strip.

I have dreadnought plans, but I’ll need to build molds and forms for the bending machine for the dreadnought body size.  I’ve got a jumbo Taylor 12 string and I’ve been peering inside to see what adaptation to braces is warranted for a 12 string and the extra tension created with 12 string pulls vs. 6.  What I’ve seen so far is beefier braces and a thicker bridge plate.  I suspect a wider fretboard, but haven’t measured yet to compare to plan dimensions.

Larry’s worried, he thinks I’ll neglect his guitar to work on the new one.  I’ll try not to get distracted with new work.  I’ve got some sanding to do on Larry’s guitar, but now that the spray booth is ready, I’m very close to applying stain and beginning the application of lacquer.

Guitar 803 – Sanding and prepping the spray booth

October 28, 2008

Last night Larry came by ostensibly to play music, but I ended up recruiting him to help finish the spray booth installation.  I crafted a booth by building a platform (table) with 1/8″ plywood trifold with a range hood mounted on the top.  I measured for the location of the vent through the wall to the outside, drilled and chiselled it out inside the house and outside the house and had Larry feed the vent tube from the outside while I lined it up with the hood duct then duct taped it in place.

We spent the rest of the evening sanding and filing the neck (me) and sanding down the body (Larry).  Today, I finished crafting a device for hanging the guitar body and neck.  I designed so a dowel attached to the guitar or neck could hang and rotate.  Turned out perfect.  I’m so clever, and humble.

081028spraybooth.jpg

081028sprayneck.jpg

081028sprayneck2.jpg

I returned to working on the side bending machine.  I’m using plans from Luthier’s Cool Tools and referring to pictures from my guitar building workshop with Charles Fox (the purported inventor/designer of the side bending machine).

081028bender_0.jpg

081028benderblock_0.jpg

Guitar 804 – Compare the size

October 26, 2008

5 days until Halloween, and 9 days until we regain our freedom.  Been working once again on tools.  Got plans to build a side bending machine, and have been spending time doing that.  As well have been exploring what I should do for Guitar 805, whether it should be an OM or Parlor.  I’m leaning toward Parlor, but here’s a side by side comparison of the two to see the size difference.

081026compareomparlor.jpg

Guitar 803 – Glue on fretboard

October 20, 2008

Used my groovy laser leveller to sight line down the body of the guitar to the end of the fretboard all the way to the nut end of the fretboard, drilled 3 pilot holes in the fret slots and inserted brads to locate the fretboard on the neck.  Unbolted the neck, inserted the truss rod, put in the vise, then slathered just enough glue on the neck AND underside of the fretboard, taking care not to apply glue to the truss rod itself, lined up the drillled brad holes and inserted brads then………….wrapped it all up in my 35,000 inch rubber band.

01020neckband.jpg

081020neckooze.jpg

There’s a brad in the 2nd fret and two in the twelfth fret slot.  These holes will be hidden once the frets are pressed in.  I found a discussion board addressing the topic of when to apply lacquer to the maple fretboard:  before fretting or after.  Concensus is after.

081020necklarry.jpg

Larry wonderz:  “That’s a neck?  It looks more like a ladies shoe, but these aren’t my regular glasses.”

Guitar 804 – Top Bound

October 19, 2008

Pulled the tape (and unfortunately, a bit of spruce grain, but that will sand out) and have a top bound guitar body ready for scraping.

081019topbound.jpg

Guitar 804 – Binding and Purfling

October 18, 2008

Just 18 more days until Barack Obama is elected.  Wish it was tomorrow.

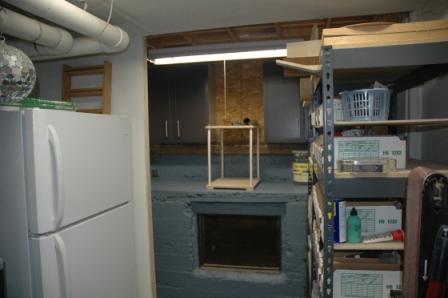
I pretty much completed my workshop remodel on Friday.  There’s still a lot of cleanup and organization to do, and maybe Carol will help me with that tomorrow.

081018workshop.jpg

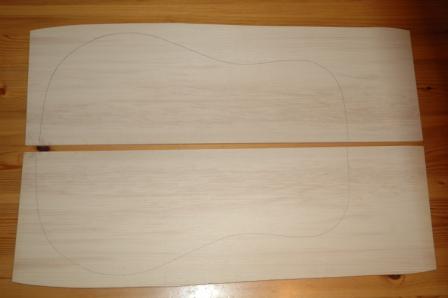
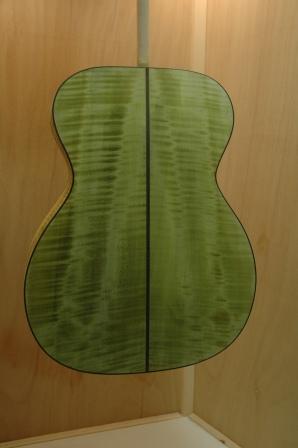
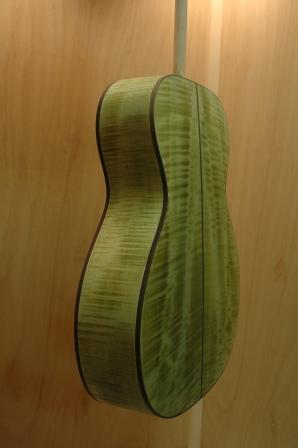
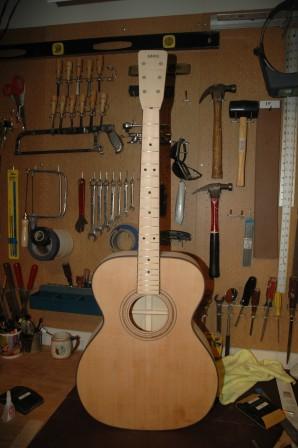
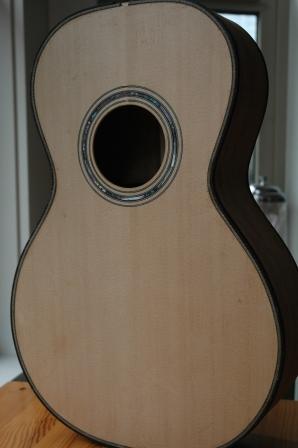
When I have multiple projects going on at the same time (like the Koa Parlor, the OM Maple, and the banjo rejuvenation) I work on the one that is the most fun.  And, I really like putting on the binding and purfling.  So even though Tom is wondering when his banjo will be done, and Larry is patiently waiting for his maple OM (which I will call the Hulk), I gravitate to the Koa Parlor as it is in the phase I enjoy the most.

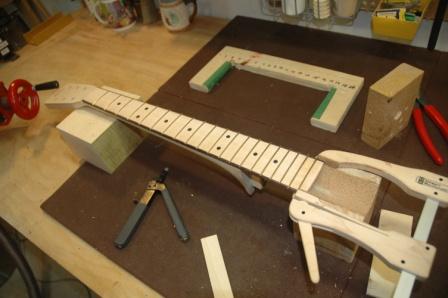
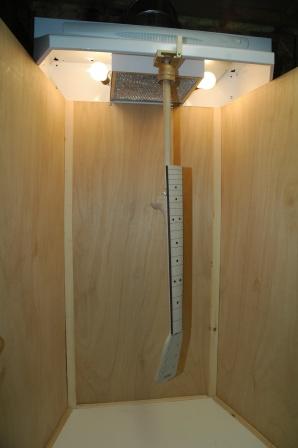
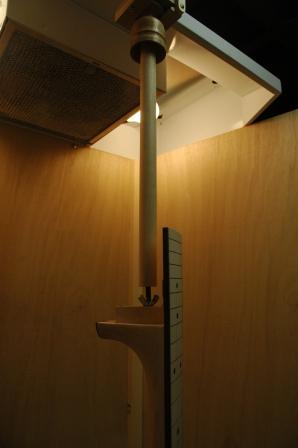
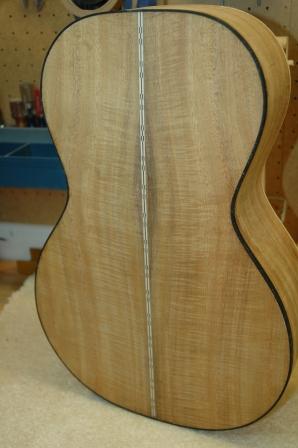
Spent a lot of time ensuring I had the right depth and height for routing the channels, and tackled the back first.

081018bindingback.jpg

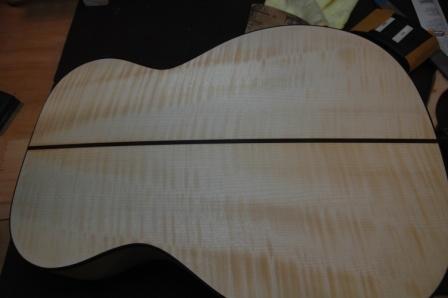
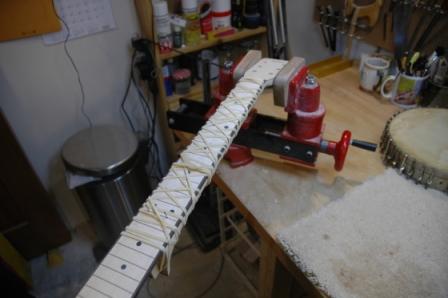
Preparing for the gluing is key.  Get all those binding tape strips ready, square off the ends of the binding, slather on the glue, and get going.  I’m always a bit sore in the forearms after applying the binding tape as the tight fit between binding and body is essential, so I really bear down on the tape as I’m putting in place.

081018backbound.jpg

It doesn’t need to be taped long, maybe a couple of hours, but I left for at least 4 hours before removing tape.

081018back.jpg

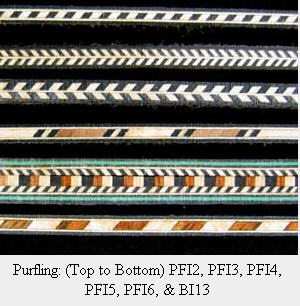
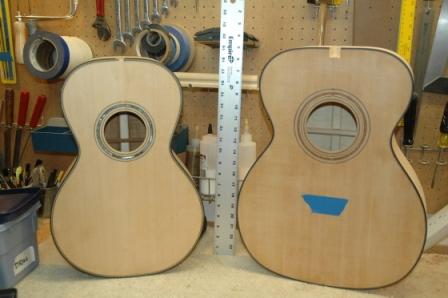
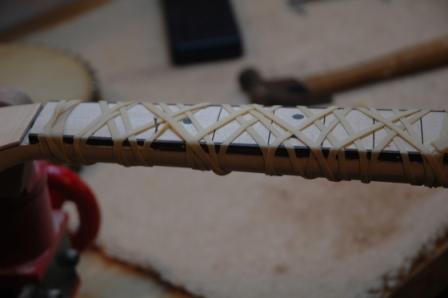
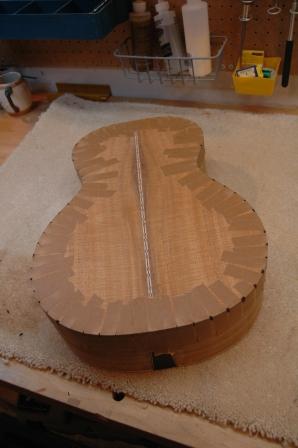
The top is a bit more complicated as it is binding and purfling.  The purfling is the decorative strip between the binding and the top.  It requires two channels carefully routed.

081018topandpurfling.jpg

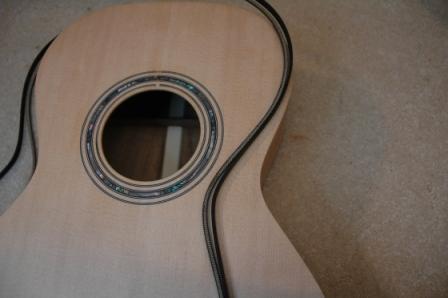
This side is quite a bit messier than the back, making sure to get all the glue in all the faces that need it:  in the channels, between the binding and the purfling.  I prefer too much glue to ensure that glue gets everywhere it’s supposed to.  I don’t want any gaps, and missing glue spots can allow gaps to open up.  Again, taping is more difficult than the back, and keeping up with the drying glue and getting everything pressed firmly together and against the top while pulling down the tape is a bit tricky.

081018topbound.jpg

Tomorrow, I can remove the tape and start scraping.  But….maybe I’ll work on the banjo and the maple OM to keep my boys happy.

« Prev - Next »