Archive for the 'Guitar Building Logs' Category

Guitar 1001 – Pore Filling

March 11, 2011

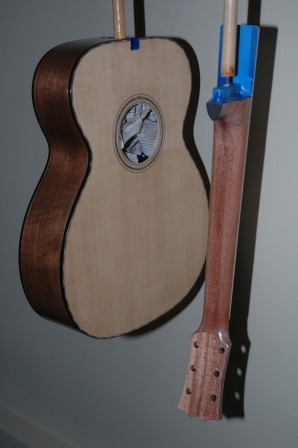
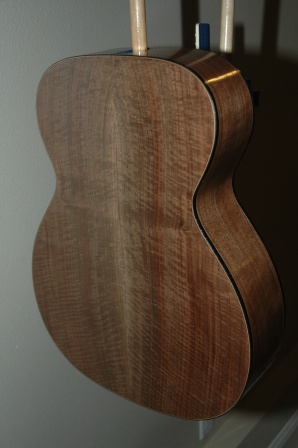
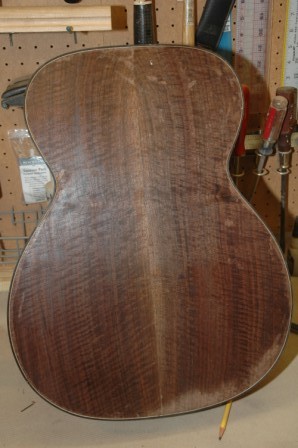
I have applied the first coat sanding sealer to Guitar 1001 in preparation for pore filling.  Today I will apply the pore filler first coat.  For the uke and the OM Walnut under construction, I used Z-Poxy as the pore filler with results that were not fully to my liking.  Although Z-Poxy is appropriate for pore filling, the application and knock down are difficult and time consuming.  Hearkening back to my lazy disposition, and not enjoying the whole knock down process, I will use a more traditional pore filling product, Chemcraft Pore Filler from LMI.

I ordered a pint of Chemcraft, colored Medium Brown, appropriate for koa, and it arrived earlier this week.  I have used Chemcraft on previous guitars with good results, but this time I’m determined to get exceptional results.  I learned from my previous forays with Chemcraft that one application is not enough:  the pores get semi-filled with one application, and two or more will be necessary to get mirror finish results (or full pore filling).

The online instructions from LMI are extensive for Chemcraft.  To gather my thoughts, I’ll recap here for you instruction geeks, and to set a roadmap for my work today.

1.  1 coat of sanding sealer (lacquer), thin.

2.  Apply with cheap bristle brush, across the grain.  “Hide” the wood under the filler.

3.  Blot or poke filler into pores with bristle brush at 90 degree angle.

4.  Wait until 70% of shine is gone and filler hazes over.  (Guess I’ll need my attenuated shine goggles for this measurement).  Instructions say 5 to 20 minutes.

5.  Remove excess with a squeegee into another jar (can be reused) at a 45 degree angle to the grain.  I have some bondo squeegees that I’ll give a try.  Some builders use old credit cards, etc.

6.  Any thin layer of filler left behind after using the squeegee can be removed with burlap or sanding after 12 – 24 hours of drying time.  Burlap can also be used 30 minutes after squeegeeing.  Rub across the grain.

Proper application can result in a one coat only experience.  If a second coat is necessary, it will be evident after sanding the dried pore filler.


Guitar 1002 – Cutaway Binding Examples

March 11, 2010

Yesterday, a customer came into the shop for a truss rod adjustment.  His guitar, an Ibanez cutaway, is an example of the approximate construction for Guitar 1002.  I took a few pics to document how the binding and fretboard and heel all come together.  This will give me some reference as I start to dimension the heel and the heel block.

Note that the side comes in and under the edge of the fretboard.

110311cutawayex3

The heel is square and meets the body flush with the binding.

110311cutawayex1

I may take that approach, but I may also consider tapering the heel.  I understand the squared heel aesthetic, as it also creates a smooth transition for the hand where the body and heel meet, rather than having an abrupt corner where the heel tapers back from the body.

This also informs me as to the width of the heel block inside the guitar.  What it also does is scare the shit out of me when it comes to creating nice binding channels around the cutaway/fretboard/heel junction.  I’ll need to carefully consider the whole binding channel preparation sequence given the spanish heel construction calls for attaching the top to the neck before inserting the sides.  I think I’ll have to get some mad chiseling skills in place.

Guitar 1002 – Neck Work, Spanish Style

February 27, 2011

Took some time today to advance the work on 1002’s neck.  As it is a Spanish Style neck, slots need to be cut at the 14th fret for body side insertion.  Two slots are cut (perpendicular, as there is little body arch at the neck) on either side of the neck, leaving 1″ of stock between the bottoms of the slots.

110227spanishslots

The slot on the cutaway side will have a small blank inserted to meet the cutaway side at a 90 degree angle.  Thoughts of binding and purfling in this tight little area have me wondering.

The neck profile has been marked and cut off in the bandsaw, leaving the neck at the approximate width, tapering up from the nut toward the heel.

110227profiledfront

110227profiledback

The block piece of the neck which is inside the guitar body will be trimmed down to allow the cutaway to run under the fretboard and flush.  That cut will wait until the sides are bent and ready to be installed to the top and neck.

Guitar 903 – Art Institute Design Fair

February 24, 2011

Devin is a student at the Seattle Art Institute studying Industrial Design.  His apprenticeship with me is a graduation requirement.  He and I have brought his guitar nearly to completion.  It’s finished enough to take on the road and display at his department’s grand opening party.  Students in the Industrial Design program will be displaying work from their portfolio, Devin’s being this guitar.

We just completed doing the pore fill step which precedes the final lacquer application.  We used Zpoxy as the pore filler, and it is just now dry enough to allow the guitar out of the shop and to go on display.

110224porefilled

110224backporefilled

Devin was scheduled to come by last night and prep the guitar to bring to the design fair, yet we were hit by a snowstorm which slowed things down and actually closed my school today.  I prepped the guitar this morning and will take it down to the fair for display.

I removed all the masking (which will have to be replaced before lacquer spraying), installed the tuners and bolted on the neck, and taped on the bridge temporarily.  I slapped an sMg sticker on the case (for marketing purposes), and stuffed a polish rag and some scotchbrite into the case compartment to give Devin an opportunity to demonstrate his buffing skills during the fair.

110224assembled

110224backwithneck

110224incase

Devin has accumulated enough hours to fulfill his apprenticeship, and we’ll work out remaining shop sessions to finish guitar 903, which coincidentally, has been transferred to Devin for his own.

Sanding Sealer

February 15, 2011

The spray odyssey begins.  One coat of sanding sealer (lacquer) before applying the pore filler.  The walnut OM color and grain is jumping out even with one coat.

110215topsealer

110215backsealed

The bubinga uke got the first spray treatment.  Some imperfections revealed themselves, but should be hidden once the 12th coat of lacquer gets applied.

110215ukesealed

The koa dreadnought is awaiting further sanding.  I am going to sand this guitar way too much vs. previous attempts to sand too little.

Flurry of Activity on the Horizon

February 13, 2011

The stage is set for the dreaded retreat to the spray booth.  Spraying lacquer is a process which is a whole lot of setup followed by very brief spraying sessions culminating in a necessary yet dreaded cleanup.  It behooves one to have several guitars ready for spraying at the same time.  I have delayed spraying the koa dreadnought to get the walnut OM and the bubinga tenor uke ready for spraying as well.  That’s three instruments staged for spraying at the same time.

I have traditionally used nitrocellulose lacquer, with excellent results but questionable effect on my respiratory system.  Even though I use a vented booth and a respirator mask, I have experienced deleterious effects from the nitrocellulose.  This round of spraying will employ a water based lacquer, KTM-9.  I have used KTM-9 in the past, and applied it with a brush, and the results were good, yet I anticipate the spray application to be excellent.

I have had mixed results with the pore filling steps, and this time am committed to ensuring the pore filling will be immaculate regardless of how many applications I need to fulfill a mirror surface on the back, sides and neck.

The proposed steps are:

1.  One coat of lacquer sanding sealer

2.  Several applications of pore filler, until smooth

3.  Sand until smooth without penetrating sanding sealer

4.  3 coats of lacquer applied every hour

5.  Cure 24 hours, scuff sand

6.  3 coats (that makes 6), cure 24 hours, scuff sand

7.  3 coats (that makes 9), cure 24 hours, scuff sand

8.  Determine need for 3 more coats or proceed to finish

9.  After 2 weeks of cure, progressive sanding, starting with 400 through 1200 wet sand

10.  Buff

These steps precede attaching the bridge, bolting on the neck and moving to final setup (fret dressing, nut and saddle shaping, install tuning machines).  Based on this schedule, I am about 3 weeks away from completion.

Spraying is a lot of hurrying to wait.  I can fill the gaps in time by continuing on construction of the hybrid Macaferri and the koa tenor uke.  Next week I will be receiving a cutaway ram to install on my side bending machine.  I have also devised a use for this ram on a side bending machine built purposely for uke sides.  Since my current machine is too large to properly bend uke sides, I am constructing a bending platform which will use the cutaway ram for the waist bend for uke sides.  Pictures coming later.

Guitar 1002 – Building Bending Molds

February 6, 2011

The Macaferri body is new to my arsenal, and so is a cutaway.  I needed to build bending molds and build or procure a cutaway ram for my bending machine.  I located a fairly inexpensive ram from Bluescreek out of Pennsylvania, and it should arrive by the end of the week.  I’ve also got a good idea about using the ram for a uke side bender, as the full sized bender is too restrictive for the small sized ukes.

Doc2

Using the Mac plans, I created an acrylic template, then transferred 1/2 (the side without the cutaway) to birch ply.  I cut out 6 half plates, 3 for the regular side, and 3 for the cutaway side.  I finished one of the half plates a wee bit smaller than the actual size, and used it as the master for replicating the other 5 using the router table.  I assembled the non cutaway half first using existing spacers and 3/4″ dowel.

110205bendingmold3

The master was then trimmed to emulate the cutaway shape, then the remaining two plates were trimmed on the router table.

110205bendingmold2

The dowels are secured with titebond and CA.

110205bendingmold1

Guitar 1002 – Neck Heel Profiled

January 23, 2011

The heel profile and neck thickness have been cut using a band saw.

110123neckprofiled

Next, a slot will be cut at the 14th fret for the sides to be inserted into.  Then, the neck will be tapered to dimensions of a steel string neck profile.

Guitar 903 – Binding complete

January 23, 2011

Devin and I have completed the binding of the body and the fretboard.

110123stilllife

The body was bound with ebony and BWB purfling.  Additionally a brown/white/black rope purfling was used for the top.

110123backbound

The back is shown with naptha towelled on, which cleans, brings out the color, and indicates where excess glue needs to be sanded off.

The fretboard has been bound with ivroid.

110123fbbound


Guitar 1002 – Fitting Tuning Machines

January 17, 2011

I used the router table to smooth away the divots from drilling out the head slots.

110117routedhead

Final smoothing will be done after tuning machine holes are drilled.  To ensure the holes are spaced properly, and equally balanced from side to side, I built a jig to direct the drill, locate the trio of holes, and prevent tearout upon exiting the headstock into the slot.

110117tunerjig

It’s a bit crumbly, as part of it is MDF.  I may rebuild with birch ply if I need to use it again sometime in the future.

Using the jig, I was able to drill holes, avoid major tearout, and dry fit the tuners to check appearance.  The top drums will need to be trimmed as they bang into each other due to the narrow profile on top..

110117backmachines

110117frontmachines

« Prev - Next »