Guitar 804 – Neck ready for schmeckling
July 20, 2008
OK, it’s been a bit since I wrote, but I have been busy. I received the spruce top and sought out the best side and position for the top orientation. Penciled in the form, and it’s ready for bandsawing.
Attacked the neck some more, sanding down and flattening the fretboard surface, and using the L. Friend for bringing the neck/headstock pieces fully square. I also rerouted the truss rod channel as inserting the graphite strips narrowed the original channel.
Guitar 804 – I went to the table, and I sawed
July 13, 2008
I went to Carl’s house on Vashon, and I worked with him and his table saw and I found God. A table saw is the holy grail of woodworking. I covet the saw. I need the saw, but yea, I have not the room. I will make the room, I will find the room, I will build the room if necessary, but I will have the table saw. Some day, some how (should those words bump into each other?).
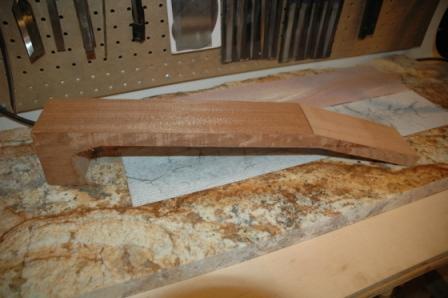
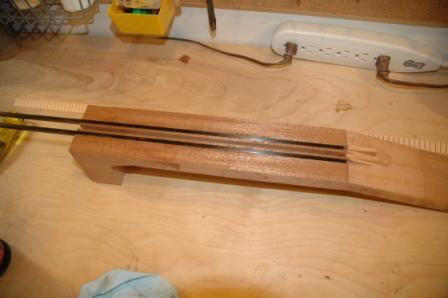
So, I channeled the mahogany neck for the koa to accept graphite rods and the truss rod, and I milled a whole shitload of bracewood, both mahogany and spruce. It was fun, it was dusty, and it prepped me for epoxying in the graphite rods and such (such? what’s that mean?).
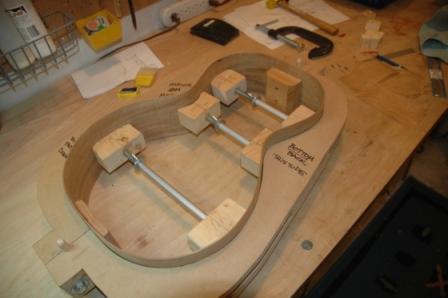
Here’s the end result of the graphite rod channel, and even though the rods are a bit over the surface, I think I can sand down the graphite quite easily even though I’ve not worked with it yet.
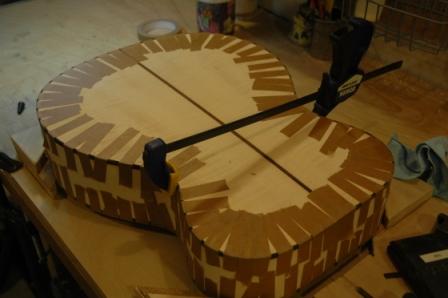
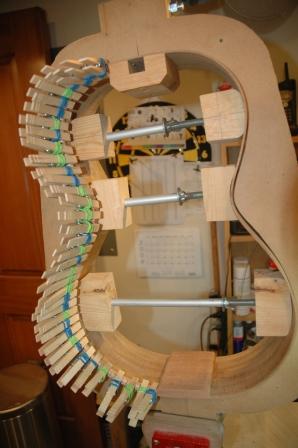
I also did the kerf install on the top for this guitar. Oddly, I love to kerf. I’m looking forward to making my own kerf lining someday, even though it seems something best left for someone else. If I want to use the Fox version of kerfing, the one which contributes to the side shaping, I’ll have to make my own kerf. I’ll keep it in mind.
I’ve got one more picture. What is it? Let’s go see.
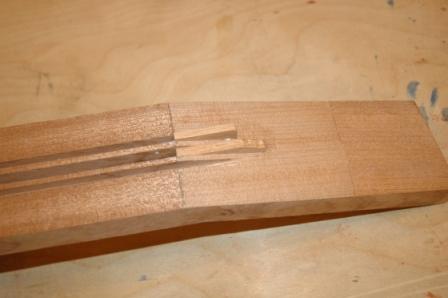
Oh yeah, I’m going to insert little laminated pieces of mahogany into the slots I made for the channels. Then I’ll chisel down and flush up before gluing down the headstock veneer. I was going to install the graphite rods in the maple neck, but I already trimmed the neck back and didn’t leave myself a square surface for channeling. Since I have inserted a rosewood laminate center, I’ll depend on that to keep the neck from twisting and warping (the purpose of the graphite). Only time will tell. Larry will call me when his neck goes south. Iris’s neck will maintain its integrity for time immemorial.
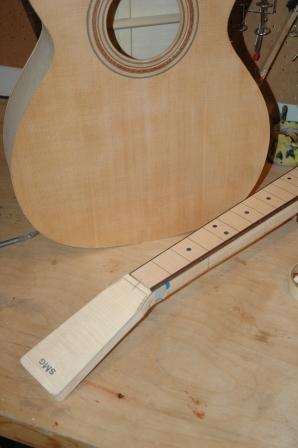
I also have mentioned before, but it begs mentioning again, I’m going to use a spruce top for this guitar, not the mahogany I originally planned. Mahogany should not be used for tops. Carl mentioned that to me in an aside whisper. I’m glad I came to this conclusion before it was too late.
Cheers.
Guitar 804 – Neck cut jig, glue in the blocks
July 13, 2008
Taking a cue from Charles Fox, I built a jig for cutting the headstock piece off the neck blank. Being the conservative I am, I used MDF scrap from the previous mold construction.
Did have a small problem with the fact the neck blank was a skosh out of square. Minor issue that will resolve when I trim down the headstock and carve the neck.
Trimmed the sides, glued in the butt block and the neck block (newly purchased from StewMac).
As I look more and more at the mahogany top piece, I’m thinking the top should be spruce.
Once Again – I’ve changed my numbering scheme
July 13, 2008
Time and time again, especially when writing an entry here, I stumble on my guitar numbering scheme. Bottom line, I don’t like it. So, I’ve changed it again. First digit, year, second two digits sequential from 01.
My first guitar, the 000 Mahogany, is now 801.
Rosewood OM – 802.
Maple OM – 803.
Koa Parlor – 804.
Guitar 0208 – Plan of attack
July 9, 2008
- Continue to sand in stages. 220 – 440
- Move to next stage 600 – 1200 – buff
- Clean up neck/fretboard/body lacquer valley of despair
- Clean up back brace glue squeeze out
- Clean inside of guitar / blow with compressed air
- Fill headstock chipout
- Level frets
- Install bridge
- Do a little dance, make a little love, get down
Guitar 0308 – Plan of attack
July 9, 2008
- Build jig for slotting neck for install of graphite rods
- Trim headstock veneer
- Build routing jig for neck tenon and body mortise
- Build bench end guitar body vise
- Sharpen/burnish scraper
- scrape sides, fair and square
- install binding
- Route neck / body after determining neck angle
Guitar 0408 – Plan of attack
July 9, 2008
OK, rather than run down into the shop and start working on whatever I bump into, I’m compiling a list, by guitar of what to tackle next.
- Bend the side waist tighter using bending iron
- Cut sides
- Glue in butt block after checking square, dimensions, and radius
- Glue in neck block after checking dimensions and recording distance between holes in mortise
- Trim down the spreaders
- Make a rosette jig
- Cut the rosette channels, use teflon strips, remove, install abalone, flood with super glue. Don’t forget the vinyl sealer
Guitar 0308 – Headstock veneer installed
July 8, 2008
I prematurely glued down the headstock veneer on the maple neck. I say prematurely as I purchased graphite rods to set into the neck, and the presence of the headstock veneer will make the channel routing all that more difficult.
Maple necks are notoriously heavy and prone to movement or warping. The introduction of graphite rods (2, either side of the truss rod) will reduce the neck weight and give it stability to prevent future movement of the neck.
I’ll need to build a jig for sawing the slots before heading out to Vashon to use Carl’s table saw. Even with that, I will run short of the desired length of the slots, as I’ll run up against the headstock veneer. I’ll probably need to finish off the channels with my Dremel, which for a short distance, will work well.
My next challenge is routing out the tenon channel in the body and creating a matching tenon on the neck with the proper neck angle. O’Brien has a nice jig example, and I can apply the knowledge of setting neck angle from my ASL workshop.


