Guitar 1001 – Binding done, scraping begins
November 16, 2010
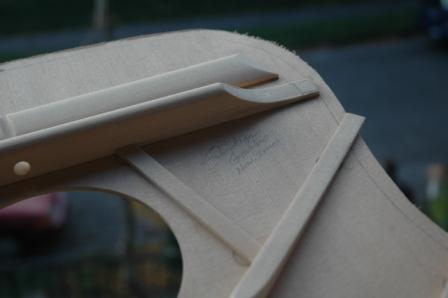
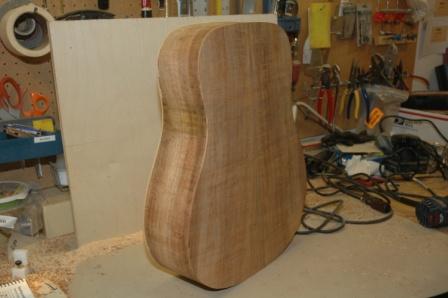
The binding has been installed.
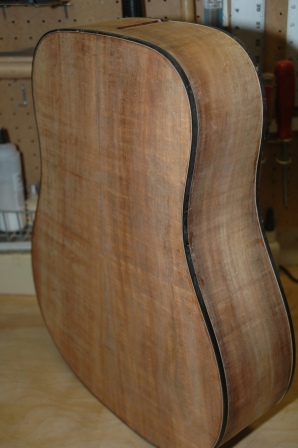
Now the scraping and shaping.
November 16, 2010
The binding has been installed.
Now the scraping and shaping.
November 11, 2010
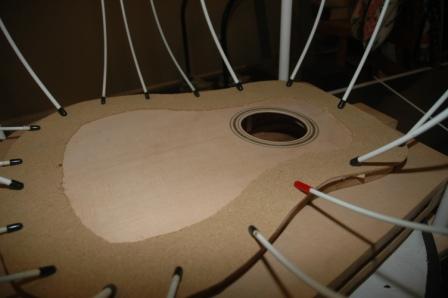
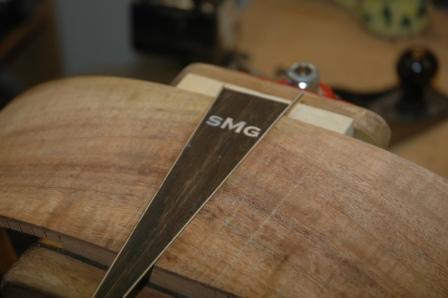
Routed the channels in the body back and top for the binding and purfling. Used a rubber band wrap to pull bindings in and hold secure.
November 7, 2010
Wow, that extra hour of sleep really helped. I’ve made excellent progress on the koa dreadnought today, and it’s just a few steps away from being a real guitar.
I finished up the brace shaping, sanding and cleaning up both the top and the back before installing. It’s tradition to sign the inside of the top before gluing.
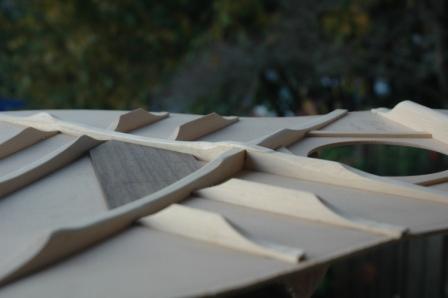
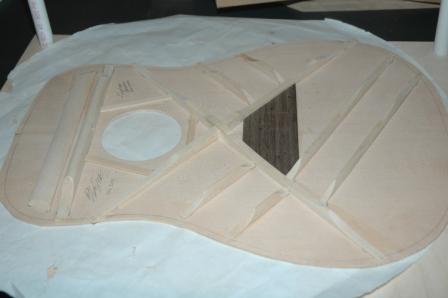
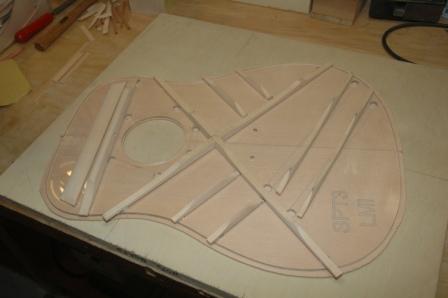
The dreadnought employs scalloped top bracing, as shown here.
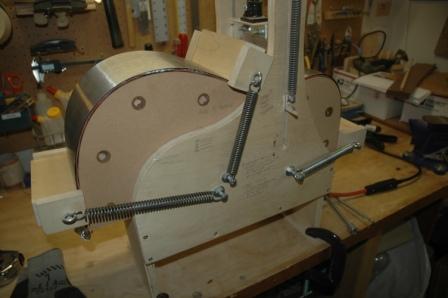
The first step before installing the top and the back is to notch the sides where the bracing and tone bars pass through the kerf. Much care is taken to keep the plates centered while marking the notches for the braces. After notching, renotching, checking and rechecking, both the top and back are fitted and ready for installation.
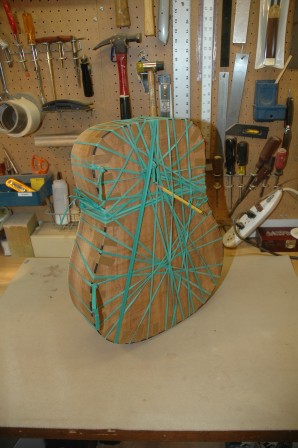
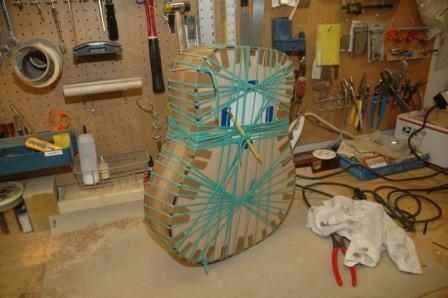
First, the back is glued on, then side grafts are added to ensure the sides resist cracking along the grain lines (over time).
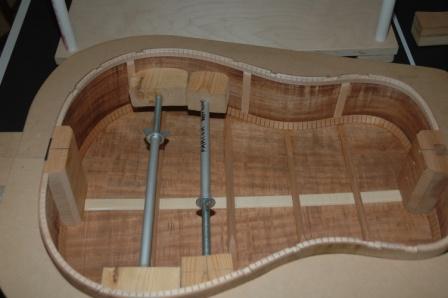
The spreaders are removed and the side grafts are glued in. One of those spreaders remained (the smaller one) as the sides came in a wee bit when all spreaders were removed. The small spreader can be removed through the soundhole after the top is on.
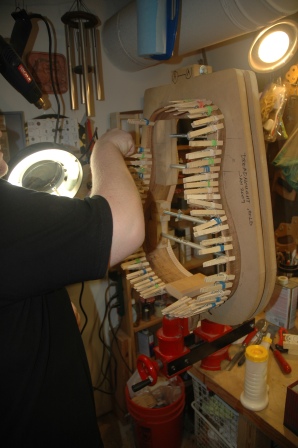
After a few hours curing, the body is removed from the gobar clamping system and the overhang from the top and back can be removed with a router using a bearing bit.
I’m continuing the slow process of radius sanding the fretboard. As soon as I have shimmery MOP throughout, I’ll finish off with fine paper and a buff before cutting the taper.
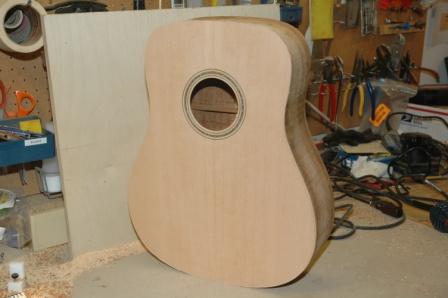
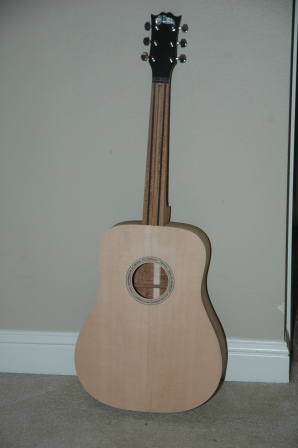
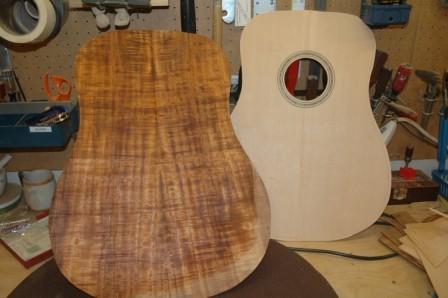
Finally, a little preview of the guitar before installing the binding.
November 5, 2010
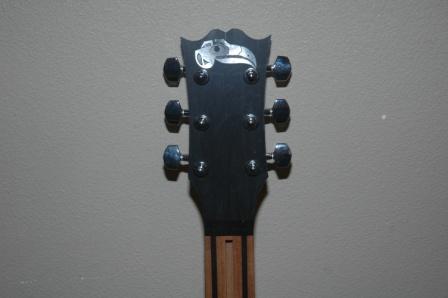
I settled on a shape for the headstock and cut it out on the bandsaw. Also drilled tuning machine holes, then dry fit tuners for a look see.
October 30, 2010
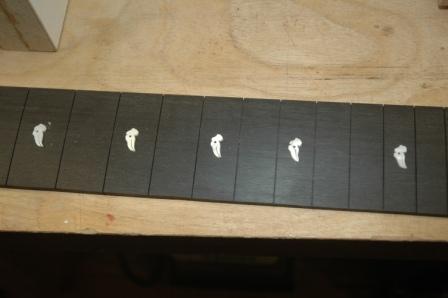
The ravens have been epoxied into the fretboard. 24 hours to dry before smoothing down.
This picture shows the shell glued to the fretboard surface. The pieces were traced with a scribe, then removed with a blade. A dremel is used to chew out the recess, then the shell is installed with oodles of epoxy.
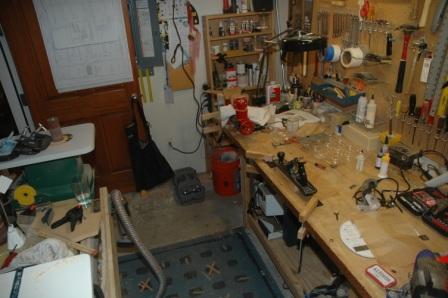
I’ve been flitting between working in the garage with power tools and the workshop, and I have been conducting myself in old ways. The shop is a mess, and tomorrow is feng shue day.
October 28, 2010
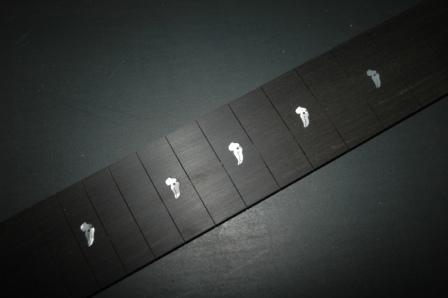
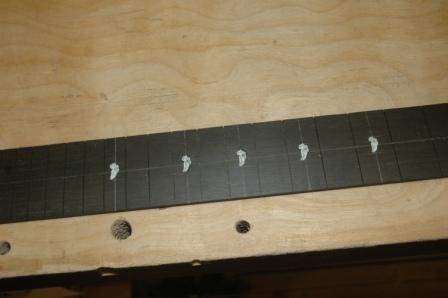
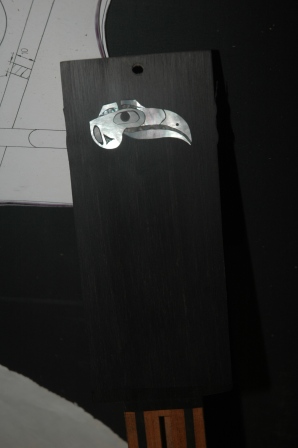
I’ve cut MOP fretmarkers in the shape of the raven used in the headstock. I shrunk the original tracing glued to MOP and sawed out. Here’s the original headstock inlay.
The fret markers have been laid out on the fretboard (upside down) to check for visual spacing.
Bracing is complete, just need to do some detailed sanding and shaving with a wee bit of tap tuning before notching the sides to accept the back and top.
October 22, 2010
Installed the butt graft today. After trimming back I can install the back and top.
October 16, 2010
Bracing is underway. Spruce for the top and mahogany for the back. Using the table saw, all pieces were cut. Those needing a radius were preshaped on the belt sander then finished in the radius dishes. I used the oscillating drum sander to pre shape the end tapers and scallops, then the belt sander to round over. Each brace is essentially its’ final shape. I’ll use a chisel to bring each brace down to finish size and shape.
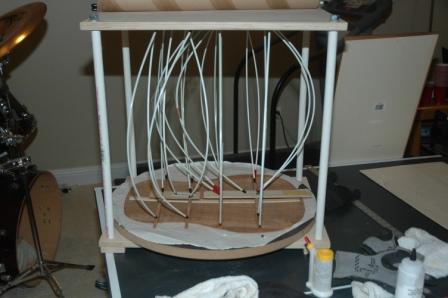
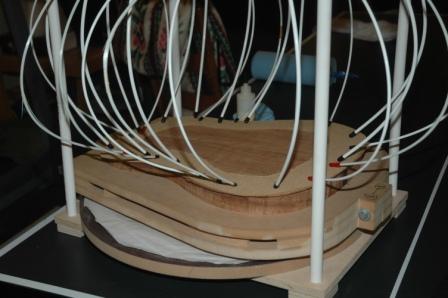
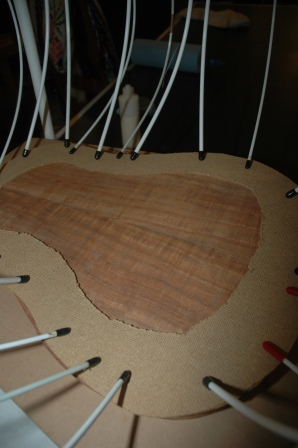
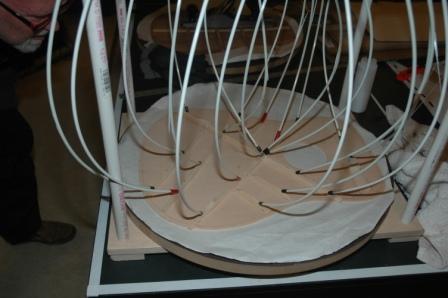
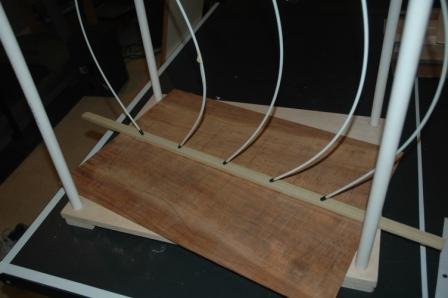
The go bar clamping system is used to attach braces. Note the plate is sitting in a radius dish.
I use an acrylic template to layout my bracing before transferring to the top.
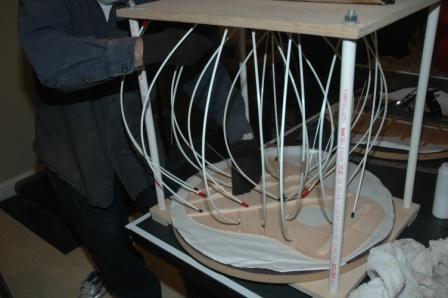
Fiberglass rods provide plenty of clamping power. Gloves are employed to avoid fiberglass splinters.
The sides have been kerfed and radius sanded and are ready for back and top attachment.
October 8, 2010
I now have an apprentice. Devin is learning while helping with construction. Tonight we made good progress on the box construction. Starting Wednesday we started with the side bending.
After the sides spent sufficient time in the bender, they were removed, trimmed and inserted into the body mold. The neck and butt block were glued in and clamped.
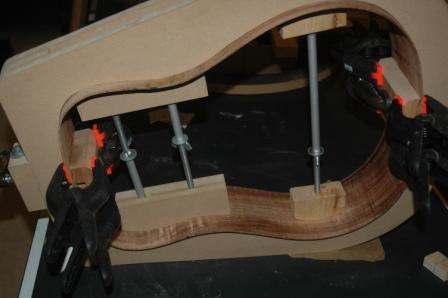
Again, after sufficient drying time, the clamps were removed and kerf installed.
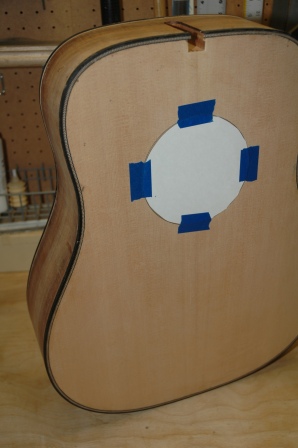
The back and top were futher sanded and scraped, the soundhole was cut from the top, and the backstrip installed.
Finally, the back and top plates were trimmed in preparation for bracing.
October 3, 2010
I have thickness planed the sides down to .108″. I still need to get them closer to .090″ before I send them off to the side bender (me, I’m the side bender). Once they are an acceptable thickness for bending, I can start the bending, end block, neck block install, followed by kerfing.
Back and top braces still need to be cut from stock then radiussed before installing.
