Archive for the 'Guitar Building Logs' Category

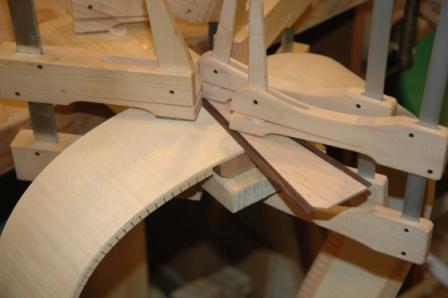
Guitar 0308 – Back brace shaping and neck block cutout

June 1, 2008

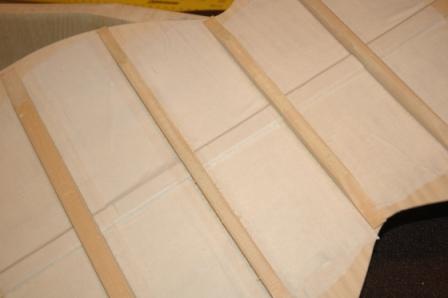
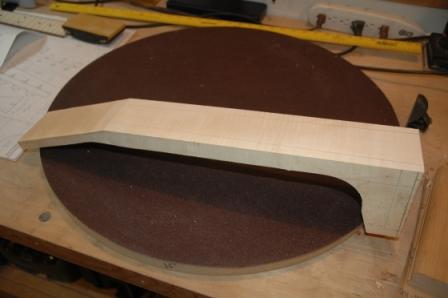
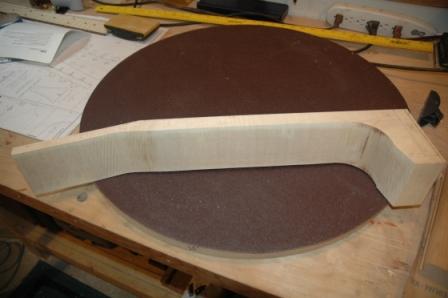
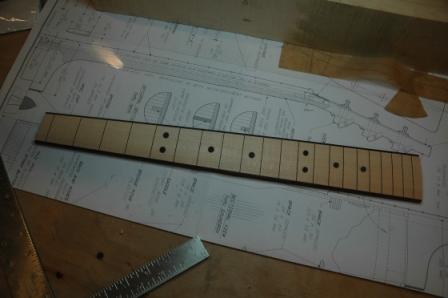
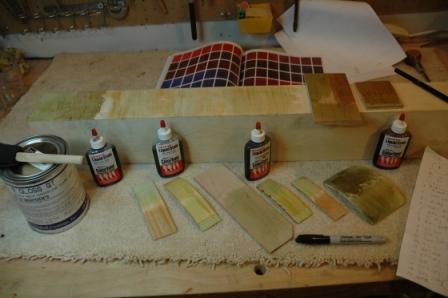
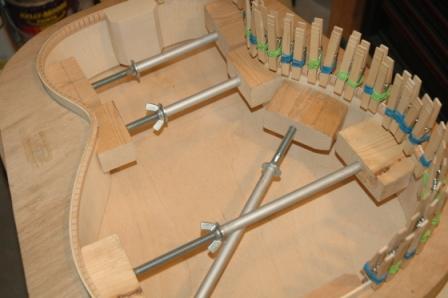
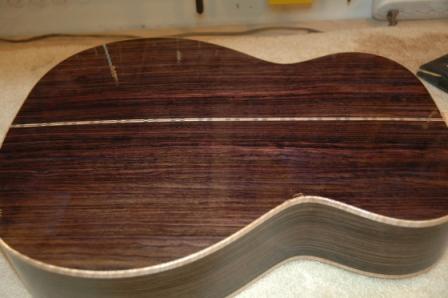
Still haven’t moved on the finish on the OM Rosewood.  I’m too distracted by working on this maple.  I worked a bit on the back brace shaping, then moved to the cutout of the neck pieces from the humongous maple neck block.  The piece was large enough to craft two necks, and I’m glad there was as the first cut ended up with a headstock too thin and out of square.  Second go around of the cutout resulted in a near perfect, and square, neck cutout.  This is just the first part of an adventure I’ve not yet embarked upon.  I’ve got the tools and plenty of advice from the O’Brien DVD, the K. book, and the Cumpiano book, where I should have a modicum of success, if I take my time.

Maybe tomorrow I’ll take a break from the maple and get on the finish work for the next 3 lacquer coats for the rosewood.

080601backbrace.jpg

080601neck.jpg

080601neck2.jpg

Guitar 0308 – What’s wrong with this picture?

June 1, 2008

Happy June everybody.  Clearly no one is paying careful attention, or you think my way is the right way.  In yesterday’s post, I showed two examples with fret dots set on top of the fretboard to see which looked better:  without the 3rd and with the 3rd.  But nobody called me a bonehead because I showed dots on the 14th and 16th instead of the 15th and 17th.  Mixolodian.

Anyway, fret dot placement exposes my dyslexia.  I’ve installed on the 11th (my Spinal Tap Dot) and offcenter and too deep and akimbo.  Just getting all the wrong possibilities out of the way.

Guitar 0308 – Hey Larry, yes 3 or no 3

May 31, 2008

Long day in the workshop.  I put the sides back in the mold after I redesigned the mold and installed 3/8″ bolts in the end clamp areas for a sure fit.  The black dots for the fretboard arrived, and I laid them out to see how they looked.  I like both, but will defer to Larry which he wants.

First, with a fret dot on the 3rd fret.

080530yes3.jpg

Next without the 3rd fret dot.

080530no3.jpg

Of course, any fret dot config would be fine, just let me know.

Guitar 0108 – Should I sell it?

May 31, 2008

It’s getting to the point where I can actually think of selling the guitars I am making. Yes, I’m very attached to my first guitar, and I love how it sounds and plays, but maybe, depending on how well number 2 sounds and plays, I’m ready to let it go. Anyone out there interested in a conversation about buying one of my guitars?

zfinished.jpg

Guitar 0208 – This weekend I’ll phase through the finish

May 31, 2008

This weekend, I’ll tear myself away from the OM Maple and apply lacquer finish to the OM Rosewood.  It already has 3 coats on the back, 3 on the top, and I’ll apply the third to the sides and neck.  After the third coat, it’s a progressive sand back to smooth, then 3 more coats.  I’m advised that even though the sanding process is tedious, I should not phone it in, as a good job here pays off down the line.  Yeah yeah yeah.  I just need to get my head around sanding, and do it, and do it right.  I’m really very close to wrapping up the second guitar, and I’m looking forward to how it sounds.

Guitar 0308 – Kerf, radius, side brace, tail wedge

May 30, 2008

Installed the kerfing, radiussed down to the sides, created a rosewood/maple/rosewood tail wedge and rosewood/maple/rosewood side bracing.  Glued and trimmed and I’m ready to move to the top bracing.

080530endpiece.jpg

080530endandside.jpg

Guitar 0408 – Scrap Koa is my friend

May 28, 2008

LMI hasn’t yet filled my order as the Koa back and sides have just come out of the kiln and are curing before being available for tonewood. As I am building a Parlor (very small), there will be a considerable amount of scrap from the back when they profile for the parlor shape. I contacted LMI to ensure that I get that scrap, which hasn’t been the case in the previous two guitars ordered from them. They assured me the scrap would be included in the shipment. I figure the profiled back is about 60% only of the starting bookmatched koa back pieces, so the amount of scrap will be substantial.

Guitar 0308 – Stain Color

May 28, 2008

Larry came by and we experimented with water based color for staining his maple guitar. He wants green. We used Stewart McDonald Colortone water based stains, bright green, amber, tobacco brown and mahogany red in varying concentrations and percentages. Finally, a 75% green with 25% tobacco brown at 65% dilution turned out to be just the color we were looking for.

It’s the one on the big hunk o’ maple farthest to the right, but left of the scrap sitting on top.

080527stain2.jpg

The colors aren’t true in these photos, but you can see the variations we came up with using different combinations of the 4 basic colors.  Oddly, the mahogany red tended more toward brown than the tobacco.  With the 65% dilution we were able to retain some of the whiteness of the wood, avoiding the loss of the maple quality.  It’s still going to be green though.

080528stain4.jpg

Guitar 0308 – Radius fretboard and install kerfing

May 27, 2008

I’m doing my famous two guitars at once routine, which is actually working out quite well.  This allows me to slowly proceed on one guitar, waiting for things on it to dry/cure/settle, then move on to the second guitar and advance through it’s dry/cure/settle phase.

The Maple OM top sides have been sanded in the 30′ radius dish and kerfing applied.  The neck and tail block have nicely settled in from the sanding, and the kerfing process is a no brainer for me now.  Once the glue dries, I will radius sand again to bring the kerfing down flush with the sides for the top.  Then I’ll turn it over and proceed with the planing of the back sides down to the rough shape before using the 15′ radius dish for final sanding before kerfing the back.

080527kerf.jpg

I thought it was going to be a chore to get the fretboard sanded down to the 16″ radius, but with my radius sanding block, it went fast, and it looks great.  I have ordered black plastic dots for the maple fretboard and will finish the fretboard surface with a spray lacquer (and I think before I install the frets).

080527fretboard.jpg

Guitar 0208 – Finish

May 27, 2008

I am proceeding with the brush on lacquer process and have applied 2 coats on the entire guitar.  I got sloppy, I made streaks, I left globules, all due to haste.  I sanded back these first two coats on the back only, then applied a coat of lacquer with only a few smooth brushstrokes, applied a bit thicker than the last applications, and did the back only.  This is a test to see the results of this technique.  If appropriate, I will then do the sides, wait until dry, then repeat for the top and the neck, in that order.

080527backlacquer.jpg

« Prev - Next »