Archive for the 'Guitar Building Logs' Category

Guitar 1002 – Headstock Slotting

December 26, 2010

Located slot position on headstock and drilled out holes (smaller than 1/2″) in preparation for head slotting.

101226headslots

The slot opening will be 1/2″.  By rasping out the material between the drilled holes, I’ll be able to create a flattened opening.

101226headslotted

Guitar 1001 – Neck Joint Finished

December 26, 2010

Today, I finished fine fitting the neck to body joint and installed the neck bolt inserts.

101226guitar

After shaving the inside of the neck where it meets the body, and sanding to ensure a flush fit between neck heel and body, I marked the location for the neck inserts and drilled two 10mm holes.

101226neckdrill

The sides of the tenon are clamped to prevent cracking when drilling and installing the inserts.  After the inserts are installed, CA glue is drizzled to secure the inserts and strenghten the tenon.  The truss rod is also inserted.

101226neckinsert

The neck is bolted to the guitar to check fit before installing the fretboard.  Later today I will further reduce the thickness of the fretboard, install frets then glue the fretboard to the neck.

Tomorrow, Steve, my customer, will drop by to check progress.  The neck is roughly finished, and Steve can provide input as to final neck shape and thickness.

101226guitarback

101226guitarfront

Guitar 1001 – Neck Ready for Fretboard

December 24, 2010

Twas the night before Christmas, and all through the house, the only stirring afoot was the Luthier Mouse.  The stockings were hung by the chimney with care, in hopes that St. Neckisloose would soon be there.  The Luthier trimmed and shaped and made dust in the night, and made all binding and neck cross sections right.

101224clampbinding

There’s neck joint alignment to do, and a check that the truss rod goes through.  Tomorrow will be a day with no dust, hoping that Santa will bring home a 3/4″ purfling muffler bearing.

Guitar 1001 – Neck Shaping

December 23, 2010

Slow and steady.  I’m resisting my desire to cut corners and am carefully rasping the neck to shape.  This neck has a veneer plate on the back of the headstock that I need to work carefully to create a clean transition.

101223neckshape1

The neck thickness has been etched into the back of the neck at the 1st fret (15.6 mm) and at the 11th fret (23 mm).  Rasps are used to bring the neck down to the right dimensions and profile.

101223neckshaping

An ebony heel cap has been glued on and the final shape penciled on.

101223heelcap

Several more hours of rasping and sanding before the final shape has been achieved.

Guitar 1002 – Shape Head

December 23, 2010

Using the softwood template for shaping the headstock, I first clamped to locate.

101223mounttemplate

Screws through the tuning machine slots are used to hold the template in place.  Using a bearing mounted flush cut router bit, the headstock is shaped to the template.

101223headtemplate

The template is removed, and viola, the headstock is shaped.

101223neckhead

Guitar 1001 – Fair and Square, Neck Angle Measured

December 22, 2010

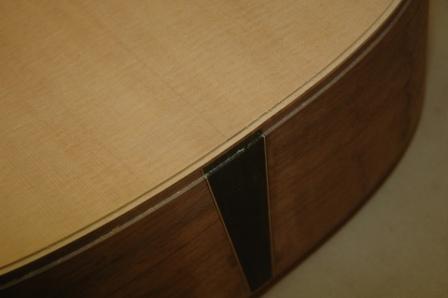
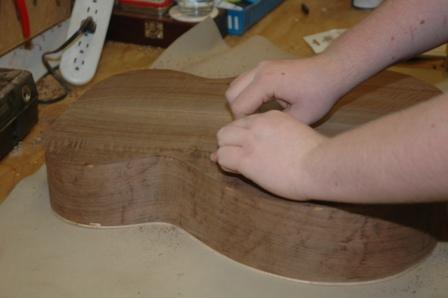
Spent several uninterrupted hours trimming down the binding flush to the body.  I used an orbital sander to start the finish sanding in preparation for determining the neck angle.  The binding and purfling is fit to the body very nicely, and I won’t have any gap repairs.

101222top

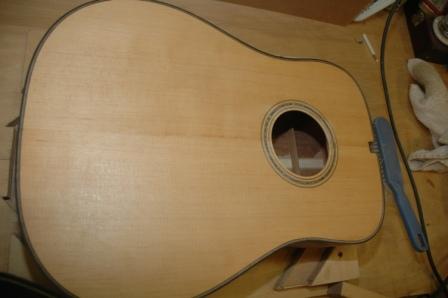
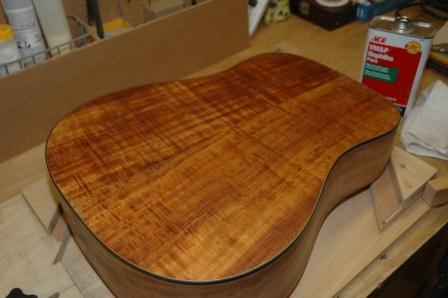
The top was getting a little ragged due to all the handling and the sanding brought it right back to perfect.

101222side

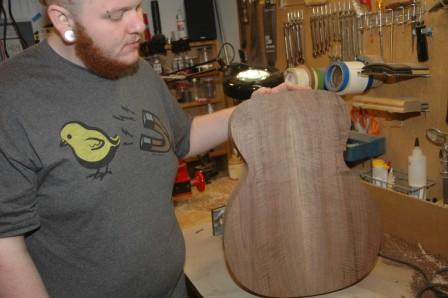
The back and sides have been cleaned with naptha, which brings out the color and shine that the lacquer finish will provide.

101222back

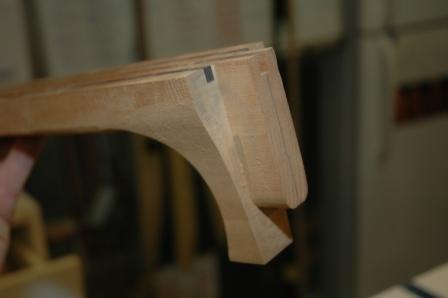
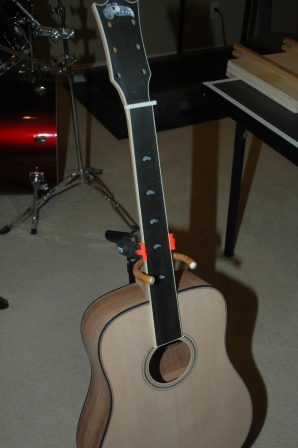
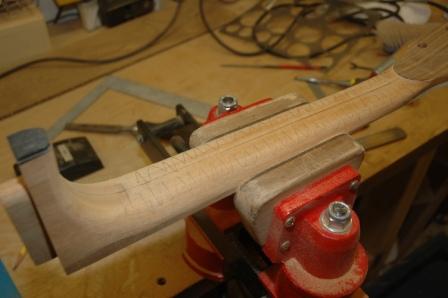
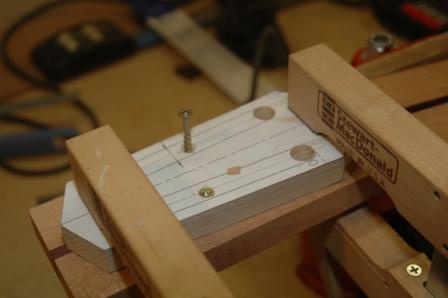
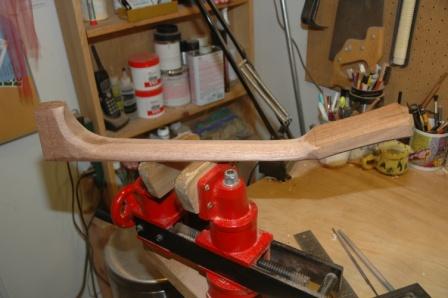
The neck angle on a guitar with a radiussed top is not exactly 90 degrees.  The neck angle needs to be determined to properly route out the tenon on the neck so the fretboard will lie flat on the upper body once attached.  I transfer the measured neck angle to the tenon routing jig and secure the neck into the jig.

101222neckjig

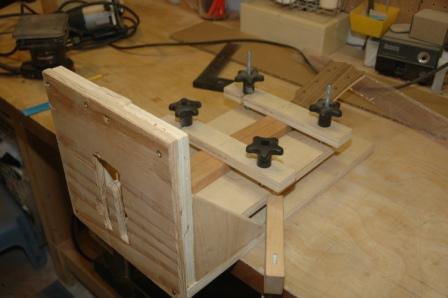
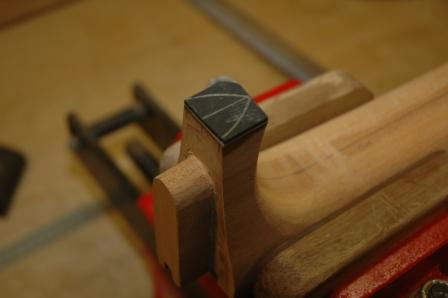
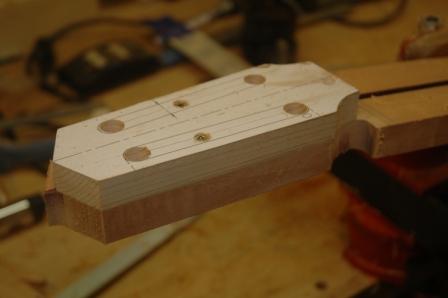
Using a bearing mounted flush cut router bit, I cut the tenon at the proper neck angle out of the neck.

101222necktenon

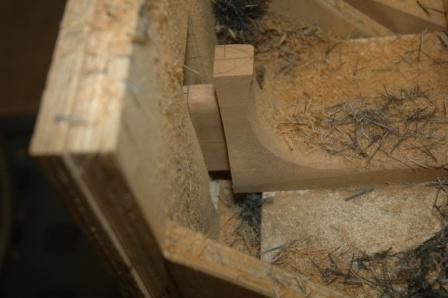
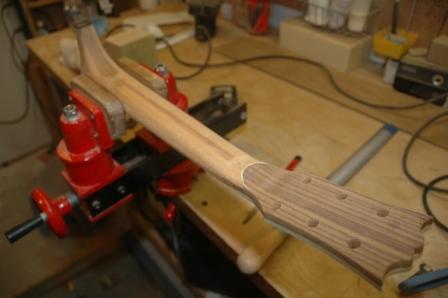
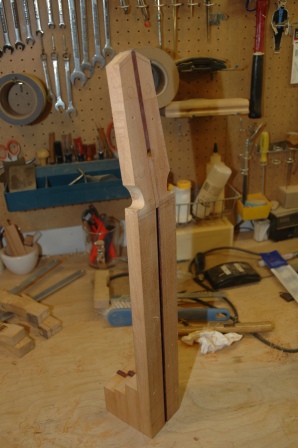
The tenon will need to be trimmed a bit, and any adjustments to the neck angle can be done with a chisel.  Once the neck set is finalized, I can install the neck bolt inserts and work on the final shaping of the neck.  After the first pass of shaping, the fretboard will be glued on, then final shaping, and I can start applying the lacquer.

101222necktenondone

Guitar 1001 – All Out Now

December 21, 2010

OK, it’s time to wrap up this guitar.  I’m at that stage where I have to spend hours fairing and squaring the body:  scraping the binding and back and sides to get them completely flush and all and any dried glue removed.

101221scrapingbinding

This is all the prelude to fitting the neck, which will need to have the tenon (or is it the mortise) shaped on the neck and angled properly to leave the neck flush with the top.

Guitar 903 – Purfling

December 13, 2010

Apprentice Devin is taking 3 weeks off to visit family and still needs around 30 hours of shop time to fulfill his apprentice hours.  We’re making good progress and there should be enough time to finish this guitar in his remaining time.

The purple heart we originally selected to use to bind the body is too brittle and came out of the bender unusable.  We changed to ebony for binding, loaded it up in the bender and left to cool while we routed the channels for binding and purfling for the top.

101213channel

The purfling, a brown/black/white ladder was also bent along with the binding.  It came out a wee bit wrinkled.  This fiber laminate is probably best hand bent.  We removed the wrinkled area and inserted a fresh piece which butts up invisibly.

101213purfling

Guitar 903 – Box trimming, neck shaping

December 11, 2010

Devin is putting the finishing touches on shaping the neck.  The heel and neck to transition still need working, and the headstock is in need of thinning to accept the newly arrived tuning machines.

101211neckshaping

The box plates have been installed, and after removing from the go-bar clamp, the excess scarf was removed with a router.

101211backinstalled

101211topinstalled

Devin’s pretty happy with the results.  He took some time to scrape the back with a cabinet scraper.  After removing minor burn streaks left by the drum thicknesser, new colors and flame were revealed.

101211scrapeback

This is one really nice piece of walnut.

We experimented with the Wagner Safe-T-Planer, a drill press inserted planer that some luthier’s have claimed success with.  We were able to take 1/8″ thick stock and plane it down to around .090″, the desired thickness for binding.  We were able to get 4 reasonable binding strips out of the band saw, and are crossing our fingers that this will bend up nicely without cracking.

The issue is with the wood.  We are using purple heart, which I haven’t seen used before, and my suspicion is that it doesn’t bend well.  We may have to rethink the binding after it comes out of the bending machine.

Guitar 903 – Ready for Box Build

December 4, 2010

The back is braced.

101204backbrace

Devin is working on his first top bracing.

101204sandtop

« Prev - Next »