Archive for the 'Uke Building Logs' Category

Uke 1101 – Resumed

October 24, 2011

Teaching has been wiping me out.  I have been immersed in such a way that my building opportunity was minimal.  I will be visiting Salt Lake for Thanksgiving, and I would like to have my sister’s uke finished by then.  It is completely possible as I am at the finishing stages.

The original uke has been sitting waiting for additional lacquer coats, so it’s part of the deal.

111024ukestosprtay

The koa is ready to accept the first coat (sanding sealer) and the bubinga is ready for coat number 15.

111024porefiller

The pore filler is a brown base so initially alters the color.  After it is applied a squeegee is used to scrape it off, hopefully leaving behind a smooth surface.  It will be scuffed down to remove any haze on the surface of the wood/purfling/binding.  It may require a second application if the pores are not fully filled.

The koa with its first coat of sanding sealer.  After scuffing the finish smooth, pore filler is applied.


Regroup – Laying Out What’s Next

August 22, 2011

The past year has gone by rapidly and I have engaged in many endeavors which little resembled guitar building.  I started and completed a program which garnered me a secondary teaching certificate.  I have accepted a job as a High School math teacher, and my first day with the students is September 7th.  All my concentration on becoming a math teacher has eaten into my time building guitars.  My 2011 output has been well below my previous years, yet I still continued to gain commissions for guitars and ukes and have created quite a backlog.

I realize that I need to analyze and prioritize my pending work and set out a semblance of a plan to organize.

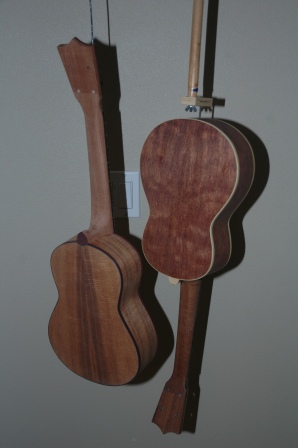
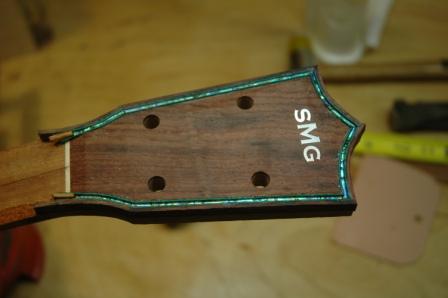
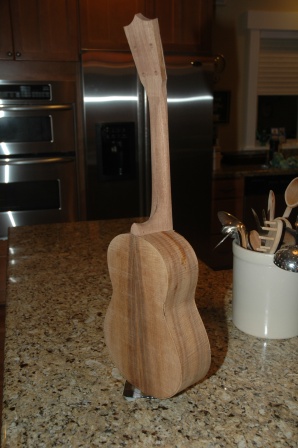
Uke 1001 – Bubinga Tenor: This, my first uke, has been sitting with 12 coats of lacquer, waiting to accept more lacquer.  My original intention was to piggy back on the lacquer work for Uke 1101.  Once the lacquer has been applied and cured, I will be able to quickly finish with the following:  Install bridge, saddle, nut, end pin and tuning machines.  Level frets and do setup.

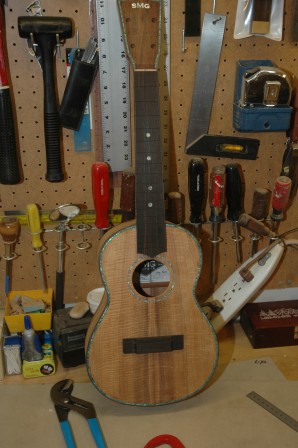
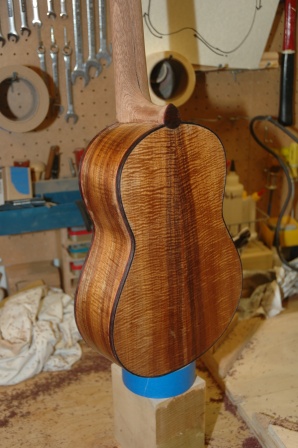
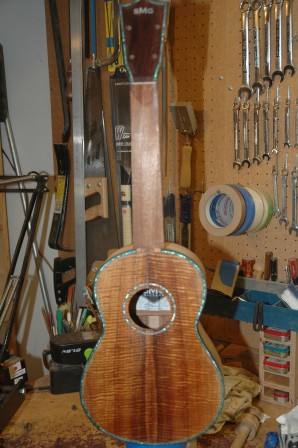
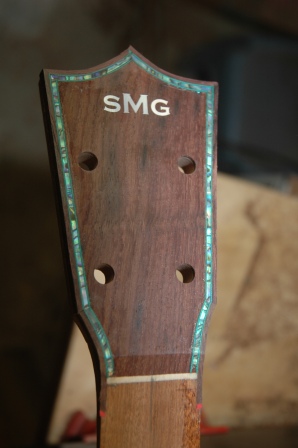
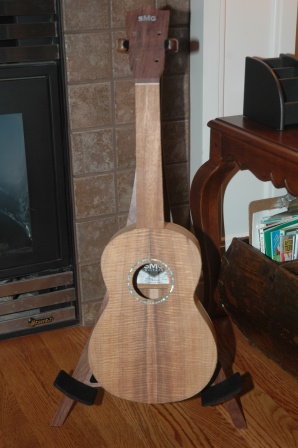
Uke 1101 – Koa Tenor: I have taken this uke on a grand tour, displaying it at a cousin reunion and guitar camp.  It needs minor filing of the binding, a bit more neck shaping, then aggressive final sanding before the sanding sealer, pore filling, and application of lacquer (together with Uke 1001).  This uke, for Cynthia, is priority number 1, and I intend to start back on Tuesday of this week.

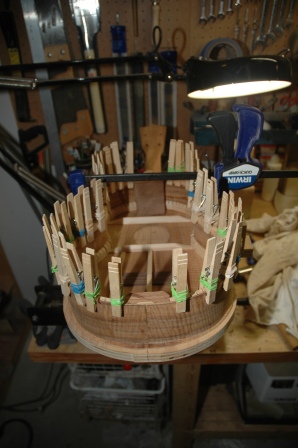
New:  Uke 1201 – Koa Tenor 2: I have all components on hand to build another Koa Tenor Uke.  A man has to build himself a uke.  This lands as priority number 5.

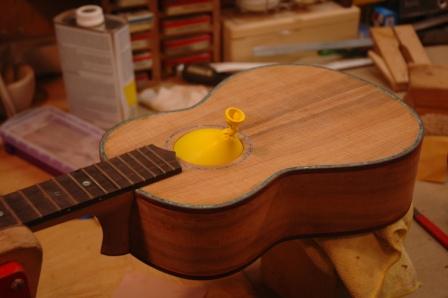
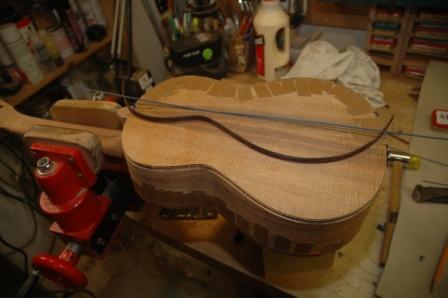
Guitar 903 – Walnut OM: Devin’s guitar (my apprentice).  Devin took the summer off and only recently has returned to finish his guitar.  The bridge is mounted, and the remaining work includes saddle shaping, bridge shaping/notching/installing, fret leveling/polishing/truss rod tweaking culminating in stringing and setup.  He is days away from walking home with his finished guitar.

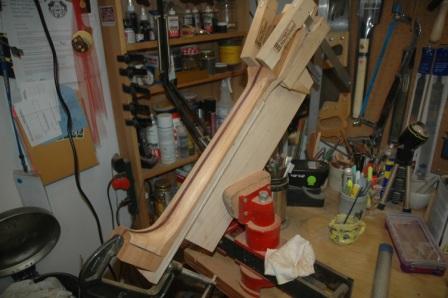
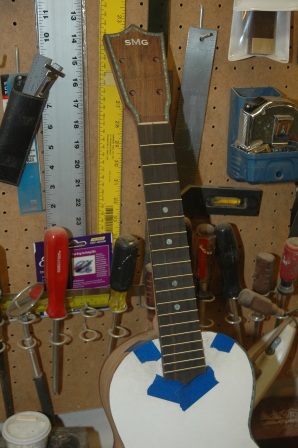
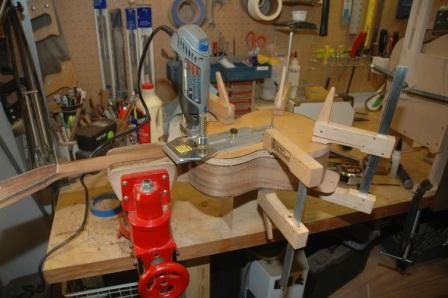
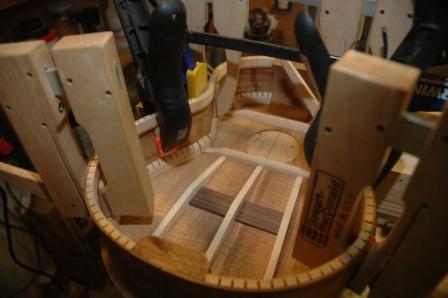
Guitar 1002 – Hybrid Cutaway: I have been ignoring the ukes by dabbling away with this Macaferri style nylon string cutaway for Jim.  I have been shaping the neck and heel and dreaming of bending the cutaway side for the past months.  Before I proceed I need to resolve the dimensions of the neck, and how the cutaway will join and transition into the neck heel.  The top and back are braced but still need further shaping/sanding before I’m ready to join the neck to the top for insertion into the new workboard.  This work is priority number 2.

New:  Guitar 1201 – Myrtle Parlor: I have a gorgeous piece of California Myrtle which will be the showcase for a new parlor for Rachel.  I already have an Engleman Spruce top which has been joined with rosette installed.  I have all components on hand and still need to decide appointments.  Priority number 3.

New:  Guitar 1202 – Indian Rosewood OM: This guitar has been commissioned by Susan as a gift for Bob.  Gonna get that name Bob into the fretboard inlay design somehow.  I always wanted to inlay the word Bob.  This, along with guitar 1203 are priority number 4.

New:  Guitar 1203 – Devil Parlor: I call this the Devil Parlor as it will have a double cutaway.  This is a commission for Emily and shares priority number 4 with Guitar 1202.  I’m using Peruvian Walnut and Engelman Spruce.  I’m considering a black lacquer back and sides and am going to attempt a sunburst top.  Ivroid binding.  Somebody tell me how I’m going to do that please.

I have numbered the new instruments with a 12 prefix, anticipating that these will be completed in 2012.

Still on hand, and available for future guitars:  Sitka Spruce, Bearclaw Sitka Spruce, Ziricote, Ovangkol, Master Grade Claro Walnut (2 sets).

Neck jig – Box balloon

July 9, 2011

Just a heads up on a few new jigs/techniques.  In order to keep dust and such out of the box during final sanding and prep, I blew up a balloon while dangled in the box, then tied it off.

110709balloon

I am now using a recently completed neck shaping jig.  It’s just a vise mounted platform that allows me access to shave and shape the neck.

110709neckjig

Uke 1101 – Frets

June 19, 2011

Sanded the fretboard smooth down to 220 grit.  Pounded in frets and trimmed.

110619frets

Uke 1101 – Fretboard Installed

May 28, 2011

Using the rubber band/index pin method, the fretboard has been installed.

110528fretboard


Uke 1101 – The Naptha Preview

May 4, 2011

There’s a little known trick of the luthier (OK, everybody knows it).  It’s called the Naptha Preview.  Before final sanding and finishing with lacquer, you clean off the instrument with a naptha bathed cloth.  It brings out the color of the wood that will appear with lacquer application and points out any spots where there’s still glue that needs sanding (the glue spots won’t absorb the lacquer).

So before I set the uke aside to finish Guitar 1001, here’s the Naptha Preview.

110504napthaback

110504napthafront

Uke 1101 – Bound and Purfled

May 1, 2011

First thing this morning I took my little finger plane and smoothed the headstock down.

110501headscraped

Since this little uke has a spanish heel, I need to route out binding channels between the top and the neck which can’t be reached by the bearing router bit.  I improvised with my dremel circle cutting jig mounted on a plate clamped to the body.

110501bindingjig

This worked well, and I proceeded to install the binding and purfling.  The bent binding came out of the bending machine almost perfect.  I only had to add a little more bend via the bending iron before proceeding.

First, the top binding and purfling was installed.  This side will also have abalam purfling, so the initial install uses teflon to create the channel to accept the abalam.

110501topteflon

The back only has a small accent strip for the purfling.  I’ve used red to trim the binding at the sides, green for the top, and blue for the back.  Oooh, lots of different colors sure is fun.

110501backbinding

Once the glue for the top dried, I removed the binding tape and the teflon, inserted abalam and flooded with CA glue.  Flooding will be several steps until the channel is filled and the CA glue (dried) is flush with the top.  The abalam actually rests below the surface of the top.

110501toppurfling

I’ve constructed a rosewood heel cap that will drift into the body at the back, which I will install after the CA glue dries.

Uke 1101 – Paua Purfling for the Headstock

April 30, 2011

This is one of my favorite parts of building:  Paua purfling.  I use abalam from the Duke of Pearl (apparently he invented abalam, which is appropriately laminated abalone).  I’ve settled on rosewood for the binding, and have prepared all the binding with red accent strips, then thinning it down to around .080″.  Four strips are sitting in the side bender overnight.  I’ll pull them out tomorrow and add more curve with the bending iron.  The channels are already cut into the body to accept the binding and purfling.  I do, however, still need to chisel out the channels where the body meets the neck.  The router bit can’t be taken too close to the neck so as to avoid putting big inappropriate divots in the neck, hence the need to chisel.

In the meantime, while the binding cures in the bender, I tackled the headstock.

110430headpurfling

Uke 1101 – Taking Form

April 26, 2011

It’s a uke!

110426ukefront

110426ukeback

Uke 1101 – Kerf, Patch, Spool

April 26, 2011

Got a lot done today between printing lesson plans and teaching 9th graders how to divide exponents.  I planed and radius sanded the back until it was in shape to accept kerfing.

110426kerfback

Lots to do on the inside before gluing on the back.  Side reinforcements go in, three to a side.

110426sidesupports

The soundhole needs to be reinforced with two spruce braces.

110426soundholepatch

The ladder bracing on the back was trimmed back, and a label was secured to the back as well.  The soundhole is too small to get my fat mitts into to glue in the label, which is what I usually do with guitars.  The back was trimmed down at the waist to accomodate a clamp to press in against the side waist to square up the sides.

110426squarewaist

The back is glued to the kerf and held down with spool clamps.

110426backspooled

Later tonight, after the glue dries, I’ll flush up the sides and it will appear to be a ukulele.

« Prev - Next »