Guitar 1001 – Knockdown Countdown

May 6, 2011

Spent several hours today knocking down the lacquer finish on the Koa Dreadnought.  A light first brush with 220 grit on the high spots, followed by a serious attack with 400 grit until NO shiny dimples remain.  A thorough dry sand with 800 grit leaves a very smooth flat surface without breaking through to the wood.

Tomorrow a quick wet sand with 1000 grit before the two stage buff on the buffing wheels.  The neck will be checked for fit and adjusted if necessary.  The lacquer on the top which is under the fretboard will be removed with Stryp-Eze then the neck will be bolted and glued in place.

Uke 1101 – The Naptha Preview

May 4, 2011

There’s a little known trick of the luthier (OK, everybody knows it).  It’s called the Naptha Preview.  Before final sanding and finishing with lacquer, you clean off the instrument with a naptha bathed cloth.  It brings out the color of the wood that will appear with lacquer application and points out any spots where there’s still glue that needs sanding (the glue spots won’t absorb the lacquer).

So before I set the uke aside to finish Guitar 1001, here’s the Naptha Preview.

110504napthaback

110504napthafront

Uke 1101 – Taking Form

April 26, 2011

It’s a uke!

110426ukefront

110426ukeback

Uke 1101 – Kerf, Patch, Spool

April 26, 2011

Got a lot done today between printing lesson plans and teaching 9th graders how to divide exponents.  I planed and radius sanded the back until it was in shape to accept kerfing.

110426kerfback

Lots to do on the inside before gluing on the back.  Side reinforcements go in, three to a side.

110426sidesupports

The soundhole needs to be reinforced with two spruce braces.

110426soundholepatch

The ladder bracing on the back was trimmed back, and a label was secured to the back as well.  The soundhole is too small to get my fat mitts into to glue in the label, which is what I usually do with guitars.  The back was trimmed down at the waist to accomodate a clamp to press in against the side waist to square up the sides.

110426squarewaist

The back is glued to the kerf and held down with spool clamps.

110426backspooled

Later tonight, after the glue dries, I’ll flush up the sides and it will appear to be a ukulele.

Uke 1101 – Neck, Top, Sides Join

April 24, 2011

To recover from the wrong way heel slots, I filled with mahogany plates.

110424neckslotsfilled

I had to carefully build a holding jig for the neck in the table saw which stabilized the neck while I drew it through the 5 degree angled blade.  Slots came out well, and I spent time shaping the heel in preparation for joining the top to the neck.

The top of the neck is routed out to accommodate the thickness of the top and ensure a flat transition from the top of the neck and the face of the top.  Center lines are matched, and the top is glued to the neck at the neck block portion of the neck.

110423necktopjoin

Once the joint is dry, it can be turned around and mounted onto the workboard.  After several dry fit attempts, everything lined up well, and glue was applied to the neck slots and the glue line along the inside of the top where the sides meet.  I probably should not have glued the slot, as I need to shim a wee bit of the sides to press against the heel for a tight fit.  So, there is a little gap between the heel and the sides which I may be able to shim out, but probably not.  The gap is very small, and will disappear when lacquered (or I can fill it).

The sides are clamped to the top, and while drying, the kerfing process can begin.

110423sidesandkerf

Guitar 1001 – Knockdown!

April 23, 2011

The lacquer on the koa dreadnought has cured for two weeks so it is time for knockdown.  Knockdown is where you sand the lacquer with increasing fineness of grade sandpaper on blocks.  The key is to remove all high spots, orange peel and drips until the surface is mirror smooth.  Each decreasing grade of grit removes any scratch marks from the previously higher grade of sandpaper.  It’s critical not to sand through the lacquer.

220 dry to remove drips

400 dry to bring surface down to flat, removing orange peel.

600 wet

1200 wet

Buff!

110423neckfront

These shots are before sanding.

110423neckback

Note the rosewood veneer backing on the headstock.

110423frontlacquered

110423backandneck

The koa is just magnificent.

Uke 1101 – Soundhole

April 21, 2011

Used a circle cutting bit for the drill press to produce the soundhole in the top.  I usually use a dremel and down cut mills, but the circle jig won’t adjust down small enough for the uke soundhole.  The top plate must be carefully positioned under the circle cutting bit as any off center positioning will show in relation to the installed rosette.

110421soundhole

Uke 1101 – Top and Back @ .100″

April 20, 2011

I enacted my theory to eliminate burning on the drum sander.  First, I replaced the sandpaper with a new roll and mounted it such that there is a barber pole install with a 1/8″ gap instead of butted flush.  Then I slowed the drive belt speed down to the minimum and began thickness sanding the koa back and top (should it be called thinness sanding?).

110420backandtop

I took these plates down from .120″ to .100″ without any burning!  I’m smugly pleased.

Uke 1101 – Dorky Day!

April 17, 2011

I always wanted to celebrate Dorky Day.  So today, I am.  See The Fan Man for more background.

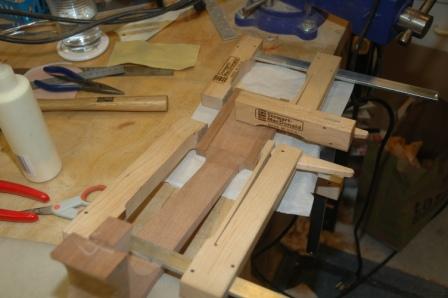
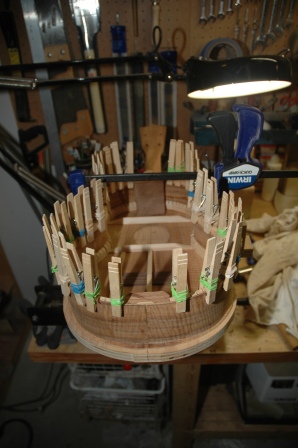
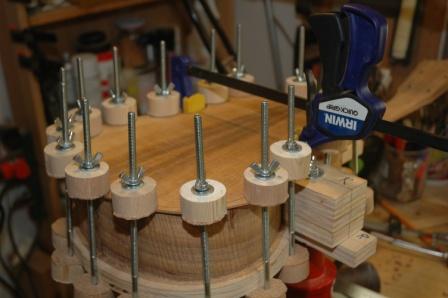
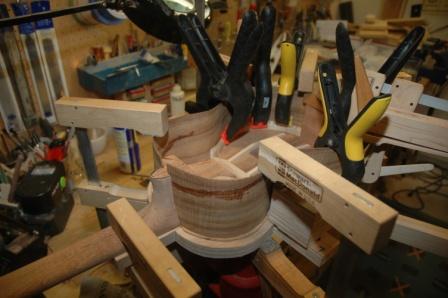
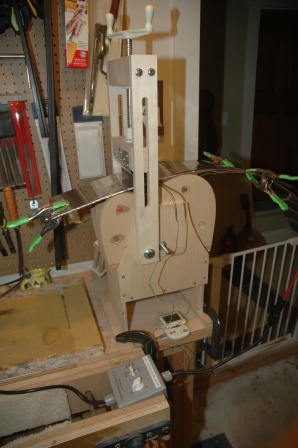
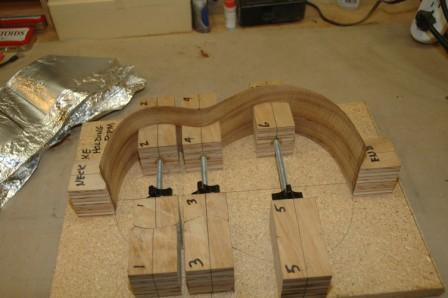
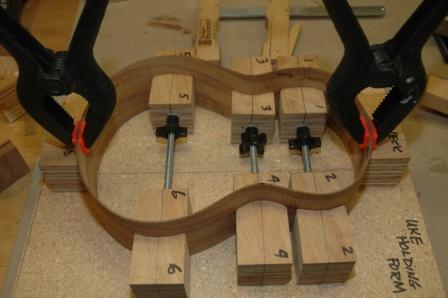
Anyway, aside from Dorky Day, today was work on the uke day.  The mold for holding the sides is only that:  a holder of the sides until ready to mount to the top and neck.  I’m trying a little experiment, which may or may not prove worthwhile.  Since I experienced a bit of cracking of the sides when I was inserting into the mold, I wanted to ensure that further cracking wouldn’t occur.  I glued in the heel block and a “plug” on the neck end to hold the sides together as I pulled them from the mold to transfer to the workboard.  The plug on the neck side is smaller than the width of stock I’ll need to remove to fit into the spanish heel slots.

110417neckslot

110417neckplug

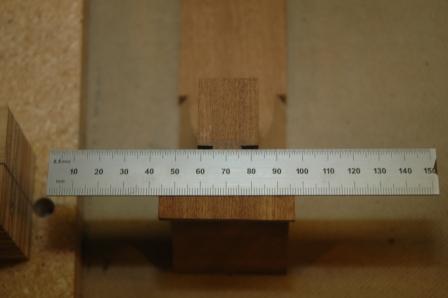
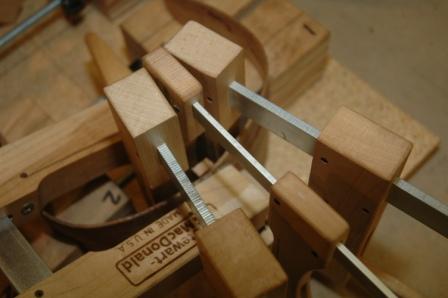
You can see the top of the plug insert sticking up between the clamps.  This is glued to the sides.  When I am ready to install the sides to the neck and top, I can use this plug as the guide for how much stock to remove before inserting into the spanish heel slots.  And, it will hold the sides in place as I remove them from the mold.

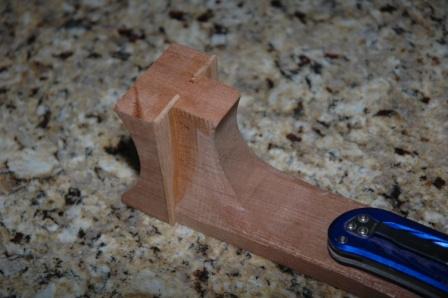
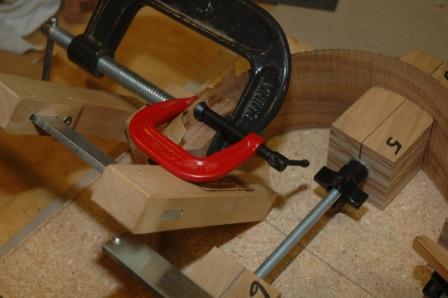
This holds true for the butt end as well.  In addition to gluing in the heel block, I added a plug (or patch) to the sides not covered by the heel block.

110417heelblock

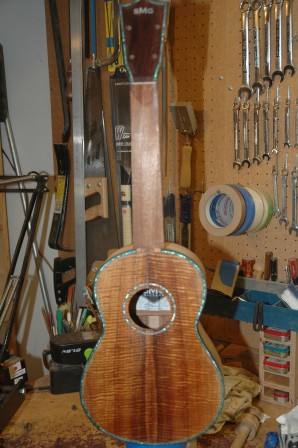
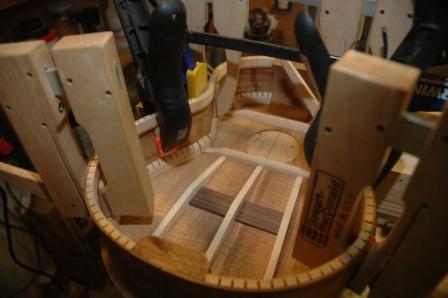
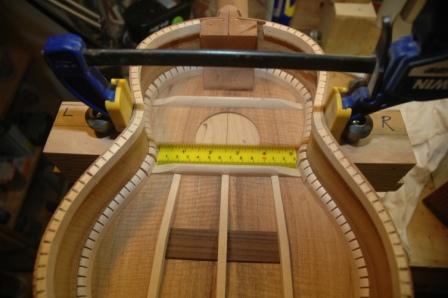
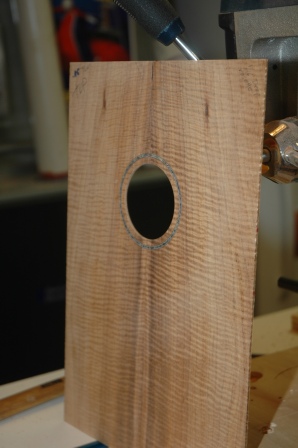
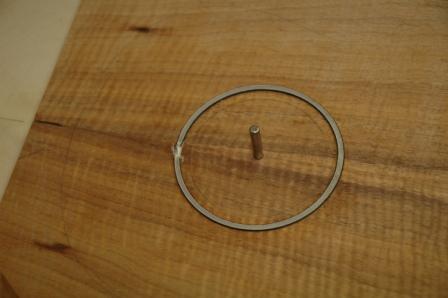
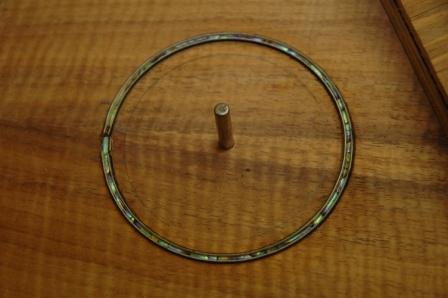
To kill idle dry time, I installed the rosette for around the soundhole.  This is an example of using teflon strips which are removed after the glued purfling dries, then inserting abalam and flooding with CA glue.

110417rosetteteflon

110417rosetteflooded

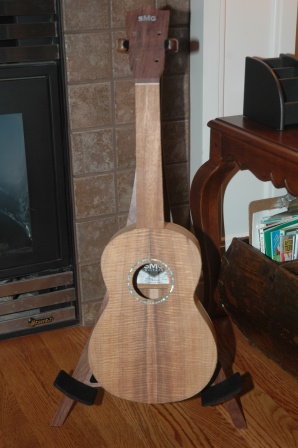
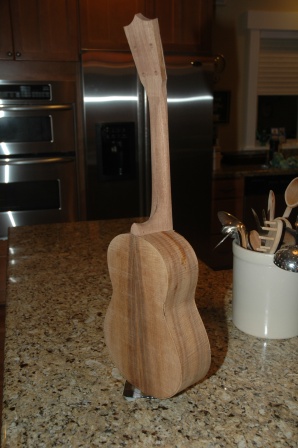
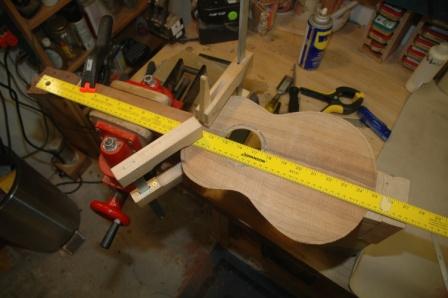
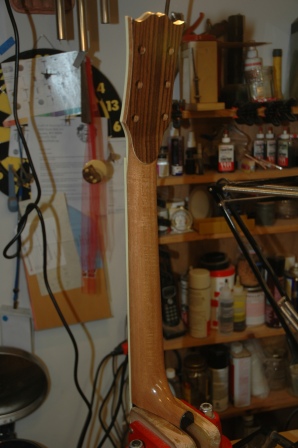
I further tapered and shaped the neck in preparation for installing to the top, and added ears to the headstock to accomodate whatever shape I decide to put it in.

110417ears

Uke 1101 – Plane sides, bend, mold up!

April 16, 2011

I use a Wagner Safetee Planer to thickness sides.

110416safetyplaner

It’s used with a drill press.  First thing is to calibrate the table it’s parallel side to side and front to back.

110416planercalibrate

The sides are run through and taken down to .070″.

110416planesides

I practiced on a scrap piece to ensure all adjustments to the table were correct, then test bent the scrap to confirm temperatures for the koa.  After planing the real koa sides, I used the new bending mold.

110416bendsides

After bending a side, it was clamped into the holding mold.

110416sidemoldhalf

Next side bend, then inserting into mold (ends were trimmed to butt flush).

110416sidemoldfull

The bends were adequate if not tight enough.  I have an electric bender which I can use to tighten up the bends on future ukes.  It’s tricky to get both sides into the holding mold if the bends aren’t tight enough, and yes, I did crack both sides while inserting.  The cracks were repaired with CA glue and won’t be visible once sanded and finished.

« Prev - Next »