Archive for the 'Guitar 906 – Decorated Parlor' Category

Guitar 906 – Oooh it is looking good

December 3, 2009

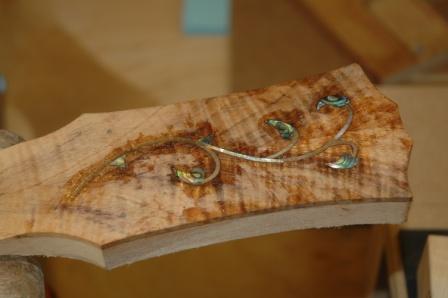
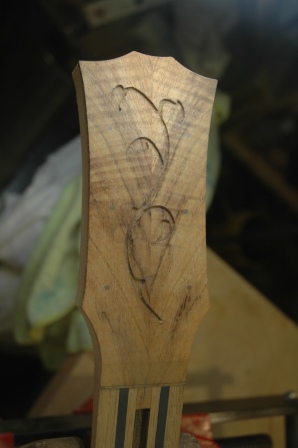
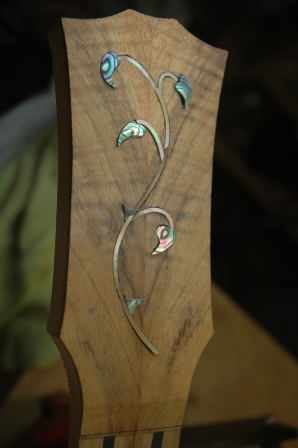
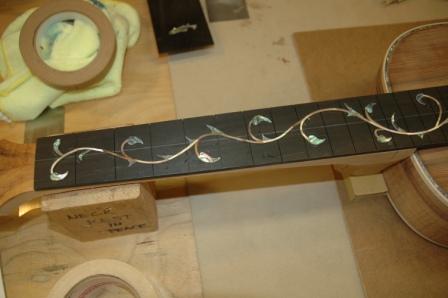
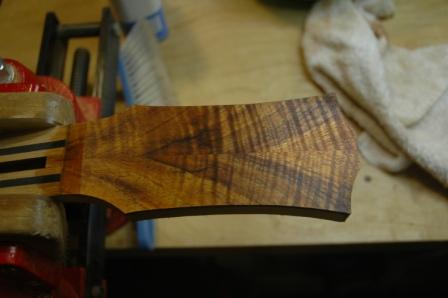
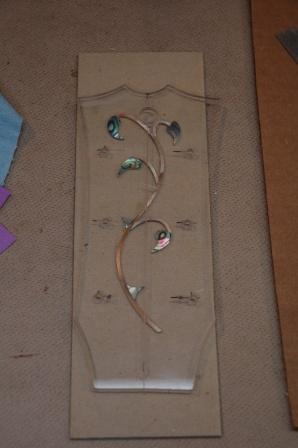
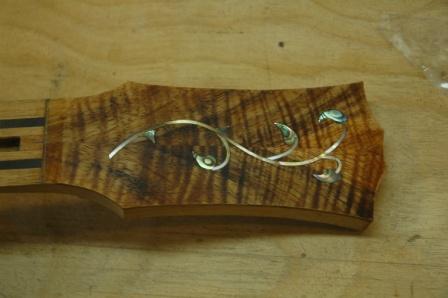
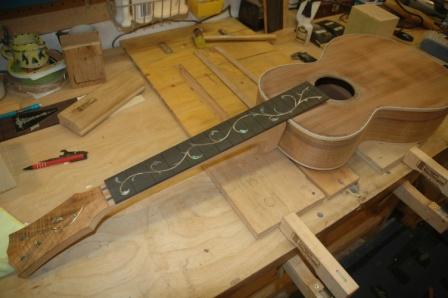
The inlay is looking really fine.  After the epoxy dried, I was able to start sanding down to see the eventual end product.  Here’s the headstock.

091203head.jpg

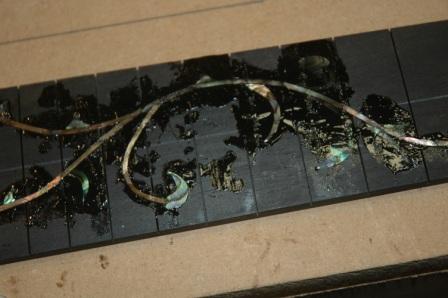
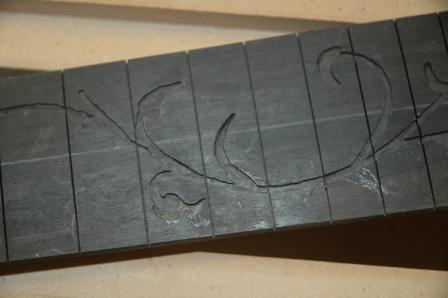
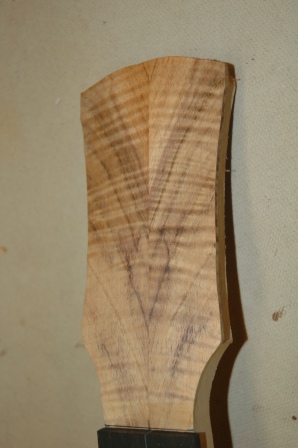
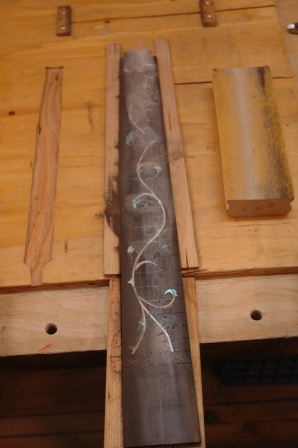
The fretboard needed lots of sanding.

091203sandit.jpg

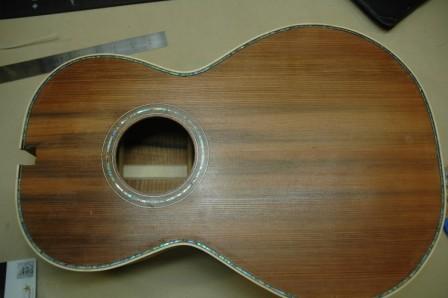
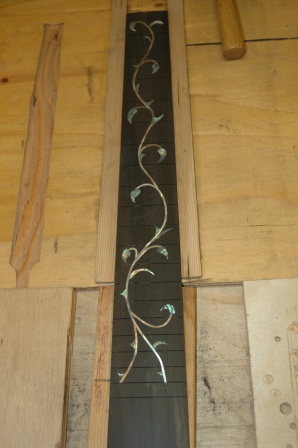
The result was quite nice.

091203sanded.jpg

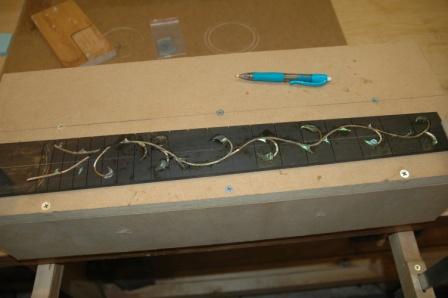
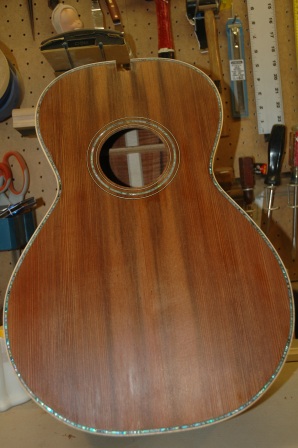
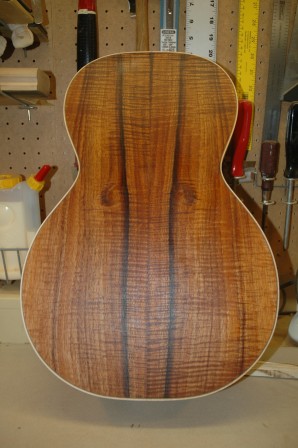
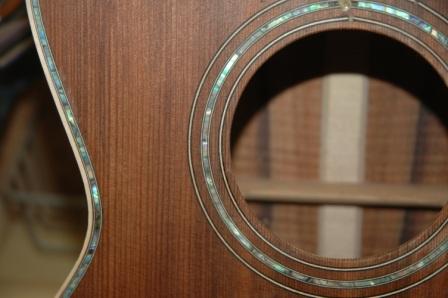
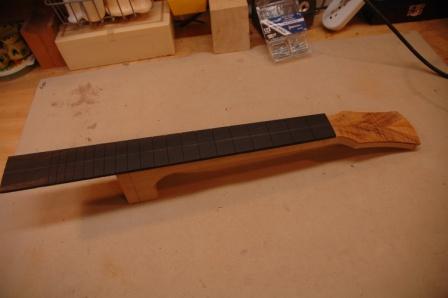
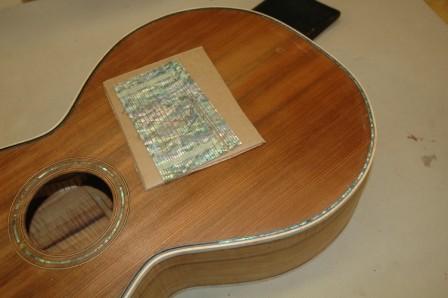
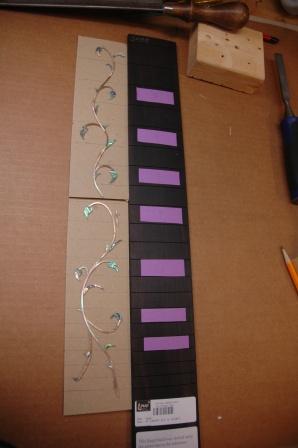
Put together, you can imagine what the end result might look like.

091203wholeguitar.jpg

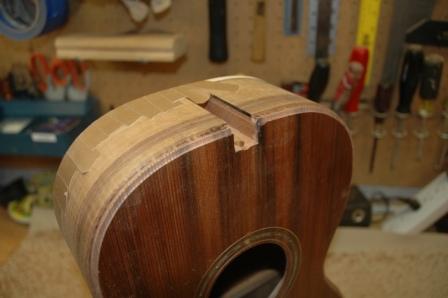
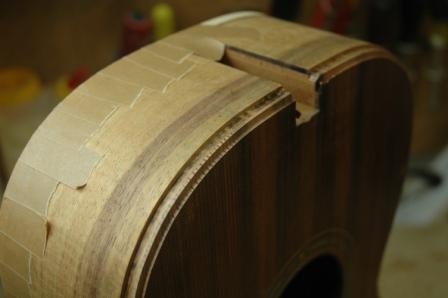
Carl asked me about the issues with the fret slots after the insertion of the inlay.  Yes, it is an issue, but I laid out the inlay so as to avoid as many fret crosses as possible, and to align the leaves at the appropriate frets.  In the end I had to saw through the frets where they were crossed by shell.  It worked out well, and I’m ready to install the frets.

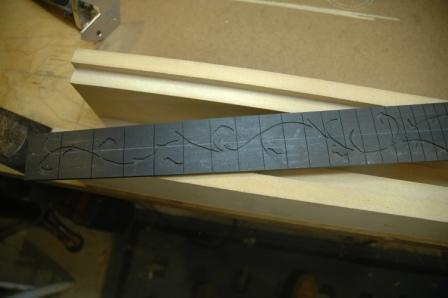
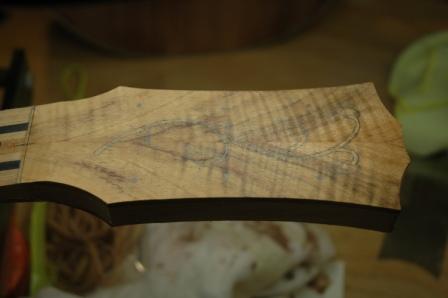
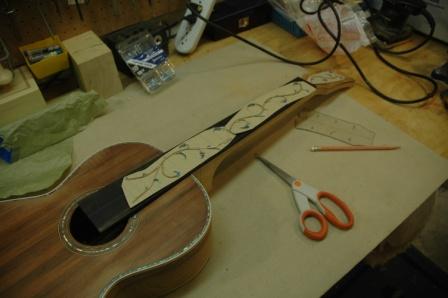
Carl, are you there?  I’m thinking of adding a little bit of additional inlay, but it may be a bit too self aggrandizing.  Take a look at the following and let me know if you are ammenable to allowing me to self promote.

091203carl.jpg

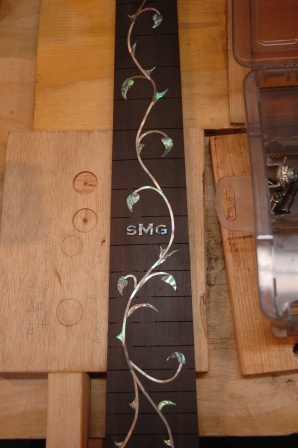
It might be too much to drill my initials into you fretboard, but I thought I’d ask.

Guitar 906 – Fretboard and Headstock Inlay

December 3, 2009

Completed the fretboard and headstock channelling after receiving new end mills.  The headstock work came out extremely well, and after losing a piece of shell for the fretboard (oh, it’s on the floor somewhere, but I need a better set of eyes to find it) I whipped up some black epoxy and koa dusted epoxy and inlaid the shell.

The fretboard looks gooey now, but aggressive sanding will result in a gap free surface.

091201gooey.jpg

091201fretboard.jpg

The headstock inlay place well, and very minor gaps will hopefully be invisible.  I used koa dusted epoxy, and although the headstock looks stained, it should sand out.

091201head.jpg

Guitar 906 – Routing the fretboard and headstock

November 30, 2009

I have several internet orders in transit for the replacement of 1/32″ end mills which I use (and break) for the fine detail fretboard and headstock routing of inlay channels.  Once received I will be able to finish the routing, then inlay the “vine and thorn” shell which was chosen for this guitar.

I was able to complete the bulk of the routing using a 1/16″ end mill, but will need to use the 1/32″ for sharp ends of the thorns.

091130fretrouted.jpg

The next picture is a closer look, where you can see the unfinished thorns and leaves.

091130fretdetail.jpg

I worked very carefully on the koa headstock (after practicing on the ebony fretboard) as any gaps between the shell and the koa are hard to hide.  The ebony is more forgiving as the black epoxy adhesive dries to be virtually identical to the ebony, thus invisible.  I use clear epoxy mixed with koa powder (from sanding) and will be nearly the color of the headstock but less invisible.

091130headrouted.jpg

The following shows what it will look like with the shell inlayed and the remaining work with the 1/32″ end mill to fully open the channels for the leaves and thorns.

091130headshell.jpg

Guitar 906 – Fretboard and Headstock Inlay

November 24, 2009

Worked on the fretboard and headstock inlay by gluing the pieces to the surface and then tracing a pencil line around the shell.

091123head.jpg

Look closely to see the pencil lines in the peghead.  I will use the Dremel to route out a channel to these lines.

091123fretboard.jpg

This is the inlay glued to the fretboard.  A pencil line is scored around the inlay, then the inlay is removed.  I returned the inlay to double stick tape on masonite to maintain the pattern.   I used the Dremel with a 1/32″ bit and started routing the fretboard.  About 20% into the full pattern the bit snapped.  $25 down the drain.  I used the 3/64″ bit and got to 70% of the pattern and the bit snapped.  Goodbye another $25.  This is the second go around for both these bits and it wasn’t because I wasn’t careful.  I think that if these things are going to keep snapping, I should only have to pay a few bucks for each.  Crap.

Well, since I know of no local source, I’ll have to order and wait for delivery before I can continue.

C’est la vie.

Guitar 906 – Fine sanding the box

November 18, 2009

Continuing the process of bringing the box down to the final sanding stages.  Still a few small gaps to fill with epoxy, but it is ever closer to being smooth and ready for the neck fitting.

Here’s a glimpse of what it will look like when lacquered (wipe a bit of Naptha on it):

091118top.jpg

I’ve got the top mostly fair and square, making sure there is no glue residue still on the surface.  I prepped the top with shellac, and sanding it back clogs the sandpaper, which I have to change out frequently.

091118back.jpg

I really like the “eyes” on this back piece of wood, and the dark striping is a nice touch.

091118rose.jpg

The paua rosette and purfling turned out quite nicely.  I have to thank Charles Fox for the tips on installing the purfling.

091118head.jpg

The koa headstock piece is nice and subtle, not to wild.  This will be trimmed with paua as well.  I need to procure some maple binding before proceeding.  It will also have a nice vine and thorn inlay to match the fretboard.

Guitar 906 – Work advances on neck

November 13, 2009

Finished the body binding and got it sanded down to near flush.  Next tackle is the neck.  Added koa headplate and shaped headstock.  Laid out the inlay in anticipation.

091113headstock.jpg

091113neck.jpg

091113inlay.jpg

Guitar 906 – Paua purfling installed

October 30, 2009

Installed top curly maple binding with teflon strip between 2 BWB purfling strips.  The teflon was removed after gluing to leave a channel to push in the Paua abalone strips.

091030installingpaua.jpg

Used mostly straight strips, which cracked (normal) when going around mild curves.  When I got to the waist and the topmost section of the upper bout, I used curved strips.  I used my thumbnail and a credit card to press the strips down into the channel.

091030installedpaua.jpg

The channel was prepped with a coat of vinyl sealer to keep the CA glue used in the final step from seeping into the side wood.  Using a pipette, I flooded the channel with the paua with CA glue (one of many applications).

091030gluedpaua.jpg

When the first flood dries, I’ll apply additional CA glue until the paua is full covered.  Once covered, I can proceed with scraping the binding/purfling down to flush.

Guitar 906 – Binding

October 29, 2009

Hey Carl, I’m back to working on your guitar after weeks of diverting my attention to building the spray booth.  I’m tackling the binding now, and very excited about the paua inlay for the top.  First I trimmed the curly maple binding with BWB then put in the bender to shape for the parlor body.   Next I routed out the channels on the back as it is the simple clean BWB Maple BWB setup.

091029binding1.jpg

091028binding4.jpg

After installing the binding for the back I moved to routing the top, after giving it a shellac whack, protecting it from dirt, tearout, and grain pullout after using binding tape.

091028binding2.jpg

091028binding3.jpg

I installed binding on one side and will do the other side tomorrow.  The top binding has a teflon strip installed which will be removed to give a channel for pressing in the paua.  Oooh, excited.

Back in the shop

October 20, 2009

Yes, it’s been three weeks since I laid hands on any guitar work.  The primary distraction  has been the building of a new spray booth.  I constructed an enclosed booth in the garage with an exhaust fan, lighting, electricity, and units to hang guitar components for spraying and drying.  The majority of the work is done, it just needs a few wrap-ups from the punch list.  I will complete those wrap-ups just prior to my next need for spraying guitars 905 and 906.

I have a considerable backlog of work.  The following list is to help me prioritize.

1.  Guitar 905:  Back is attached to sides, next step is to finish brace shaping and sanding for the top, then installing the top.

2.  Guitar 906:  Box is assembled, next step is to bend binding, route, then install binding.

3.  Guitar 903:  This guitar still has no identity, yet I’m leaning toward a dreadnought, just because.  After I adjust the drum sander, I can thickness sand the sides then bend.  I need to identify and prepare a top.  The Ovankol back is joined and ready for thickness sanding.

4.  Oliver Classical Guitar Repair:  Thank God my brother in law is understanding.  Starting this repair is hard to think about.

5.  Oliver A  Mandolin Repair:  I’ll begin tackling this repair ASAP.  I know what needs to be done, it just needs to be done.

6.  Tepp A  Mandolin Repair:  Much progress made, much to go.  It will be a good companion to the Oliver A Mandolin repair.

7.  Tepp Ukulele:  Modest repair can be done now that I have my RARE Earth magnets.

8.  New Repair Job:  Expecting a guitar to come into the shop Wednesday to improve intonation, probably through a bridge saddle replacement.

Stand by, the Dude Abides.

Guitar 906 – Headstock and Fretboard Inlay

September 7, 2009

Carl’s inlay arrived.  I’ve got quite the task ahead to create the channels for inserting this vine/thorn inlay.

090907headstock.jpg

090907fretboardinlay.jpg

« Prev - Next »