Guitar 906 – Box assembled

September 3, 2009

I have completed the assemble of the box for the Koa/Redwood Parlor.  I mounted the top last night and the back this morning.

090903backon.jpg

After drying, I removed the mold (oh yes, and I removed the spreaders before mounting the back) and trimmed the scarf/overhang with a bearing flush router bit.

090903boxassemblefront.jpg

090903boxassembleback.jpg

090903boxassembleneck.jpg

090903boxassemblebutt.jpg

Guitar 906 – Top glued to sides

September 2, 2009

Worked on 906, notched sides for where braces meet kerf and glued top to the sides.

090902toponsides.jpg

Damn autofocus thinks the bar for the platform is the most important object.

Tomorrow I can glue on the back after removing the spreaders, then I can use the spreaders for putting the sides for 905 in a mold.

Cases Available for sMg Custom Guitars

September 2, 2009

I offer Guardian cases for my custom guitars.  You can go to the links section to bring up the Guardian case website to view the different cases available.  These cases are an excellent value.  The four models I carry are Standard, Deluxe, Tweed and Vintage.

The Standard is your basic case:

guardianstd.jpg

The Deluxe adds more padding and upgraded hardware:

guardiandeluxe.jpg

The Vintage is again another upgrade in materials and padding:

guardianvintage.jpg

The Tweed is the same construction as the Deluxe:

guardiantweed.jpg

Guitar 901 – Zebra Resonator is Complete

September 1, 2009

In reality, it’s never complete, there’s always something that needs to be done, but for the purposes of moving on to other guitars, guitar 901 is complete.  I’m still not fully satisfied with the finish, but I know what needs to be done to increase my satisfaction with the subsequent guitars.

090901complete.jpg

There are miniscule creases in some areas of the finish, but only because I know they are there.  I’ve never played a resonator guitar before, so the sounds I produce tend toward the seasickness range, but I’m determined to learn.

All in all, it is a very nice guitar, and the sound is very fine.  In the hands of a real player, it should be sweet.

Guitar 901, 902 and 904 have been cured: Praise God Almighty

August 31, 2009

It’s been two weeks since I applied the final coats of lacquer on three guitars.  They have sat long enough for the lacquer to be ready for final sanding and buffing.

The resonator:

090831cured2.jpg

090831cured.jpg

I’m going to tackle this guy first because I’m so interested in playing it as soon as possible.

Finally, Carol’s and Beth’s guitars, very different, but quite stunning.  They’ll look great, and I’m anticipating good quality guitar like sounds coming from them once they’re strung up.

090831curedfront.jpg

090831curedback.jpg

Even though these both are Koa guitars, they have very striking differences.

Guitar 906 – Neck shaping and graphite install

August 27, 2009

Continued shaping the neck and channelling for trussrod and graphite reinforcement rods.  Used epoxy to secure the rods and let dry for 24 hours.

090827graphite.jpg

Used the bandsaw to bring the neck down to thickness then used the spindle sander to smooth and create the heel swoop.

090827neckshaped.jpg

Guitar 905 – Headstock Veneer

August 27, 2009

I was able to extract enough material from the walnut back to craft a headstock veneer of flamed walnut.  I jointed the sides, carefully matched up the sides and joined and thickness sanded.

090827headveneer.jpg

Guitar 905 and 906 – Neck work

August 26, 2009

Worked simultaneously on necks for 905 and 906.  Got both stacked, glued and somewhat trimmed.

090826necks.jpg

Neck on top is 906, the parlor.  It’s ready for chanelling for graphite and truss rod.  Neck 905 is a little further along and also is ready for graphite and truss rod.

Both guitars have the rosewood bridge reinforcement installed and next step is to trim the bracing.

Guitar 905 – Neck construction and bracing top

August 26, 2009

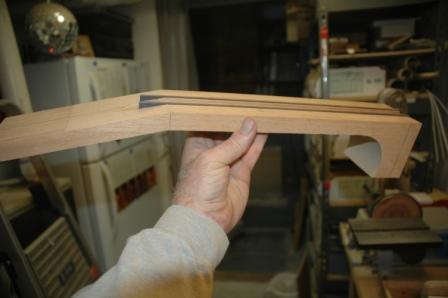
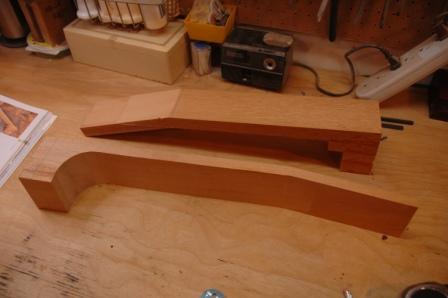
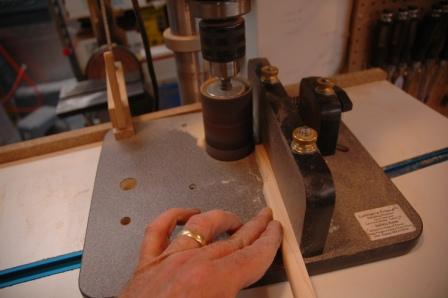
Between back bracing clamp and glue drying and constructing braces for the top, I built the rough neck using a 3″ x 1″ mahogany neck blank and the stack method.  The neck blank is cut into 5 pieces, one for the headstock, one for the neck, and three for the stacking heel block.  The neck blank is marked before cutting to ensure that all pieces are aligned.  I planed the gluing surfaces before cutting to create a perfectly flat surface for invisible glue lines.

090826neckstack.jpg

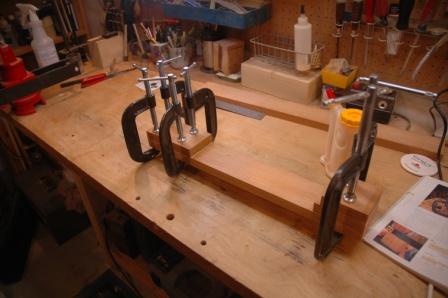
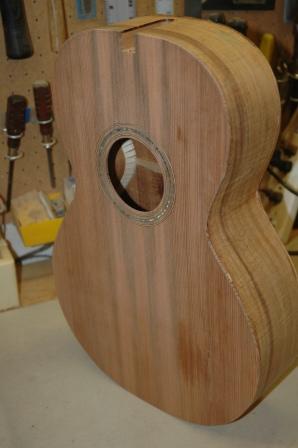
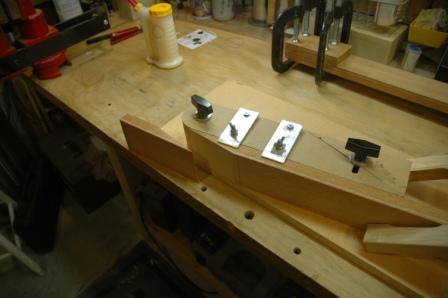
While this sucker dries, I profiled all the top braces prior to gluing.

090826braceprofile.jpg

Profiling brings the brace down to it’s approximate shape and size.  Final shaping and sizing is done with a chisel and plane after the braces have been glued to the soundboard.

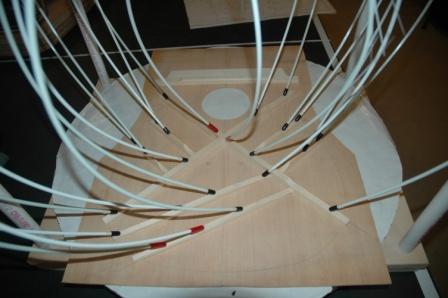
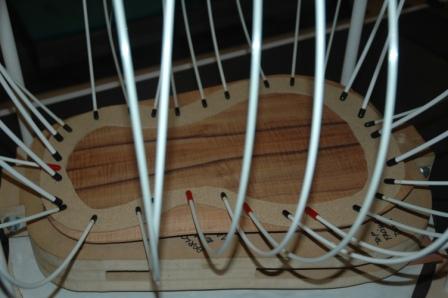
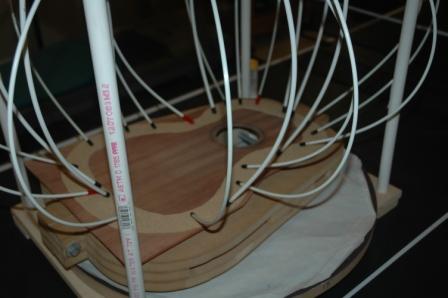
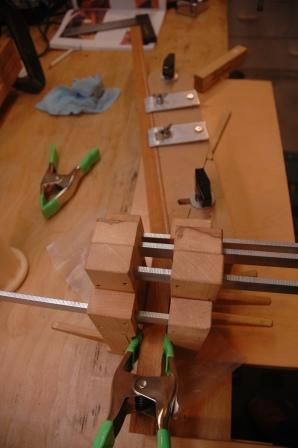
Prior to installing the braces, the soundboard is marked to show exact locations for each brace.

090826bracepatter.jpg

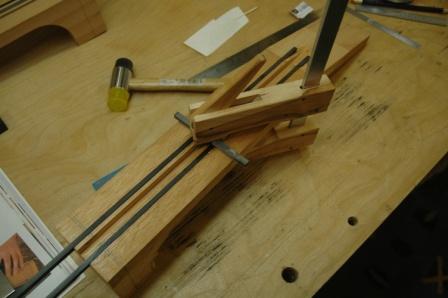
The only brace which is radiussed for the top is the X Brace, at 15′.  This is just enough to give spherical support to the bridge, and still be close to flat.  The X Brace is installed first, followed by the remaining braces.

090826topbracing.jpg

Guitar 906 – Neck blank into neck

August 26, 2009

Multitasking.  While clamped and glued bracing dries, I started on the neck.  I’m using a 3″ x 1″ mahogany board and using the angled headstock cut and reverse to create a long grain headstock.  I have a special jig I use to hold the neck blank and cut at the desired angle.  For this guitar I’m using 12 degrees.

090826headstockoff.jpg

After slicing off the headstock piece, I plane the surfaces which came out of the cut to give a perfectly flat edge I can use to glue.  Using the same jig as a clamp, I roll the headstock wedge over and glue it to the back of the neck blank.  This will sit for 12 hours before releasing from the clamp.  Next step is to build a stacked heel with the same neck blank material.

090826necknheadstock.jpg

« Prev - Next »