Guitar 805 – Warped back continues to plague

January 10, 2009

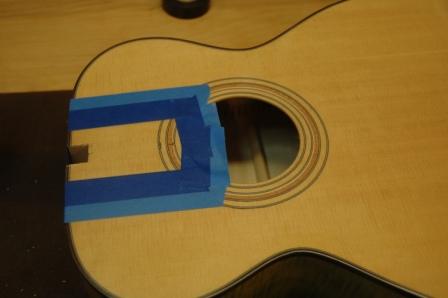
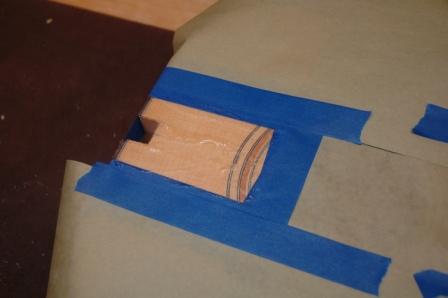
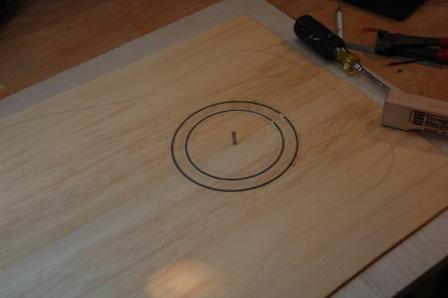
I made some advancement on working the rosette for the spruce top, but discovered I did not have enough BWB binding.  I installed the inner and outer ring, and will complete the center ring which will be BWB PAUA BWB when I receive the BWB I ordered today.

090109rosette.jpg

I measured the thickness of the wood on my Taylor 12 string, and at 3.4mm, I confirmed I had the thickness of my top and back around 3.5mm and proceeded with the rosette and the back reinforcement strip.

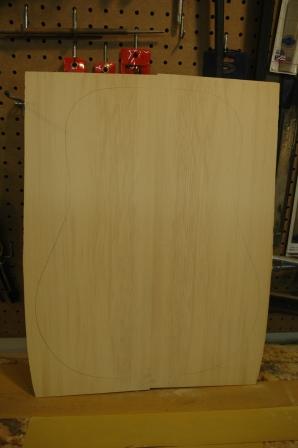
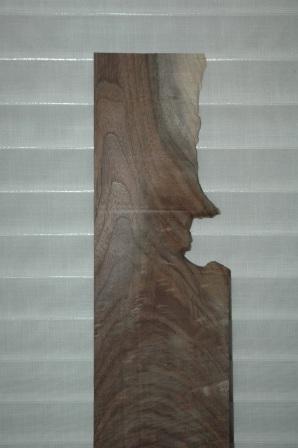
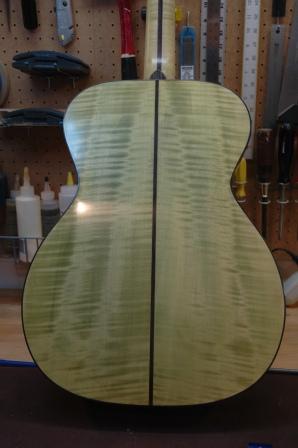
Here’s what the back looked like before adding the reinforcement strip.

090104backjointok.jpg

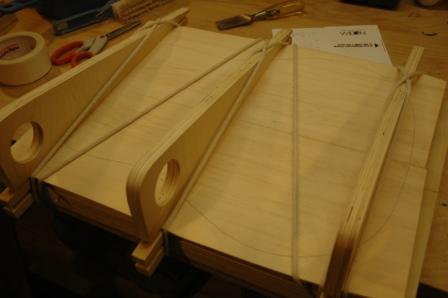
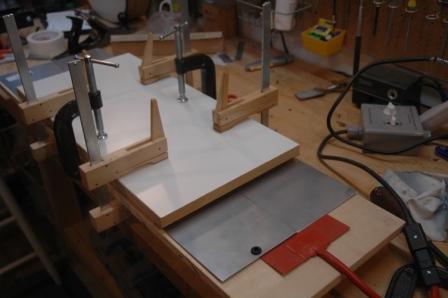
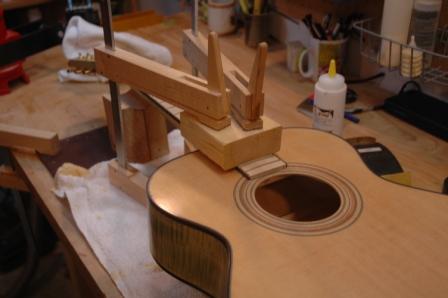
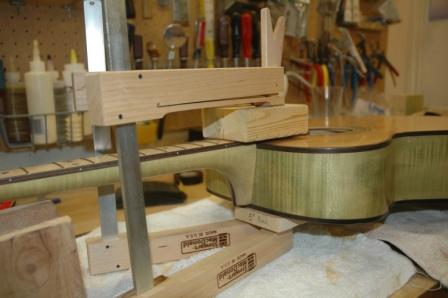
I used my gobar platform to install the strip, and also forced down the warped sides into the radius dish to allow the glue to dry with the back in it’s eventual shape.

090109backreinforcement.jpg

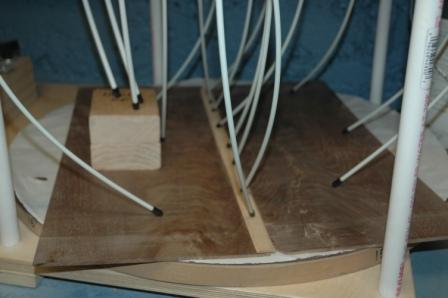
I was concerned about the cracking sounds that accompanied the clamping.  My concerns were confirmed when I released the back from the gobar and saw the backstrip had split.

090109cracked_0.jpg

So, now I am double trouble.  I don’t have another backstrip, I don’t have another back reinforcement strip, and the warped sides won’t like being braced without breaking the backstrip again (I suspect).  So, as part of my emergency order for BWB for the rosette, I added multiple backstrips, multiple reinforcement strips, and to be on the triple safe side, multiple curly maple binding strips and purfling (these objects will be bent in my bending machine, and God knows, I will probably break a few in the process of bending).

The beauty of my task list, mentioned in the previous entry, is that I have several task paths which I can take should one or more tasks go south on me, like the one with the back.

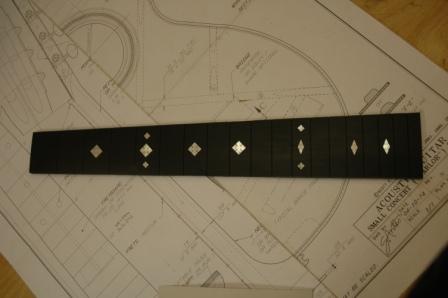
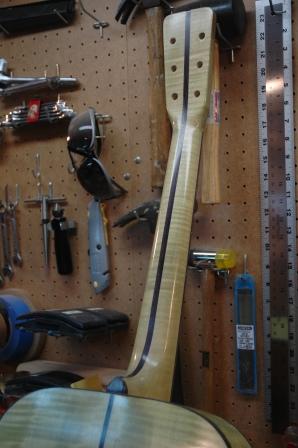
I worked a bit on shaping the neck, bringing the thickness of the headstock down to 15mm, drilling holes for the tuning machines and installing fret dots.

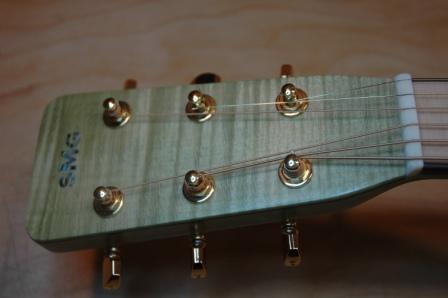
I have decided to install the tuning machines “down” as I like the balance better.

090109tunersup.jpg

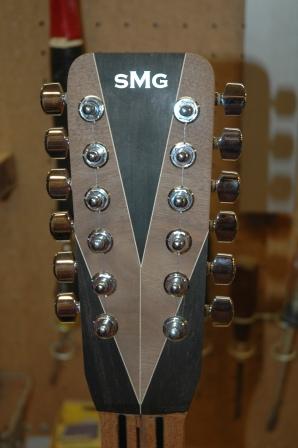
Here they are “up” (the tuning peg exits the shaft on the upper side).

090109tunersdown.jpg

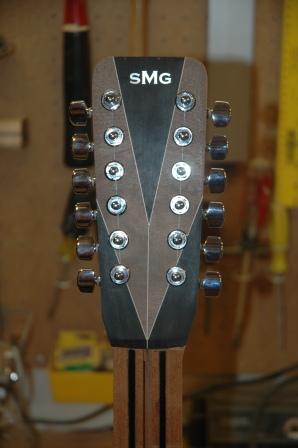
“Down”.  I still have some right side peghead removal to get the dimensions balanced.  It’s a little fat on the right.

Plan of attack

January 9, 2009

Given that I have a hard deadline for Guitar 805 and I’m committed to finishing 804 quickly, I documented all remaining tasks for each guitar.  I broke tasks down into 4 hour blocks, assuming I could safely devote an average of 4 hours per day, 7 days a week, between now and end of February.  I also established a date when I must finish the lacquer application to allow 9 days of curing.

The good news is that I do have enough days to work on both guitars to have them ready simultaneously for lacquer application as it would be nice to spray them at the same time.

The bad news is there’s little room for error, of which I am erring more often with this walnut than I have in the past with other guitar woods.  I set a deadline of January 23rd as the date I must receive the replacement walnut sides, and still keep on track for applying lacquer starting February 2nd.  I have received notice that the expected delivery date of the walnut sides is January 20th.

Guitar 804 – Ready to move on to final stages

January 4, 2009

The Koa Parlor now needs my full attention.  I will work on it primarily and only diddle with 805 (12 string) when waiting (lacquer coats drying, etc.).

The neck is shaped to the point where I can glue on the fretboard before doing the final shaping/finishing.

090104finallook.jpg

This is what it looks like with the tuners and bridge in place (not glued or screwed).

I think I’ll get a little fancy with the inlay.

090104inlaylayout.jpg

I’ll mask the fretboard then draw positioning lines on the masking tape, then glue the inlay to the tape.  After the glue dries, I’ll score around the inlay through the tape into the fretboard, then remove the masking tape and route out the cavities for the inlay using a Dremel tool mounted on a guide.

Guitar 805 – two steps forward, one step back

January 3, 2009

Now that my keyboard has self healed, I can add captions to these posted photos.

090103planer.jpg

I purchased a planer, and successfully created excelsior!  Actually, it worked very well on the spruce, but I erred seriously on a walnut side.  See below.

0993jointop.jpg

Joined the top plates, then sanded down.  I’m at 3.5mm, which may be right for a 12 string top.  I’ll measure my Taylor to see, then sand down to the appropriate thickness after I install the rosette.

090103topjoined.jpg

This spruce has a lot of color change going on, which is an intentional choice of the commissionee.

090103topgrain.jpg

Narrow grain at center widens out toward the sides.

090103flattenback.jpg

The back pieces were warped, and I took a stab at flattening with heating blanket.  Helped, but only a wee bit.

090103backdetail.jpg

Here’s a detail look at the back after joining and some sanding.  It’s still warped, and my hope is that the braces will hold it to shape.

090103sidefucked.jpg

Here’s the result of improper use of the planer on the walnut sides.  Let this be a lesson to you!  I THOUGHT I was paying attention to the grain direction, but erred and chopped out several large hunks.  This piece may be salvagable, but I’m not sure yet what for.  It’s now too short to be used as sides, even on a small parlor guitar.  Maybe a uke.  Nah.

2009 – 4 projects in the queue

January 1, 2009

For 2009 I have 4 projects in progress:

1.  Guitar 804 – Koa Parlor.  The hard part is over.  The body is assembled, the neck is rough shaped and the mortise and tenon are approximately shaped.  My plan is to tackle 804 as my primary, with the intention of finishing before the end of January.

2.  Guitar 805 – 12 string dreadnought.  I need to solve the thicknessing issue to proceed.  The neck is ready for shaping, the dred mold is constructed, and the side bending and plate joining will come as soon as the back, sides, and top are thickness planed.  I need to finish this guitar by mid February.

3.  Guitar 901 – Zebrez.  This is my personal resonator guitar.  I’ve essentially got all the components, and I should avoid working on this at the peril of not finishing 804 and 805.

4.  Classical Guitar Repair.  I need to inform my brother-in-law that this will get my attention after the end of February.

Possible additional guitars.  Larry mentions some others with interest in commissions.

Happy New Year!

January 1, 2009

It was one year ago when I embarked on guitar building.  I will recount my accomplishments during the year of 2008 and look forward to what lies ahead in 2009.

This all started with a Stew Mac 000 kit which I received as a Christmas gift from Carol, my wife.  It started as an experiment to determine whether I should add something meaningful to my “free” time, as I was spending much too much time in the chair.  After spending an absurd amount of money on tools and expanding my  workshop, I completed the Stew Mac 000 (guitar 801) in March.

Before I completed my first guitar, I knew I was hooked.  I discovered LMI and used their kit wizard to purchase the components for a rosewood OM (guitar 802), which ended up in my daughter, Rachel’s hands before she went off to her sophomore year at NYU in August.

I sent out feelers for commissions, a means to continue building, but getting someone else to fund my efforts before I could legitimately sell custom guitars.  My friend and music partner Larry ordered a maple OM using the LMI kit wizard, and guitar 803 was born.  I just finished 803 on December 31st and turned it over to Larry.

Through Larry, I got a second commission from one of his business associates.  Guitar 804 is a Koa Parlor, also sourced through LMI, which is 75% complete.  See “looking forward” below.

In June I attended a guitar building workshop from Charles Fox and the American School of Lutherie in Portland.

I did a few repair jobs, one of which was a refret/refurbish of an old 5 string banjo for my friend Tom.  I also took possession of a classical guitar with serious neck and top problems from my brother-in-law Bim.

And, guitar 805 started construction in November with wood stock from a tree farm which will end up being a 12 string dreadnought.

Finally, in wanting to do something for myself, I started guitar 901, a zebrawood resonator guitar which needs to sit idle for some time while I finish things earlier in the queue.

Later tonight, I’ll lay out my roadmap for 2009.

Guitar 804 – Move forward

December 31, 2008

Look!  It’s tomorrow!  But you can find my progress right here on the immediate response web thing.

OK, here’s a little something for the 804 followers.

081230neckdryfit.jpg

Oh look, it has a neck!

081230withfretboard2.jpg

Oh look!  It has a fretboard.

Guitar 803 – I made it! Before year end!

December 30, 2008

Wow.  I promised Larry way back in October that I would have his guitar ready for him.  I failed, did not fulfill my obligation, and felt a bit awkward, but he and I agreed that things take their time, and his guitar would be ready at the appropriate time.  And now is the appropriate time.  I finished (relative term) his guitar and delivered to him this very evening.  It still needs the LR Baggs electronics installed, but I want him to take it home and give it the old go around and come back to me next week for tweaking and fine tuning and.. the install of the LR Baggs.

081230strings.jpg

Many steps to getting the guitar ready for Larry.  Strings on is one.  Spent several iterations getting the strings settled properly.  Did have to shim up the saddle twice, but well worth it.

081230smg.jpg

Just damn proud of the SMG label inside the soundbox.

081230head.jpg

The sycamore headstock turned out very nicely and without my compete knowledge, I bought (gold) strings which were complementary to the whole gold tuner/fret thing.

081230finished.jpg

So, here’s the baby, bridged, stringed, cradled, and ready for Larry to accept.

081230cased.jpg

So, the first thing is, you must nestle the thing in the new case.  Just to make sure it fits and it has a home.  And…yes, it fits.  More importantly, does the player/owner love it?  Oh yes.

081230proudlarry.jpg

This almost looks like a Shamwow commercial.

081230proudlarrymugs0.jpg

Now here he is riffing some Pink Floyd, or is it Moby Grape?

081230larrytakeshome.jpg

And finally, he looks so happy, the next thing he did was walk out the door.  I suppose he really likes the guitar.  He’ll tell me next week.

I spoke with Carl tonight, and with the combination of giving up one of my babies (guitar) and speaking with my music partner who has moved on to another city, I got a bit schmelke (sad, melancholy).

It’s hard to see your craftwork depart and your music partner so far away.

The good part is they both will come back to you someday.

Guitar 803 – Buffed and installed neck

December 29, 2008

Hey, it’s Rachel’s birthday!  Happy Birthday Rachel.  She is no longer a teenager, and she made it to twenty!

Completed the sanding of the lacquered neck and body through the 1200 wet sand then used my buffing wheel for the first time.  First, several passes with the fine compound and the muslin wheel, then finished off with the dormet and the very fine compound.  Oooh, looks great!

081229buffedback.jpg

081229buffedneck.jpg

Since I chose to finish the neck and body separately, I needed to strip off the lacquer where the neck glues to the body.

081229maskforstrip.jpg

First, mask off the area in preparation for the Stripeze.  Then apply the stripper, scrape off, apply again, then scrape off again.

081229gooapplied.jpg

Do a little sanding, practice dry fitting and clamping before applying glue (to the fretboard extension only, as I am using a bolt on neck).  Glue up the fretboard extension, bolt in lightly, apply clamps, tighten bolts, tighten clamps, tighten bolts, and….neck is installed.  It will now sit for a couple of hours before I take similar steps to install the bridge.

081229neckclamped.jpg

081229neckclampside.jpg

Guitar 901 – Zebrez part arrives

December 28, 2008

Arrived home from Florida to find my resonator cover has arrived.  Next I need to figure out exactly how to install cone/spider/cover.

081229rezcover.jpg

« Prev - Next »