January 29, 2012
I finished detailing the bracing on the top and trimmed back the ends to make room for the attachment of the sides to the top. The butt block was radiused and trimmed to length (about 1/8″ longer than actual) and glued to the top.
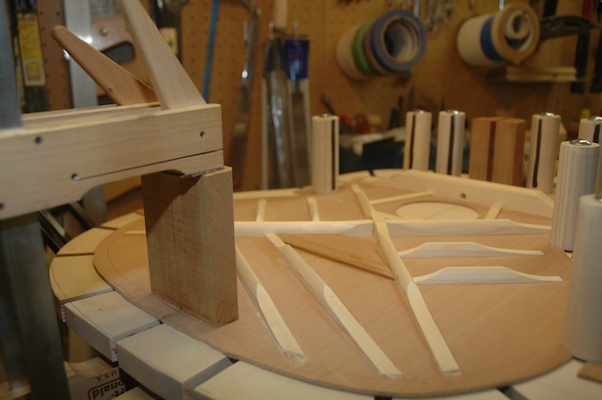
I also trimmed the sides to the same width as the butt block height then proceeded to bend the non-cutaway side.
After heating and bending, the side is allowed to cool, then the heat is turned back on for 15 minutes, then the side will sit in the mold overnight. After removal, it will need more hand bending to bring it to the desired curve to avoid having to spring the side into the workboard, which puts stress at the butt block and neck joint points which can cause splitting.
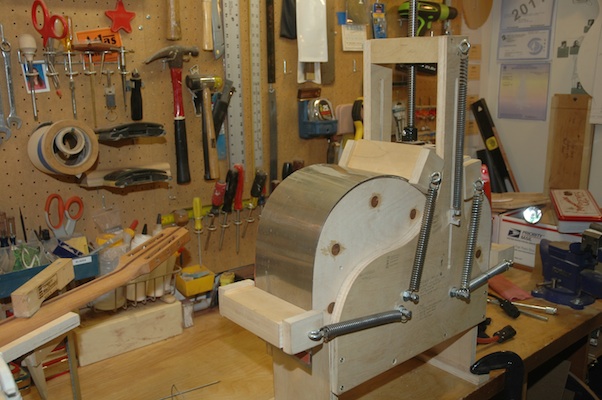
The cutaway side remains to be bent, but first I have to devise where the cutaway ram will be mounted on the bending machine. Hope I get it right. I’ve been avoiding this bend for months, and I am fully prepared to order new sides if I muck this up. So much for practicing on throwaway stock.
Published by Stephen on 29 Jan 2012 under Guitar 1002 - Hybrid Cutaway,Guitar Building Logs
Tags: End Block, Hand Bending, Hybrid, Side Bender
Comments: 1
January 22, 2012
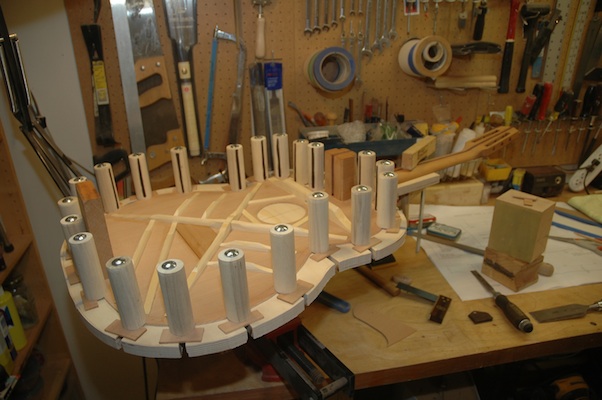
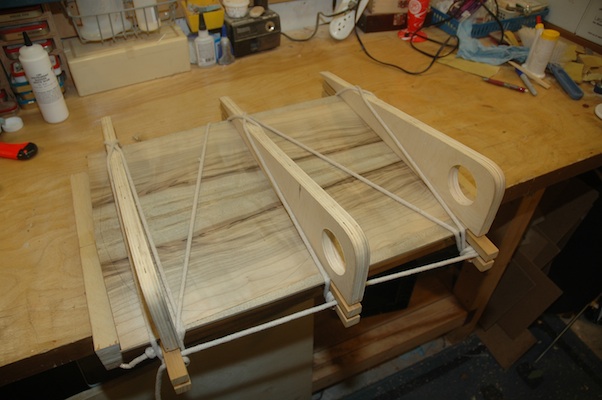
I built this workboard several months ago. It’s adapted from the workboard I used for the ukes and examples I’ve seen at luthier suppliers. The next step is to shape and dimension the butt block then glue it in place in preparation for the attachment of the sides.
Published by Stephen on 22 Jan 2012 under Guitar 1002 - Hybrid Cutaway,Guitar Building Logs
Tags: Hybrid, Workboard
Comments: none
January 22, 2012
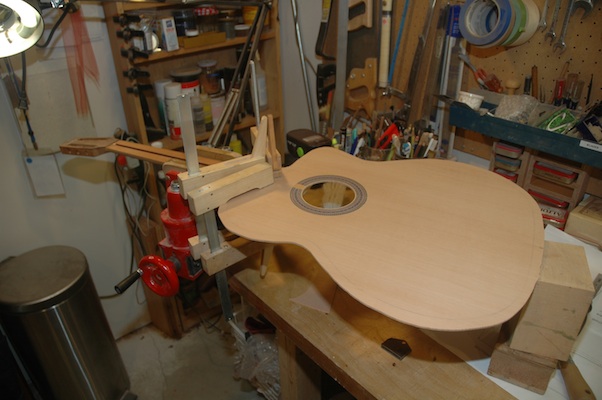
The neck was notched on the router table to accept the top. The center lines were aligned, pilot holes drilled, and the neck has been glued to the top. After drying, the neck and top will be mounted to the workboard in preparation for attaching the butt block and joining the sides to the top.
Published by Stephen on 22 Jan 2012 under Guitar 1002 - Hybrid Cutaway,Guitar Building Logs
Tags: Hybrid, Neck Join
Comments: 1
January 18, 2012
It’s a snow day, a day before my son’s 19th birthday, and the birth of my second uke. The finish is KTM9, a water based lacquer which I believe I will continue to use for future instrument finishes. I took several months to apply, knockdown and buff the finish, and I believe it improved the results. Also, 24 or more very thin coats proved to be the right approach. I avoided drips and orange peel effect, and the knockdown was more straightforward.
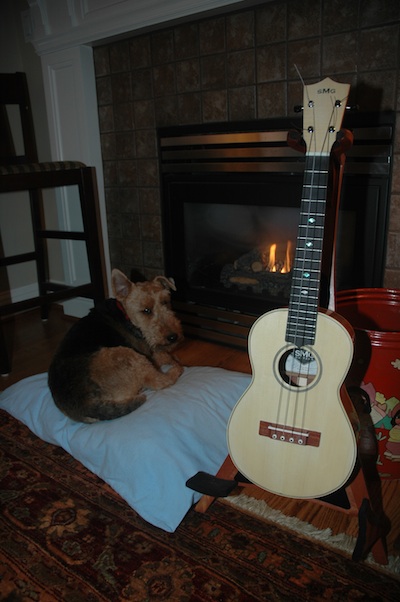
There’s nothing like a fire, dog and uke to complete a snow day at home.
Published by Stephen on 18 Jan 2012 under Uke 1001 - Bubinga Tenor,Uke Building Logs
Tags: Bubinga, Knockdown, Spray Lacquer, Uke
Comments: none
January 15, 2012
Tomorrow this uke will be making music. The finish is all knocked down and polished, and today I mounted the bridge. After setting overnight it will be a quick transition to get the strings installed.
Published by Stephen on 15 Jan 2012 under Uke 1001 - Bubinga Tenor,Uke Building Logs
Tags: Bridge, Bubinga, Uke
Comments: 1
December 22, 2011
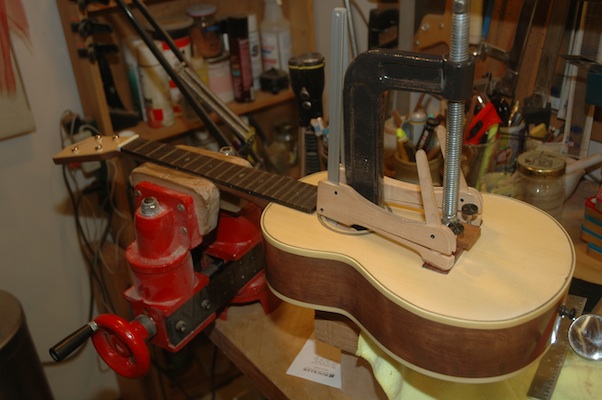
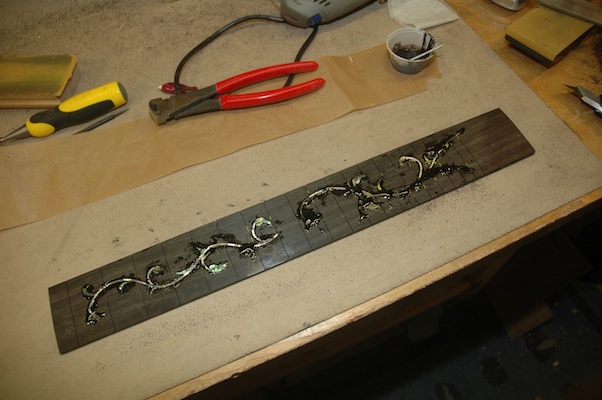
Back to work in the shop. I’ve done the fretboard inlay for the hybrid, and started tackling portions of guitar 1202, the Rosewood OM also known as Bob. First, I joined the back.

I tried using tempera paint to outline the thorn and vine inlay for the fretboard.

It certainly made for a clear distinction when diving in with the router to clear out the channel for the shell. I was a bit sloppy wity the application and got too much on the shell and had to spend extra time to remove the paint from the shell before installing.
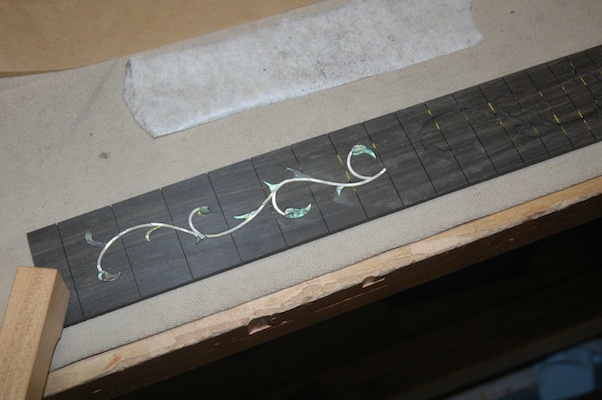
Finally, using black epoxy, the shell was glued in. Note the excess splurted over the top. This ensures all gaps get filled, and a nice clean seam between the shell and the fretboard.
Published by Stephen on 22 Dec 2011 under Guitar 1202 - Rosewood OM (Bob),Guitar Building Logs
Tags: Fretboard, Inlay, Plate Joining
Comments: none
November 25, 2011
The uke has been delivered. Here are the final images.
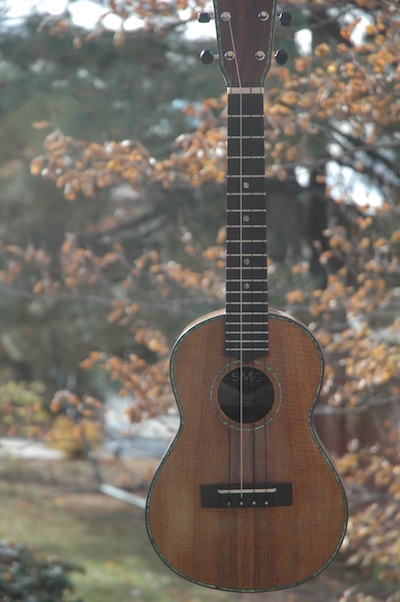
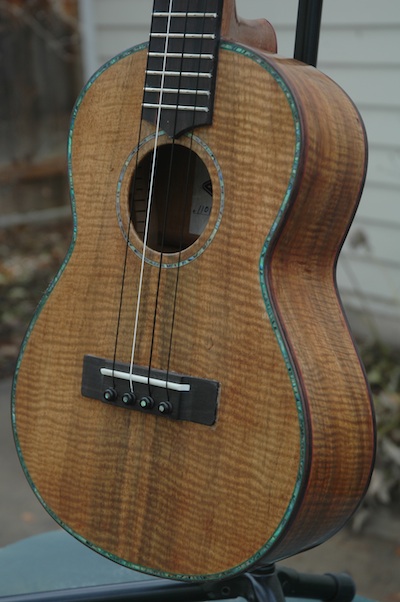

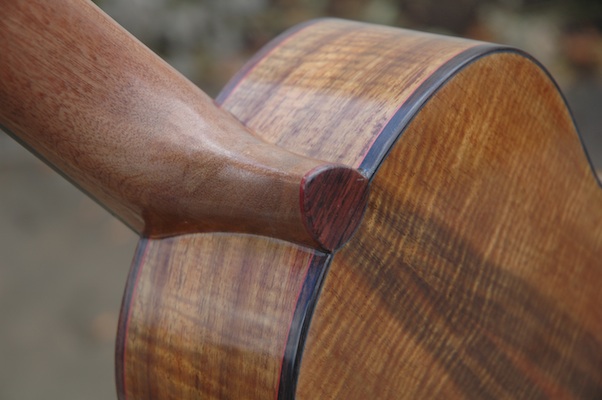
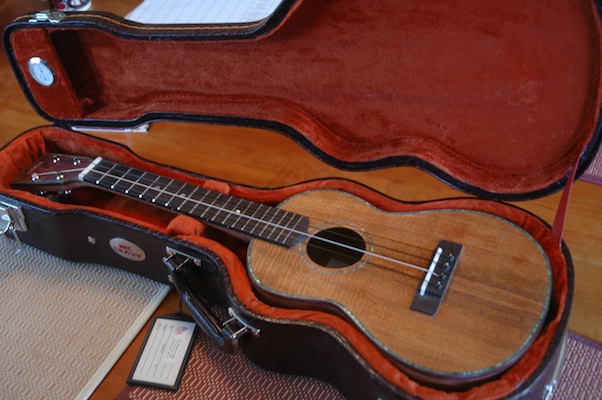
Published by Stephen on 25 Nov 2011 under Uke 1101 - Koa Tenor,Uke Building Logs
Comments: none
November 20, 2011
It was May when I added the label, which is why it’s dated May 2011. Boy am I slow. The strings are on. It sounds lovely. Monday and Tuesday I will: Fill a few minor gaps with lacquer, remove the strings and tuning machines, lower the height of the nut and the saddle, clean up the fretboard, knockdown the sides and neck, wet sand the entire uke, buff it to a glorious sheen, glue in the nut, reinstall the tuning machines and strings, then play it until my fingers fall off.
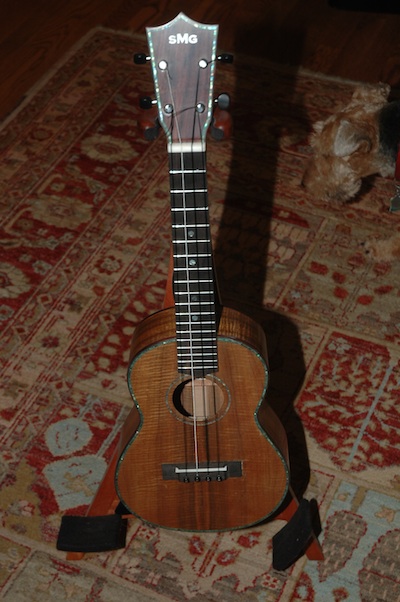
Published by Stephen on 20 Nov 2011 under Uke 1101 - Koa Tenor,Uke Building Logs
Tags: Buffing, Knockdown, Nut, Saddle, Strings, Tuning Machines, Uke, Walnut
Comments: none
November 19, 2011
After joining the myrtle back for Rachel’s parlor:
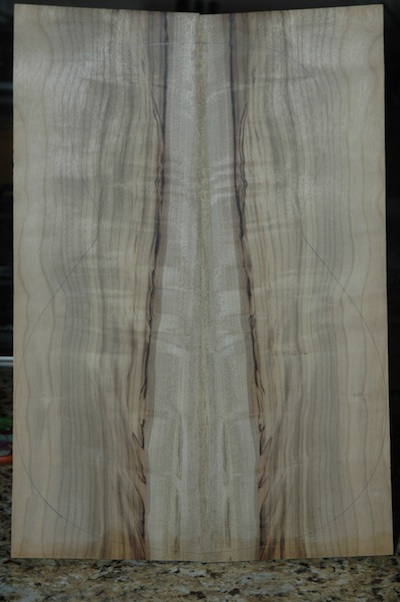
Yum.
Four more days before we load the dog in the car and trek to SLC for family Thanksgiving. I’ve finished applying the lacquer and have started knockdown.
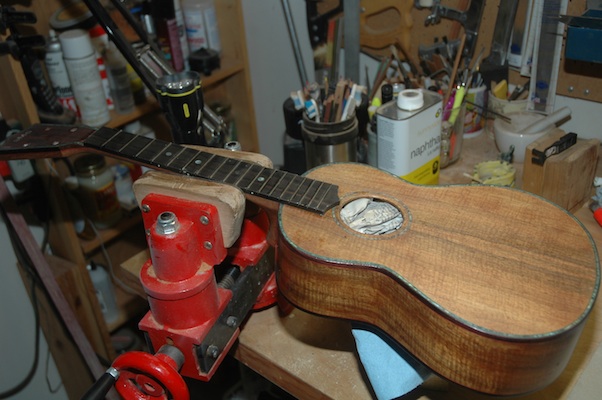
The lacquer is still a wee rubbery, but hell, I can’t let that stop me. 440, then 800 grit on a sanding block, and I have the top and the headstock knocked down. I finished with 1200 grit wet sanding, then buffed (top only) in preparation to mount the bridge. I figure I can mount the bridge, and while it is clamped up, I can proceed to knockdown the rest, clean up the fretboard, and start to shape the nut and saddle.

I’m absolutely sure this will be a playable uke by Tuesday, and it will ride with us to SLC.
Published by Stephen on 19 Nov 2011 under Guitar 1201 - Myrtle Parlor,Guitar Building Logs,Uke 1101 - Koa Tenor,Uke Building Logs
Tags: Bridge, Knockdown, Koa, Myrtle, Uke
Comments: none
November 6, 2011
Devin dropped by today and we polished up his frets, nut, saddle, and installed a pickguard. Looks like it’s really done.
I’ve been applying lacquer to the Bubinga Uke and the Koa Uke. The Bubinga is fully lacquered and is sitting in cure mode for a couple of more weeks.
The Koa uke has 16 coats, and I think 24 will be the cat’s pajamas. I should be able to get the 24 applied by Tuesday evening.
Between lacquer applications (wait one hour please) I’ve been bracing the Myrtle Parlor (for Rachel) and I joined the back plates.
I’m liking this myrtle, and it seems like it will be nice to work on. It planed easily while preparing the plate joint.
Published by Stephen on 06 Nov 2011 under Guitar 1201 - Myrtle Parlor,Guitar Building Logs,Uke 1001 - Bubinga Tenor,Uke 1101 - Koa Tenor,Uke Building Logs
Tags: Bubinga, Koa, Myrtle, Parlor, Spray Lacquer, Uke
Comments: none
« Prev - Next »
