Archive for the 'Guitar 905 – The Auction Guitar' Category

Guitar 905 – Join Back

August 22, 2009

Thickness sanded the walnut back in the drum sander.

090822drumsander.jpg

Used a plane to joint the sides, then applied glue in preparation for the joining jig.

090822joinback.jpg

Aligned the back grain and clamped into the joining jig.

090822backjoint.jpg

Also jointed the top, after planing down in the planer.  Used a shooting plane to create seamless joint.

090822shootingplane.jpg

Later this afternoon, I’ll remove the back from the joining jig and join the top.  Tomorrow I should be able to install the rosette.

Guitar 905 – Bending Walnut Guitar Sides

August 22, 2009

Earlier today John emailed and asked how I bent the sides for his walnut OM.  I responded with a quick description, but thought it might be interesting to you, my dear readers, to demonstrate with a little storyboard.

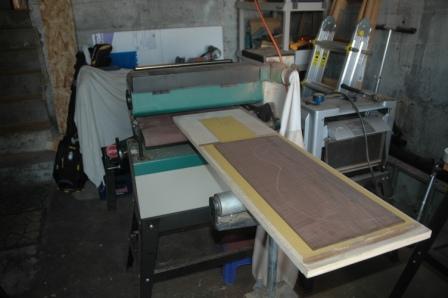
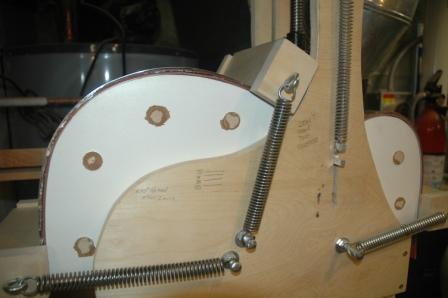
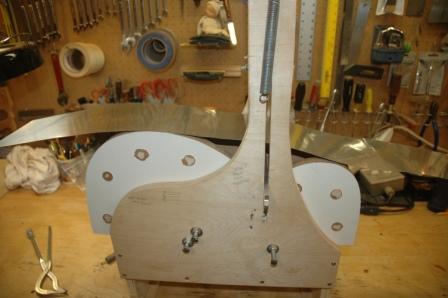
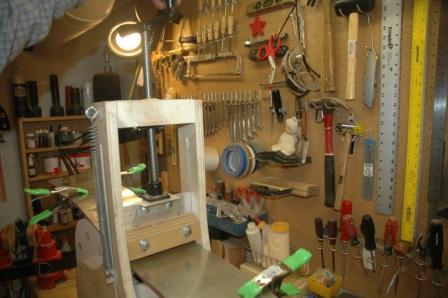
I use a side bending machine which I constructed, modelled after the Fox Side Bending Machine devised by Charles Fox.  I have various forms for the different body sizes I build.  First step is to insert the proper form into the bending frame and clamp down to the workbench.  Next I lay out the beginnings of the sandwich, which is (from the bottom up) stainless steel, heating blanket, wood, stainless steel.

090822bend1.jpg

The magic silicon heating blanket (developed by rocket scientists as NASA) is the same dimension as the stainless steel plates.  It’s layered onto the first stainless steel plate.

090822bend2.jpg

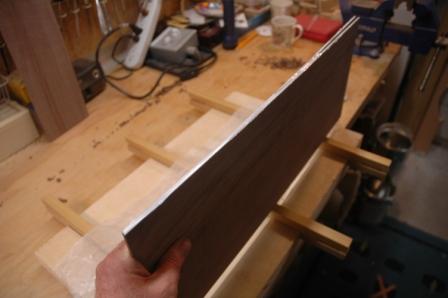
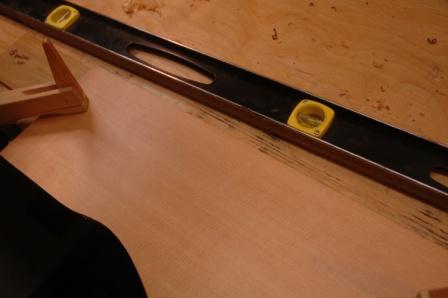
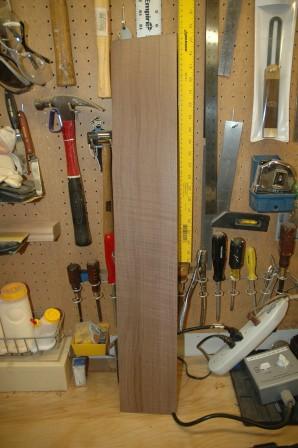
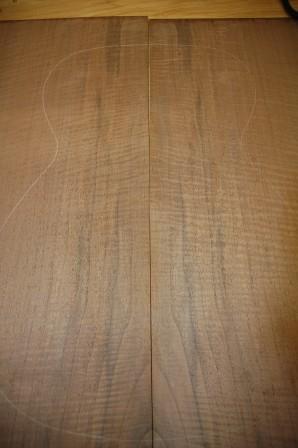
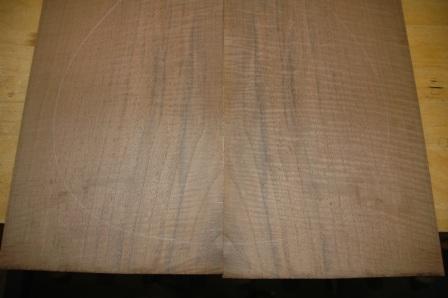
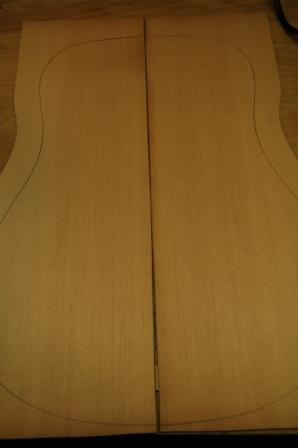
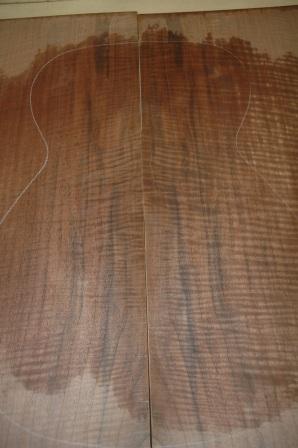
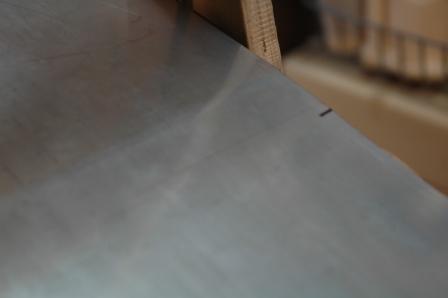
The side plates have been thicknessed down to at least .110″, and the outside, waist location, and neck end have been marked.

090822bend3.jpg

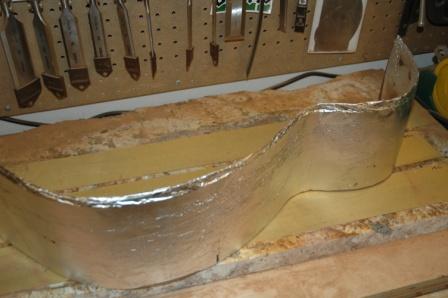
One side is bent at a time.  This side is the “left” side, and the waist mark will be at the back of the bender as you face it from the workbench side.  I spritz it lightly with distilled water and wrap in foil.

090822bend4.jpg

The wrapped plate is then placed on top of the heating blanket.  This is very important, as regulating the temperature is very tricky, and if the wood were to burn slightly, it would do so only on the inside, protecting the outside from telltale burn markings.

090822bend5.jpg

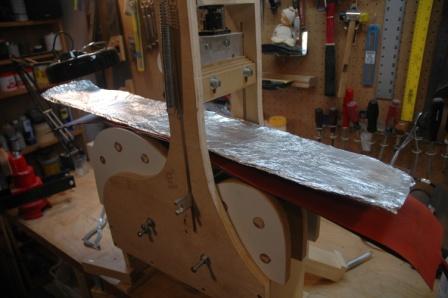
To complete the sandwich, the second stainless steel plate is placed on top.  I mark the top piece of stainless with the waist location for alignment with the waist clamp.

090822bend6.jpg

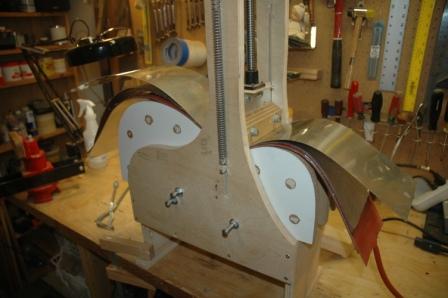
An aluminum bar under the sandwich is spring loaded against the waist clamp, and the sandwich is held together with simple spring clamps.  I use an electronic meat thermometer to measure the temperature of the heating blanket.

090822bend7.jpg

Once the sandwich is in place, and the waist clamp is brought down to where the sandwich is just touching the upper and lower bout edges, the blanket is plugged in to a timer/variable set switch and turned on.090822bend8.jpg

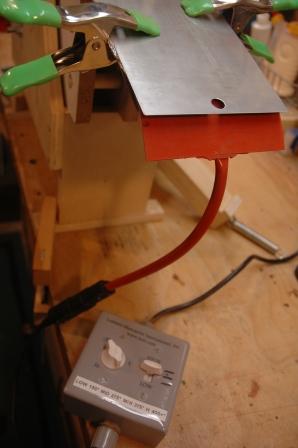
I watch the temperature gauge, and when it gets to 300 degrees, I begin advancing the screw press on the waist clamp slowly until it is within 1/16″ of being fully screwed down.

090822bend9.jpg

090822bend10.jpg

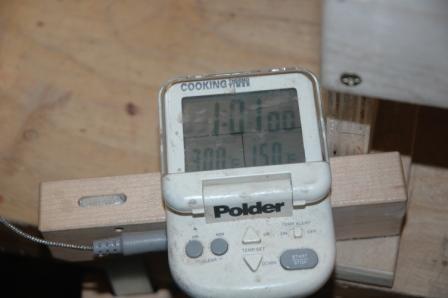
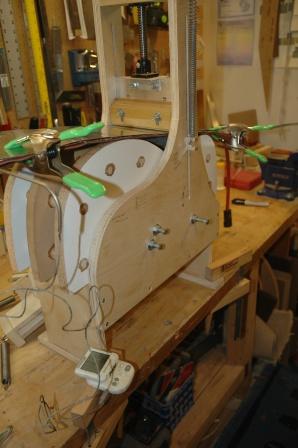
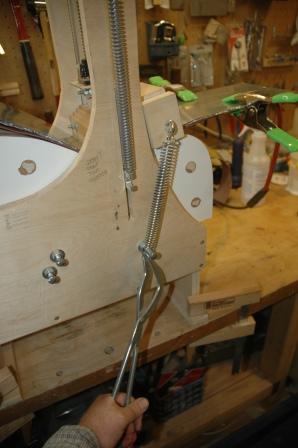
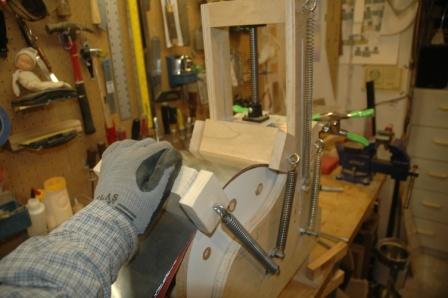
By the time the waist clamp is fully screwed down, the temperature will have risen to 350 degrees.  (These temps work for me, and are relative to this setup.  The actual temps may be higher or lower, I really don’t know).  I ramp back the adjuster on the timer slightly then pull the spring loaded presser bars over the top of the side.  I use an automotive brake spring tool to pull the springs over the posts.

090822bend11.jpg

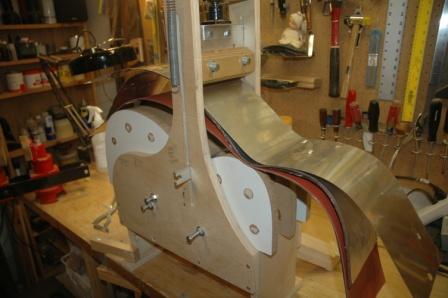
The spring loaded presser bars are drawn slowly over the sandwich toward the ends.  I pull the lower bout pressers first, followed by the upper bout to allow the tighter bends to sit under heat longer.

090822bend12.jpg

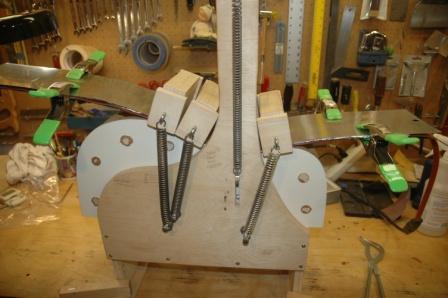
I wear heat resistant gloves during the process as the thing is damn hot.

090822bend13.jpg

There are two bars on the lower bout end to help keep bulges from arising.

090822bend14.jpg

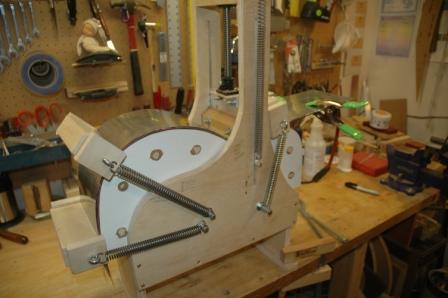
The upper bout bend must be taken very slowly, as this tight bend is prone to cracking.

090822bend15.jpg

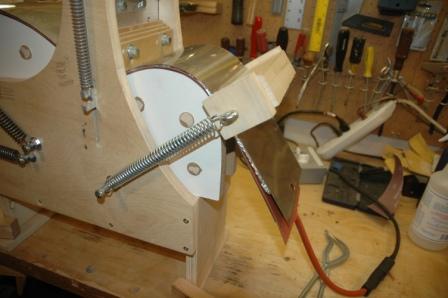
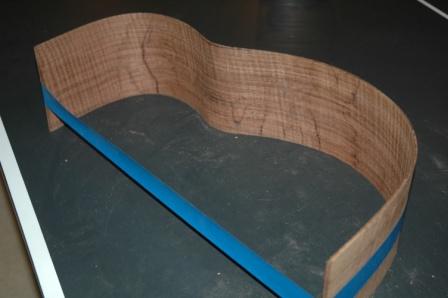
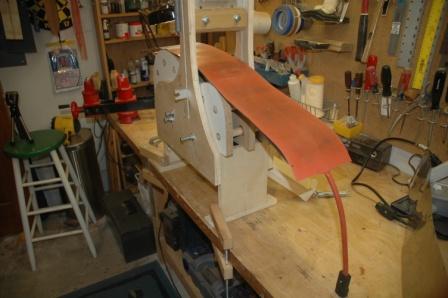
Once the bends are complete, the timer is unplugged and the side can sit in the bender overnight.

090822bend16.jpg

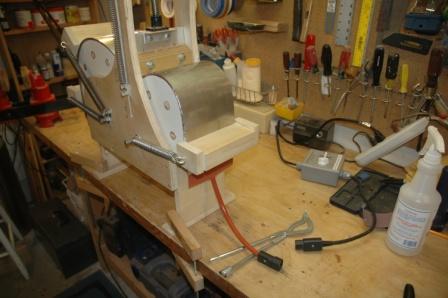
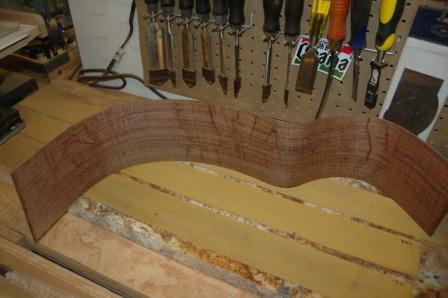
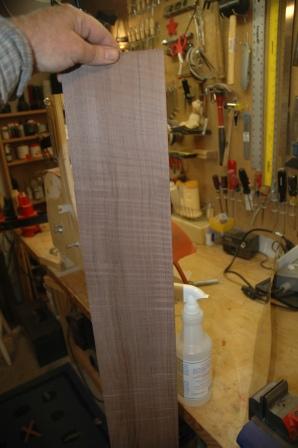
Once the side is removed from the bender, it should be placed immediately in a mold.  If a mold is not available, the side can be taped to prevent the bend from self straightening, which is what it really wants to do.  The pictures below show the progress of removing and taping.  Note the slight burn discolorations on the inside of the side.  This is minor (AND on the inside), and can be sanded off.

090822takeout2.jpg

090822takeout3.jpg

090822takeout4.jpg

090822takeout5.jpg

090822takeout6.jpg

Guitar 905 – Underway, some fretmarker decisions

August 21, 2009

I started construction in earnest today on guitar 905.  This is the walnut OM for John.  I’ve got the drum sander working to perfection and it is cranking out some very nice thickness sanded side plates.  After sanding the side plates down to around .110″ I set up the bender for the OM shape and put the first side in.  It is now sitting until tomorrow when I’ll bend side 2.

090821side.jpg

090821bent.jpg

The back will go into the thickness sander tomorrow.  It’s a really nice piece of claro walnut with lots of flame.

090821back.jpg

090821back0.jpg

The top is a very impressive sitka spruce with straight tight grain.  Even before planing, it has a rich tone.  I’ll run it through the planer to bring it down to thickness.

090821top.jpg

It already has a nice amber color, so may not need much if any tinting to give it that warm old look.

John is still deciding on the fret markers and is tending toward simple.  From simplest to less simple, here are some options:

Using 3mm paua dots only:

090821fretmarkers1st.jpg

3mm paua dots only, doubled up on frets 5 and 12:

090821fretmarkers2nd.jpg

Doubled up dots replaced with paua notched diamonds:

090821fretmarkers3rd2.jpg

Each photo also shows the ivroid strip which will bind the fretboard.  Note that this fretboard has not been tapered yet.

Guitar 905: Components

August 5, 2009

I now have in hand all the components for Guitar 905.  As soon as I return from guitar camp (PSGW), I’ll start building.  I’ll be balancing my work between this guitar, Carl’s parlor, and the final setup for 901, 902 and 904.  As well, guitar 903 will get some attention.  I need to keep next steps for each guitar documented so that as one component sits and cures (after glue up), I can use the wait time to tackle another piece.  I plan to bring 3 guitars up to completion prior to spraying so I can maximize the time in the spray booth.

I now have multiple unassociated backs, sides and tops (not committed to a customer).  I have Engleman parlor tops, sitka spruce tops, and a redwood sinker top.  For back and side sets, I have East Indian rosewood, ziricote, mayan walnut, and claro walnut.  Oooh, so many opportunities.

Guitar 905 – Will be a Walnut OM

August 2, 2009

John, the new owner of Guitar 905, and I discussed design considerations and component choices and arrived upon using a Claro Walnut back and sides and Sitka Spruce top (with a little amber thrown in to soften the whiteness) for an OM.

We picked some walnut from Notable Woods in Lopez Island, WA.  The walnut arrived yesterday and is just the ticket.  Lots of curl and distinctive grain running through the back and sides.

090802walnutback.jpg

Guitar 905 – The Auction Guitar has given me a ring

July 30, 2009

I have been contacted by the “recipient” of my auction guitar; the guitar which was auctioned off at the Phinney Neighborhood Center’s Moulin Rouge Auction event.

John and I have been emailing and phoning to determine the guitar to be built.

Decision:  A Claro Walnut OM.  Components are in transit, and work begins in earnest next week.

Guitar 905 or 906

July 19, 2009

This date in history…today is St. Vincent de Paul day.  (Founder of the Lazarist Fathers and the Daughters of Charity (1576-1660)).

I was informed that this was a lazy man’s way to provide a topic for a daily post.  But it does provide a useful topic for today’s entry.  Charity.

Carl, don’t dismay, this isn’t charity, it’s desire.  Desire to make another guitar for a true friend.

I have come to an arrangement with my friend Carl to make him his own sMg guitar.  This will be guitar number 10 or 11, depending upon whether the “auction guitar” ever comes to fruition.  I have not yet been approached by the winner of the Phinney Community Center auction guitar.  I’m not sure how to follow up, whether I should let Phinney know, or to stand by until contacted.  That being said, I will retire guitar number 905 until the auction guitar is resolved.

So Carl, that means you are guitar 906.  When you peer into the sound hole and see the embossed serial number on the neck block, you can turn the guitar upside down, peer once again, and see that the serial number has not changed.

Carl and I have been working on materials and design and concluded that a parlor of koa (ooh, my most favorite) with lots of nice appointments is his future guitar.

I’m going to take my first journey of top pufling in paua.  This little guitar will shine.

Misc. This and That

May 26, 2009

It’s Tuedsay and I’m golfing this afternoon.  Beforehand I took the maple neck blank left over from building Larry’s guitar and replicated the insertion of a Cocobola laminate/center strip.  This neck will be overstock until some guitar comes along and begs for a maple neck.

I got an email from Phinney Neighborhood Assn. with photos from the auction.  Here’s some auction girls doing a little Smoke on the Water with my demonstration guitars.

zvannas.jpg

When the bidding got up to $3000, I got a little excited.

zstephrn.jpg

Guitar 905 – The Auction Guitar

May 8, 2009

On May 2nd, I donated my labor for the construction of a custom guitar.  The auction generated a lot of action with frenzied bidding that surprised the auctioneer (who was vocally, a dead ringer for Fred Willard).

I have not yet been contacted by the winning bidder, but am very excited to work with her on designing and delivering the guitar of her dreams (hopefully not too exotic, given I’m such a traditionalist).

« Prev